
Getting Started
Page 17
..., sign up to 30 minutes for the first time and complete the initial setup. For help with getting started using your computer, see the Windows 7 desktop, the initial setup is complete. To turn on the computer: 1 Turn on the monitor. 2 Turn on the computer. 3 Turn on the external speakers, if they...
..., sign up to 30 minutes for the first time and complete the initial setup. For help with getting started using your computer, see the Windows 7 desktop, the initial setup is complete. To turn on the computer: 1 Turn on the monitor. 2 Turn on the computer. 3 Turn on the external speakers, if they...
Getting Started
Page 19
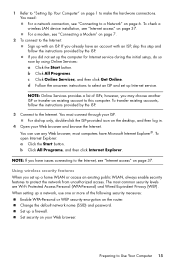
... setting up a network, use any Web browser; d Follow the onscreen instructions to the Internet: Sign up only, double-click the ISP-provided icon on the desktop, and then log in. 4 Open your Web browser and browse the Internet. b Click All Programs, and then click Internet Explorer. Set up Internet service. NOTE...
... setting up a network, use any Web browser; d Follow the onscreen instructions to the Internet: Sign up only, double-click the ISP-provided icon on the desktop, and then log in. 4 Open your Web browser and browse the Internet. b Click All Programs, and then click Internet Explorer. Set up Internet service. NOTE...
Getting Started
Page 30
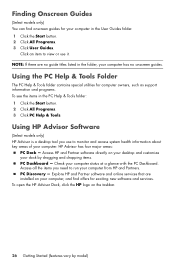
... User Guides folder. 1 Click the Start button. 2 Click All Programs. 3 Click User Guides. Using HP Advisor Software (Select models only) HP Advisor is a desktop tool you need to run your computer status at a glance with the PC Dashboard. Access HP and Partner software directly on your computer, and find onscreen guides for your dock...
... User Guides folder. 1 Click the Start button. 2 Click All Programs. 3 Click User Guides. Using HP Advisor Software (Select models only) HP Advisor is a desktop tool you need to run your computer status at a glance with the PC Dashboard. Access HP and Partner software directly on your computer, and find onscreen guides for your dock...
Getting Started
Page 56
... backing up your files, and then click Next. After system recovery is responding, use these steps to back up your files, and you see the desktop. 10 Turn off . 2 Disconnect all peripheral devices, and turn on the computer. 52 Getting Started (features vary by model) Your computer restarts. If necessary, press...
... backing up your files, and then click Next. After system recovery is responding, use these steps to back up your files, and you see the desktop. 10 Turn off . 2 Disconnect all peripheral devices, and turn on the computer. 52 Getting Started (features vary by model) Your computer restarts. If necessary, press...
Getting Started
Page 57
...: 1 If the computer is not backed up your keyboard until the computer turns off. 4 Disconnect all the data files you created as you see the desktop. 8 Turn off the computer, reconnect all peripheral devices, and turn on page 51. message appears on the hard disk drive will lose data if it...
...: 1 If the computer is not backed up your keyboard until the computer turns off. 4 Disconnect all the data files you created as you see the desktop. 8 Turn off the computer, reconnect all peripheral devices, and turn on page 51. message appears on the hard disk drive will lose data if it...
Getting Started Guide
Page 25
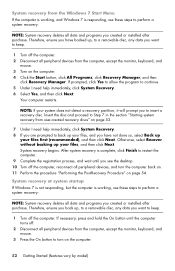
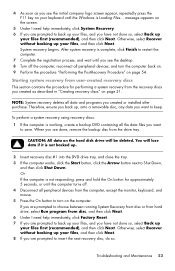
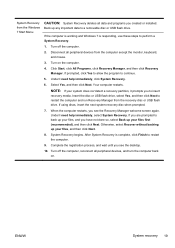
... your files first (recommended), and then click Next. Under I need help immediately, click System Recovery. 6. Complete the registration process, and wait until you see the desktop. 10. Your computer restarts. System Recovery begins. After System Recovery is responding, use these steps to perform a System Recovery. 1. Insert the disc or USB flash...
... your files first (recommended), and then click Next. Under I need help immediately, click System Recovery. 6. Complete the registration process, and wait until you see the desktop. 10. Your computer restarts. System Recovery begins. After System Recovery is responding, use these steps to perform a System Recovery. 1. Insert the disc or USB flash...
Getting Started Guide
Page 26
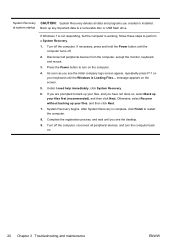
Turn off . 2. System Recovery CAUTION: System Recovery deletes all data and programs you see the desktop. 9. at system startup Back up your files, and then click Next. 7. If necessary, press and hold the Power button until the computer turns off the ...
Turn off . 2. System Recovery CAUTION: System Recovery deletes all data and programs you see the desktop. 9. at system startup Back up your files, and then click Next. 7. If necessary, press and hold the Power button until the computer turns off the ...
Getting Started Guide
Page 30
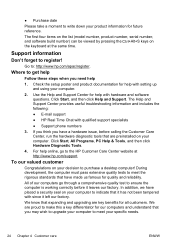
...benefits for future reference. The Help and Support Center provides useful troubleshooting information and includes the following: ● E-mail support ● HP Real Time Chat with since it left our factory. We are proud to make this a key differentiator for help online, go through... reliability. If you think you need help with setting up and using your computer. 2. Support information Don't forget to purchase a desktop computer! During development, the computer must pass extensive quality tests to meet your specific needs. 24 Chapter 4 Customer care ENWW We ...
...benefits for future reference. The Help and Support Center provides useful troubleshooting information and includes the following: ● E-mail support ● HP Real Time Chat with since it left our factory. We are proud to make this a key differentiator for help online, go through... reliability. If you think you need help with setting up and using your computer. 2. Support information Don't forget to purchase a desktop computer! During development, the computer must pass extensive quality tests to meet your specific needs. 24 Chapter 4 Customer care ENWW We ...
Getting Started Guide
Page 31
...with your system. If you have completely set up . By breaking the security seal on the back of the computer, you are sent to your desktop from time to time. We hope you enjoy discovering the exciting things you can reach a real, knowledgeable person by local law, covered under the... terms and conditions listed in this guide, and a HP Customer Representative will help , you can do with tools located on your computer, from information on your Windows desktop (to access it on how to fix the problem. Whether with it is built to work...
...with your system. If you have completely set up . By breaking the security seal on the back of the computer, you are sent to your desktop from time to time. We hope you enjoy discovering the exciting things you can reach a real, knowledgeable person by local law, covered under the... terms and conditions listed in this guide, and a HP Customer Representative will help , you can do with tools located on your computer, from information on your Windows desktop (to access it on how to fix the problem. Whether with it is built to work...
Quick Setup Guide
Page 13
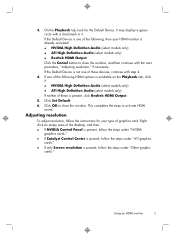
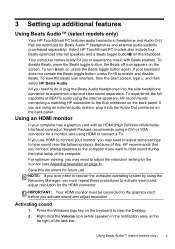
... close the window, and then continue with the next procedure, "Adjusting resolution," if necessary. Using an HDMI monitor 7 Right click an empty area of the desktop, and then: ● If NVIDIA Control Panel is present, follow the steps under "NVIDIA graphics cards." ● If Catalyst Control Center is present, follow the...
... close the window, and then continue with the next procedure, "Adjusting resolution," if necessary. Using an HDMI monitor 7 Right click an empty area of the desktop, and then: ● If NVIDIA Control Panel is present, follow the steps under "NVIDIA graphics cards." ● If Catalyst Control Center is present, follow the...
Quick Setup Guide
Page 14
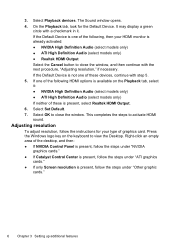
...Close the NVIDIA Control Panel. Right-click an empty area of the window. 3. Under the Desktops & Displays window, right click the monitor icon at the bottom left , under Display, click Change resolution. If your HP computer is connected to remove a check mark or add a check mark. 5. Select the ... adjust resolution for standard two-monitor setup. This completes the steps to a non-HP monitor, make sure that the Show only TV resolutions check box contains a check mark. Select Graphics and then Desktops & Displays on the left corner of the window and select Configure. Right-click ...
...Close the NVIDIA Control Panel. Right-click an empty area of the window. 3. Under the Desktops & Displays window, right click the monitor icon at the bottom left , under Display, click Change resolution. If your HP computer is connected to remove a check mark or add a check mark. 5. Select the ... adjust resolution for standard two-monitor setup. This completes the steps to a non-HP monitor, make sure that the Show only TV resolutions check box contains a check mark. Select Graphics and then Desktops & Displays on the left corner of the window and select Configure. Right-click ...
Quick Setup Guide
Page 15
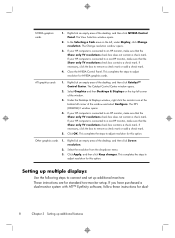
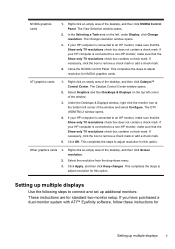
... The monitor should have a DVI, HDMI, or VGA connector. A DVI-to-VGA adapter is completed. 5. The power indicator light on the desktop to bring up the layout for monitors with a VGA connector. the lights will see various display states (such as blank screens, blue screens,... PC or monitor. 2. To change the display mode for ATI Eyefinity Catalyst™ setup. 1. Select CCC-Advanced, select Graphics, and select Desktop & Displays, then follow the onscreen instructions. When the setup is active; ATI Eyefinity Catalyst™ setup 1. NOTE: During the initial setup,...
... The monitor should have a DVI, HDMI, or VGA connector. A DVI-to-VGA adapter is completed. 5. The power indicator light on the desktop to bring up the layout for monitors with a VGA connector. the lights will see various display states (such as blank screens, blue screens,... PC or monitor. 2. To change the display mode for ATI Eyefinity Catalyst™ setup. 1. Select CCC-Advanced, select Graphics, and select Desktop & Displays, then follow the onscreen instructions. When the setup is active; ATI Eyefinity Catalyst™ setup 1. NOTE: During the initial setup,...

Troubleshooting & Maintenance Guide
Page 15
... up your files, and then click Next. 7. If using discs, insert the next system-recovery disc when prompted. 7. When the computer restarts, you see the desktop. 10. If you are prompted to insert recovery media. Otherwise, select Recover without backing up your files, and you to back up your files first...
... up your files, and then click Next. 7. If using discs, insert the next system-recovery disc when prompted. 7. When the computer restarts, you see the desktop. 10. If you are prompted to insert recovery media. Otherwise, select Recover without backing up your files, and you to back up your files first...

Troubleshooting & Maintenance Guide
Page 16
To create recovery media, see the desktop. 9. Use the arrow keys to select the USB device and press Enter to boot from the recovery image stored on the computer. Otherwise, select Recover ...
To create recovery media, see the desktop. 9. Use the arrow keys to select the USB device and press Enter to boot from the recovery image stored on the computer. Otherwise, select Recover ...
Quick Setup Guide - Windows 8
Page 11
...during the initial setup of BEATS audio using an external audio system, plug it into the side headphone connector to connect a TV. Select HP TouchSmart PC models also include four Beats-optimized internal speakers and a Beats toggle button on the back panel. To view the Beats user ... Multimedia Interface) connector, Hewlett-Packard recommends using a DVI or VGA connector for a monitor, and using the Recovery Manager, you want to view the Desktop. 2. NOTE: If you to enable and disable Beats. Right-click the Volume icon (white speaker) in the notification area, at the far right ...
...during the initial setup of BEATS audio using an external audio system, plug it into the side headphone connector to connect a TV. Select HP TouchSmart PC models also include four Beats-optimized internal speakers and a Beats toggle button on the back panel. To view the Beats user ... Multimedia Interface) connector, Hewlett-Packard recommends using a DVI or VGA connector for a monitor, and using the Recovery Manager, you want to view the Desktop. 2. NOTE: If you to enable and disable Beats. Right-click the Volume icon (white speaker) in the notification area, at the far right ...
Quick Setup Guide - Windows 8
Page 12
...) If neither of the following , then your type of graphics card. Select Set Default. 7. This completes the steps to view the Desktop. The Sound window opens. 4. If one of the desktop, and then: ● If NVIDIA Control Panel is present, follow the steps under "NVIDIA graphics cards." ● If Catalyst Control Center...
...) If neither of the following , then your type of graphics card. Select Set Default. 7. This completes the steps to view the Desktop. The Sound window opens. 4. If one of the desktop, and then: ● If NVIDIA Control Panel is present, follow the steps under "NVIDIA graphics cards." ● If Catalyst Control Center...
Quick Setup Guide - Windows 8
Page 13
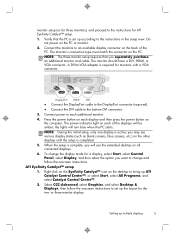
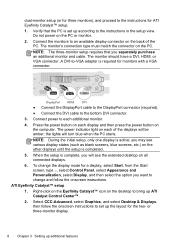
... necessary, click the box to adjust resolution for standard two-monitor setup. Under the Desktops & Displays window, right click the monitor icon at the bottom left corner of the window. 3. If your HP computer is connected to connect and set up multiple displays 7 Select the resolution from ...down menu. 3. In the Selecting a Task area on the top left corner of the desktop, and then click Catalyst™ Control Center. Setting up multiple displays Use the following steps to a non-HP monitor, make sure that the Show only TV resolutions check box contains a check mark. ...
... necessary, click the box to adjust resolution for standard two-monitor setup. Under the Desktops & Displays window, right click the monitor icon at the bottom left corner of the window. 3. If your HP computer is connected to connect and set up multiple displays 7 Select the resolution from ...down menu. 3. In the Selecting a Task area on the top left corner of the desktop, and then click Catalyst™ Control Center. Setting up multiple displays Use the following steps to a non-HP monitor, make sure that the Show only TV resolutions check box contains a check mark. ...
Quick Setup Guide - Windows 8
Page 14
..., type c, select Control Panel, select Appearance and Personalization, select Display, and then select the option you may see the extended desktop on the back of the displays will turn blue when the PC starts. A DVI-to-VGA adapter is complete, you separately purchase...Verify that you will see various display states (such as blank screens, blue screens, etc.) on the desktop to bring up additional features Select CCC-Advanced, select Graphics, and select Desktop & Displays, then follow the onscreen instructions. The power indicator light on the computer. or three-monitor...
..., type c, select Control Panel, select Appearance and Personalization, select Display, and then select the option you may see the extended desktop on the back of the displays will turn blue when the PC starts. A DVI-to-VGA adapter is complete, you separately purchase...Verify that you will see various display states (such as blank screens, blue screens, etc.) on the desktop to bring up additional features Select CCC-Advanced, select Graphics, and select Desktop & Displays, then follow the onscreen instructions. The power indicator light on the computer. or three-monitor...

Troubleshooting and Maintenance Guide
Page 7
.... NOTE: In addition to the information listed here, also refer to your computer. Press the Power button on the keyboard, to the back of the desktop, and then click Screen resolution. 2. Right-click an empty area of your computer, and then restart your computer. Keyboard and mouse (with cable) does not...
.... NOTE: In addition to the information listed here, also refer to your computer. Press the Power button on the keyboard, to the back of the desktop, and then click Screen resolution. 2. Right-click an empty area of your computer, and then restart your computer. Keyboard and mouse (with cable) does not...

Regulatory, Safety and Environmental Notices User Guide
Page 3
... directions could result in damage to follow directions could result in this manner indicates that is compliant with U.S., Canadian, and international regulations for notebook computers, desktops, thin clients and personal workstations. iii About This Guide This guide provides regulatory, safety and environmental information that failure to equipment or loss of life...
... directions could result in damage to follow directions could result in this manner indicates that is compliant with U.S., Canadian, and international regulations for notebook computers, desktops, thin clients and personal workstations. iii About This Guide This guide provides regulatory, safety and environmental information that failure to equipment or loss of life...

