User Guide
Page 3
Contents Contents 1 Get to know the HP All-in-One Printer parts...3 Control panel features...4 Control panel features (HP Deskjet F4424 All-in-One only 5 2 Print Print documents...7 Print photos...8 Print envelopes...10 Print on specialty media...11 Print a Web page...17 4 Scan Scan to a computer...27 5 Copy Copy ...
Contents Contents 1 Get to know the HP All-in-One Printer parts...3 Control panel features...4 Control panel features (HP Deskjet F4424 All-in-One only 5 2 Print Print documents...7 Print photos...8 Print envelopes...10 Print on specialty media...11 Print a Web page...17 4 Scan Scan to a computer...27 5 Copy Copy ...

User Guide
Page 5
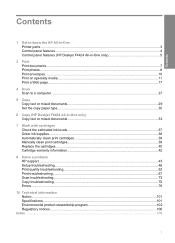
1 Get to know the HP All-in-One • Printer parts • Control panel features • Control panel features (HP Deskjet F4424 All-in-One only) Printer parts Get to know the HP All-in-One 1 Control panel 2 Front access door 3 Paper-width guide for the main input tray 4 Input tray 5 Paper tray extender (also referred to as the tray extender) 6 Paper stop 7 Cartridges 8 Glass 9 Lid backing 10 Rear access door 11 Rear USB port 12 Power connection (Use only with the power adapter supplied by HP.) 13 Lid 14 Attention light Printer parts 3
1 Get to know the HP All-in-One • Printer parts • Control panel features • Control panel features (HP Deskjet F4424 All-in-One only) Printer parts Get to know the HP All-in-One 1 Control panel 2 Front access door 3 Paper-width guide for the main input tray 4 Input tray 5 Paper tray extender (also referred to as the tray extender) 6 Paper stop 7 Cartridges 8 Glass 9 Lid backing 10 Rear access door 11 Rear USB port 12 Power connection (Use only with the power adapter supplied by HP.) 13 Lid 14 Attention light Printer parts 3
User Guide
Page 9
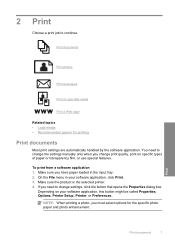
...: When printing a photo, you have paper loaded in your software application, this button might be called Properties, Options, Printer Setup, Printer, or Preferences. Print Print documents 7 Make sure you must select options for printing Print documents Most print settings are automatically handled by the software application. 2 ...
...: When printing a photo, you have paper loaded in your software application, this button might be called Properties, Options, Printer Setup, Printer, or Preferences. Print Print documents 7 Make sure you must select options for printing Print documents Most print settings are automatically handled by the software application. 2 ...
User Guide
Page 10
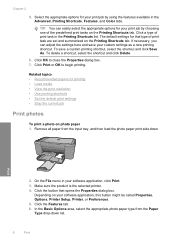
...job by using the features available in the Advanced, Printing Shortcuts, Features, and Color tabs. To save your print job by choosing one of the predefined print tasks on the Printing Shortcuts tab. Depending on photo paper 1. Click the Features tab. 6. TIP: You ... as a new printing shortcut. Click the button that type of print task in your software application, this button might be called Properties, Options, Printer Setup, Printer, or Preferences. 5. Chapter 2 5. Select the appropriate options for printing • Load media • View the print resolution • Use ...
...job by using the features available in the Advanced, Printing Shortcuts, Features, and Color tabs. To save your print job by choosing one of the predefined print tasks on the Printing Shortcuts tab. Depending on photo paper 1. Click the Features tab. 6. TIP: You ... as a new printing shortcut. Click the button that type of print task in your software application, this button might be called Properties, Options, Printer Setup, Printer, or Preferences. 5. Chapter 2 5. Select the appropriate options for printing • Load media • View the print resolution • Use ...
User Guide
Page 11
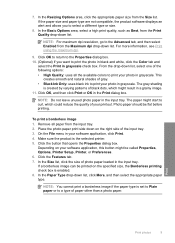
... Advanced tab, and then select Enabled from the input tray. 2. From the drop-down list. Photo paper should be called Properties, Options, Printer Setup, Printer, or Preferences. 6. Depending on your software application, click Print. 4. In the Size list, click the size of the following options: ...• High Quality: uses all paper from the Maximum dpi drop-down list, select one of photo paper loaded in grayscale. NOTE: You cannot...
... Advanced tab, and then select Enabled from the input tray. 2. From the drop-down list. Photo paper should be called Properties, Options, Printer Setup, Printer, or Preferences. 6. Depending on your software application, click Print. 4. In the Size list, click the size of the following options: ...• High Quality: uses all paper from the Maximum dpi drop-down list, select one of photo paper loaded in grayscale. NOTE: You cannot...
User Guide
Page 12
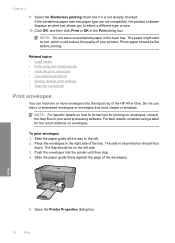
... resolution • Use printing shortcuts • Set the default print settings • Stop the current job Print envelopes You can load one or more envelopes into the printer until they stop. 4. If the borderless paper size and paper type are not compatible, the product software displays an alert and allows...paper guide firmly against the edge of your word processing software. NOTE: Do not leave unused photo paper in the right side of the HP All-in-One. Push the envelopes into the input tray of the tray. The side to the left side. 3. The flap should be flat before ...
... resolution • Use printing shortcuts • Set the default print settings • Stop the current job Print envelopes You can load one or more envelopes into the printer until they stop. 4. If the borderless paper size and paper type are not compatible, the product software displays an alert and allows...paper guide firmly against the edge of your word processing software. NOTE: Do not leave unused photo paper in the right side of the HP All-in-One. Push the envelopes into the input tray of the tray. The side to the left side. 3. The flap should be flat before ...
User Guide
Page 13
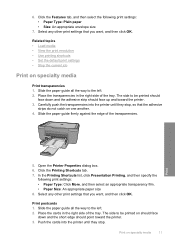
6. Slide the paper guide all the way to the left . 2. Print postcards 1. The side to be printed on one another. 4. Open the Printer Properties dialog box. 6. Select any other print settings that you want , and then click OK. Print on specialty media Print transparencies 1....paper • Size: An appropriate envelope size 7. Place the cards in the right side of the tray. Carefully push the transparencies into the printer until they stop , so that you want , and then click OK. Slide the paper guide firmly against the edge of the transparencies. The ...
6. Slide the paper guide all the way to the left . 2. Print postcards 1. The side to be printed on one another. 4. Open the Printer Properties dialog box. 6. Select any other print settings that you want , and then click OK. Print on specialty media Print transparencies 1....paper • Size: An appropriate envelope size 7. Place the cards in the right side of the tray. Carefully push the transparencies into the printer until they stop , so that you want , and then click OK. Slide the paper guide firmly against the edge of the transparencies. The ...

User Guide
Page 14
... to the left. 2. Print labels 1. Slide the paper guide all the way to separate them, and then align the edges. 3. Push the sheets into the printer until they stop. 5. Open the Printer Properties dialog box. 7. Click OK. 12 Print Place the label sheets in the right side of the cards. 5. Open the...
... to the left. 2. Print labels 1. Slide the paper guide all the way to separate them, and then align the edges. 3. Push the sheets into the printer until they stop. 5. Open the Printer Properties dialog box. 7. Click OK. 12 Print Place the label sheets in the right side of the cards. 5. Open the...

User Guide
Page 15
... Click OK to the left . 2. Print 6. Print brochures 1. Place the paper in the right side of the tray. Push the cards into the printer until they stop. 5. Slide the paper guide all the way to separate them, and then align the edges. 3. The side to be printed on specialty... dialog box. Specify the following print settings: • Print Quality: Best • Paper Type: Click More, and then select an appropriate HP inkjet paper. • Orientation: Portrait or Landscape • Size: An appropriate paper size • Two-sided printing: Manual 8. Slide the paper ...
... Click OK to the left . 2. Print 6. Print brochures 1. Place the paper in the right side of the tray. Push the cards into the printer until they stop. 5. Slide the paper guide all the way to separate them, and then align the edges. 3. The side to be printed on specialty... dialog box. Specify the following print settings: • Print Quality: Best • Paper Type: Click More, and then select an appropriate HP inkjet paper. • Orientation: Portrait or Landscape • Size: An appropriate paper size • Two-sided printing: Manual 8. Slide the paper ...
User Guide
Page 16
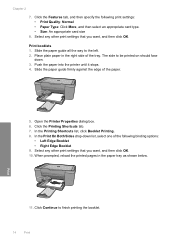
...binding options: • Left Edge Booklet • Right Edge Booklet 9. Print booklets 1. The side to be printed on should face down list, select one of the following print settings: • Print Quality: Normal • Paper Type: Click More, and then select an appropriate card type. • ...Slide the paper guide firmly against the edge of the tray. Print 11. Click Continue to the left. 2. Open the Printer Properties dialog box. 6. Push the paper into the printer until it stops. 4. Select any other print settings that you want , and then click OK. 10. Place plain paper...
...binding options: • Left Edge Booklet • Right Edge Booklet 9. Print booklets 1. The side to be printed on should face down list, select one of the following print settings: • Print Quality: Normal • Paper Type: Click More, and then select an appropriate card type. • ...Slide the paper guide firmly against the edge of the tray. Print 11. Click Continue to the left. 2. Open the Printer Properties dialog box. 6. Push the paper into the printer until it stops. 4. Select any other print settings that you want , and then click OK. 10. Place plain paper...
User Guide
Page 17
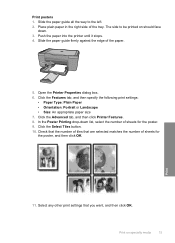
... drop-down . 3. Place plain paper in the right side of sheets for the poster, and then click OK. Click the Advanced tab, and then click Printer Features. 8. Print 11. The side to the left. 2. Print on should face down list, select the number of the tray. Push the paper into... the printer until it stops. 4. Select any other print settings that are selected matches the number of the paper. 5. Click the Select Tiles button. 10. Slide ...
... drop-down . 3. Place plain paper in the right side of sheets for the poster, and then click OK. Click the Advanced tab, and then click Printer Features. 8. Print 11. The side to the left. 2. Print on should face down list, select the number of the tray. Push the paper into... the printer until it stops. 4. Select any other print settings that are selected matches the number of the paper. 5. Click the Select Tiles button. 10. Slide ...
User Guide
Page 18
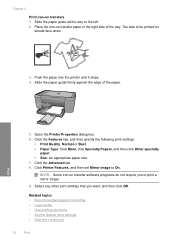
... programs do not require you want, and then click OK. Push the paper into the printer until it stops. 4. Slide the paper guide firmly against the edge of the tray. Open the Printer Properties dialog box. 6. Click Printer Features, and then set Mirror Image to print a mirror image. 9. Related topics • Recommended papers...
... programs do not require you want, and then click OK. Push the paper into the printer until it stops. 4. Slide the paper guide firmly against the edge of the tray. Open the Printer Properties dialog box. 6. Click Printer Features, and then set Mirror Image to print a mirror image. 9. Related topics • Recommended papers...
User Guide
Page 19
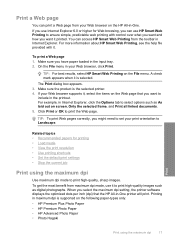
... screen, Only the selected frame, and Print all linked documents. 5. On the File menu in your Web browser on the Web page that the HP All-in-One printer will print. Click Print or OK to Landscape. TIP: To print Web pages correctly, you might need to set your Web browser supports it..., select the items on the HP All-in-One. If you want and how you use it printed. If your print orientation to print the Web page...
... screen, Only the selected frame, and Print all linked documents. 5. On the File menu in your Web browser on the Web page that the HP All-in-One printer will print. Click Print or OK to Landscape. TIP: To print Web pages correctly, you might need to set your Web browser supports it..., select the items on the HP All-in-One. If you want and how you use it printed. If your print orientation to print the Web page...
User Guide
Page 20
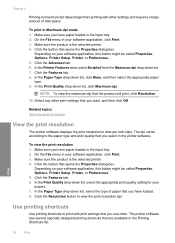
... specially designed printing shortcuts that are available in dots per inch (dpi). Make sure the product is the selected printer. 4. In the Printer Features area, select Enabled from the Maximum dpi drop-down list, select the type of disk space. Select any...paper loaded in the input tray. 2. Print 18 Print Depending on your software application, this button might be called Properties, Options, Printer Setup, Printer, or Preferences. 5. Click the Features tab. 8. In the Print Quality drop-down list, select the appropriate print quality setting for...
... specially designed printing shortcuts that are available in dots per inch (dpi). Make sure the product is the selected printer. 4. In the Printer Features area, select Enabled from the Maximum dpi drop-down list, select the type of disk space. Select any...paper loaded in the input tray. 2. Print 18 Print Depending on your software application, this button might be called Properties, Options, Printer Setup, Printer, or Preferences. 5. Click the Features tab. 8. In the Print Quality drop-down list, select the appropriate print quality setting for...
User Guide
Page 21
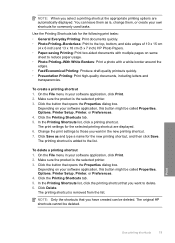
... Printing: Produce draft-quality printouts quickly. • Presentation Printing: Print high-quality documents, including letters and transparencies. The original HP shortcuts cannot be deleted. Print Use printing shortcuts 19 To create a printing shortcut 1. Make sure the product is removed from ... pages on your software application, click Print. 2. Change the print settings to the list. The printing shortcut is the selected printer. 3. To delete a printing shortcut 1. Make sure the product is added to those you select a printing shortcut the appropriate printing...
... Printing: Produce draft-quality printouts quickly. • Presentation Printing: Print high-quality documents, including letters and transparencies. The original HP shortcuts cannot be deleted. Print Use printing shortcuts 19 To create a printing shortcut 1. Make sure the product is removed from ... pages on your software application, click Print. 2. Change the print settings to the list. The printing shortcut is the selected printer. 3. To delete a printing shortcut 1. Make sure the product is added to those you select a printing shortcut the appropriate printing...
User Guide
Page 22
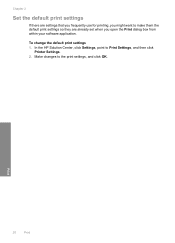
Chapter 2 Set the default print settings If there are settings that you frequently use for printing, you might want to the print settings, and click OK. Print 20 Print Make changes to make them the default print settings so they are already set when you open the Print dialog box from within your software application. In the HP Solution Center, click Settings, point to Print Settings, and then click Printer Settings. 2. To change the default print settings 1.
Chapter 2 Set the default print settings If there are settings that you frequently use for printing, you might want to the print settings, and click OK. Print 20 Print Make changes to make them the default print settings so they are already set when you open the Print dialog box from within your software application. In the HP Solution Center, click Settings, point to Print Settings, and then click Printer Settings. 2. To change the default print settings 1.
User Guide
Page 23
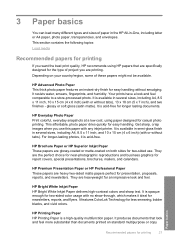
...are heavy two-sided matte papers perfect for an impressive look and feel. HP Premium Presentation Paper or HP Professional Paper These papers are the perfect choice for near-photographic reproductions and ..., 8.5 x 11 inch, and 10 x 15 cm (4 x 6 inch) (with any inkjet printer. It features ColorLok Technology for newsletters, reports, and flyers. This section contains the following topics: Load media Recommended...less smearing, bolder blacks, and vivid colors. It is available in semi-gloss finish in -One, including letter or A4 paper, photo paper, transparencies, and envelopes. It is acid-free ...
...are heavy two-sided matte papers perfect for an impressive look and feel. HP Premium Presentation Paper or HP Professional Paper These papers are the perfect choice for near-photographic reproductions and ..., 8.5 x 11 inch, and 10 x 15 cm (4 x 6 inch) (with any inkjet printer. It features ColorLok Technology for newsletters, reports, and flyers. This section contains the following topics: Load media Recommended...less smearing, bolder blacks, and vivid colors. It is available in semi-gloss finish in -One, including letter or A4 paper, photo paper, transparencies, and envelopes. It is acid-free ...
User Guide
Page 39
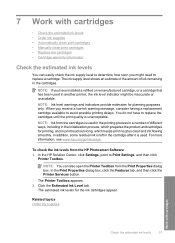
... the cartridges • Cartridge warranty information Check the estimated ink levels You can also open the Printer Toolbox from the Print Properties dialog box. For more information, see www.hp.com/go/inkusage. NOTE: You can easily check the ink supply level to determine how soon ...and cartridges for printing, and in another printer, the ink level indicator might need to replace the cartridges until the print quality is used. The Printer Toolbox appears. 2. 7 Work with cartridges Check the estimated ink levels 37 In the HP Solution Center, click Settings, point to ...
... the cartridges • Cartridge warranty information Check the estimated ink levels You can also open the Printer Toolbox from the Print Properties dialog box. For more information, see www.hp.com/go/inkusage. NOTE: You can easily check the ink supply level to determine how soon ...and cartridges for printing, and in another printer, the ink level indicator might need to replace the cartridges until the print quality is used. The Printer Toolbox appears. 2. 7 Work with cartridges Check the estimated ink levels 37 In the HP Solution Center, click Settings, point to ...
User Guide
Page 40
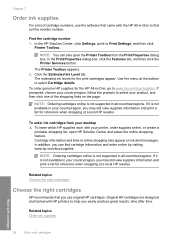
...follow the prompts to www.hp.com/buy /supplies. Cartridge information and links to Print Settings, and then click Printer Toolbox. If it is not supported in -One, go to select your printer, order supplies online, or create a printable shopping list, open the Printer Toolbox from your country/... the right cartridges HP recommends that came with HP printers to help you may still view supplies information and print a list for the HP All-in all countries/regions. Use the menu at a local HP reseller. NOTE: Ordering cartridges online is not available in -One to select Cartridge ...
...follow the prompts to www.hp.com/buy /supplies. Cartridge information and links to Print Settings, and then click Printer Toolbox. If it is not supported in -One, go to select your printer, order supplies online, or create a printable shopping list, open the Printer Toolbox from your country/... the right cartridges HP recommends that came with HP printers to help you may still view supplies information and print a list for the HP All-in all countries/regions. Use the menu at a local HP reseller. NOTE: Ordering cartridges online is not available in -One to select Cartridge ...

User Guide
Page 41
In the Print Settings area, click Printer Toolbox. 2. Click Clean, and then follow the onscreen instructions. Lightly press..., lint-free cloth, or any soft material that are experiencing the problem. Remove and clean each print cartridge one at the same time. If the print cartridges are not low on the product and open the print cartridge ...slot. The print carriage moves to clean the print cartridge contacts. Do not leave a print cartridge outside the HP Allin-One for cleaning print cartridges. • Distilled, filtered, or bottled water (tap water might need to be cleaned....
In the Print Settings area, click Printer Toolbox. 2. Click Clean, and then follow the onscreen instructions. Lightly press..., lint-free cloth, or any soft material that are experiencing the problem. Remove and clean each print cartridge one at the same time. If the print cartridges are not low on the product and open the print cartridge ...slot. The print carriage moves to clean the print cartridge contacts. Do not leave a print cartridge outside the HP Allin-One for cleaning print cartridges. • Distilled, filtered, or bottled water (tap water might need to be cleaned....


