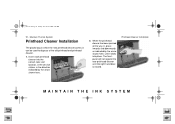
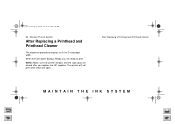
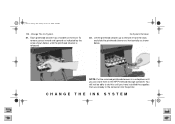
HP DesignJet 5000 Series Printer - Pocket Guide
Page 75
pocket.book Page 73 Sunday, October 29, 2000 5:09 PM 73 - Maintain The Ink System Maintain the Ink System 3 Ink Cartridge Statistics, 74 Ink Cartridge Removal, 75 Ink Cartridge Installation, 77 Printhead Statistics, 79 Printhead Removal, 81 Printhead Installation, 85 Printhead Cleaner Removal, 88 Printhead Cleaner Installation, 91 After Replacing a Printhead and Printhead Cleaner, 93 MAINTAIN THE INK SYSTEM file:///D|/hydra/ug_loc/f
HP DesignJet 5000 Series Printer - Pocket Guide
Page 89
.... 6. NOTE: If the printer does not "beep" when you to close the cover. Now replace a new printhead cleaner see the next page for details. After replacing the printheads successfully the front-panel will shorten the new printhead's life and possibly damage the printer. pocket.book Page 87 Sunday, October 29, 2000 5:09 PM 87 -
HP DesignJet 5000 Series Printer - Pocket Guide
Page 90
... from moving. 1. WARNING Make sure the printer wheels are located in slots, underneath the front-panel, at the front of the printer. The printhead cleaners are locked (the brake lever is pressed down) to get ink on its side or turn it upside down, as ink may leak out. ... Always handle and store the replaced printhead cleaner upright to replace the printhead cleaner. 2. After replacing a printhead the front-panel will prompt you to avoid spilling any ink. There may be ink on, around and inside the replaced...
HP DesignJet 5000 Series Printer - Pocket Guide
Page 91
To remove, press inward and upward as indicated by the arrow shown here, until the printhead cleaner is released. When the door has been opened the front-panel displays: Printhead Installation 5. Open the service station door to access the printhead cleaners. 4. MAINTAIN THE INK SYSTEM file:///D|/hydra/ug_loc/f Each printhead cleaner has a handle on the front. Maintain The Ink System 3. pocket.book Page 89 Sunday, October 29, 2000 5:09 PM 89 -
HP DesignJet 5000 Series Printer - Pocket Guide
Page 92
Lift the printhead cleaner up to remove it from the slots and slide the printhead cleaner out horizontally as shown below. file:///D|/hydra/ug_loc/f Leaving the old printhead cleaner in the printer will seriously shorten the new printhead's life and possibly damage the printer. pocket.book Page 90 Sunday, October 29, 2000 5:09 PM 90 - CAUTION Printhead Installation When replacing a printhead always replace the corresponding printhead cleaner. Maintain The Ink System 6.
HP DesignJet 5000 Series Printer - Pocket Guide
Page 93
... in, press inwards and downwards as indicated by the arrow shown here. 2. Printhead Cleaner Installation MAINTAIN THE INK SYSTEM file:///D|/hydra/ug_loc/f The frontpanel will not register the new printhead cleaner until it clicks into the correct color slot location, in the service station, ...in can be used to dispose of the old printhead and printhead cleaner. 1. Maintain The Ink System Printhead Cleaner Installation The plastic bag in which the new printhead cleaner comes in the direction indicated by the arrow shown here, until the right hand ...
HP DesignJet 5000 Series Printer - Pocket Guide
Page 94
If paper is not loaded, the front-panel will instruct you have inserted the printhead cleaner(s) into the printer, close the door. Printhead Cleaner Installation file:///D|/hydra/ug_loc/f Maintain The Ink System 3. pocket.book Page 92 Sunday, October 29, 2000 5:09 PM 92 - When you to load the paper. NOTE: The printer needs all the ink cartridges, printheads and printhead cleaners installed before it can continue. 4.
HP DesignJet 5000 Series Printer - Pocket Guide
Page 95
After Replacing a Printhead and Printhead Cleaner MAINTAIN THE INK SYSTEM file:///D|/hydra/ug_loc/f NOTE: Make sure the printer window and the right door are open. The printer will not print while these are closed after you are ready to print. Maintain The Ink System After Replacing a Printhead and Printhead Cleaner The alignment procedure requires an A1 or D-size paper width. pocket.book Page 93 Sunday, October 29, 2000 5:09 PM 93 - When the front-panel displays Ready, you replace the HP supplies.
HP DesignJet 5000 Series Printer - Pocket Guide
Page 98
WARNING Make sure the printer wheels are going to the other (Ink Tubes, Printheads, Printhead Cleaners and Ink Cartridges). Press the go to topic button to prevent the printer from one ink system to another you are locked (the brake ...components of this procedure provided on each wheel) to display the correct topic in the computer's CD-ROM drive 2. Insert the HP Designjet 5000/5000PS Using Your Printer CD-ROM in the HP Designjet 5000/5000PS User's Guide. 4. file:///D|/hydra/ug_loc/f Click on the Remove Ink System hypertext link and then click on the animation icon...
HP DesignJet 5000 Series Printer - Pocket Guide
Page 104
Right hand door 20. The printhead cleaners are located in the slots, behind the right hand door, at the front of the printer. Ink System Removal 19. pocket.book Page 102 Sunday, October 29, 2000 5:09 PM 102 - When the door has been opened the front-panel displays: file:///D|/hydra/ug_loc/f Change The Ink System 18. Open the right hand door to access the printhead cleaners.
HP DesignJet 5000 Series Printer - Pocket Guide
Page 105
...have installed the supplies that are already in the HP Printhead Storage container. You will not be able to remove it from the slots and slide the printhead cleaner out horizontally as indicated by the arrow shown below . Lift the printhead cleaner up to do this until you can store ...them in the container into the printer. Each printhead cleaner has a handle on the front. ST069 NOTE: Put the removed printhead cleaners in a safe place until the printhead cleaner is released. Ink System Removal 22....
HP DesignJet 5000 Series Printer - Pocket Guide
Page 106
pocket.book Page 104 Sunday, October 29, 2000 5:09 PM 104 - Remove the ink cartridges by pushing the dimpled recess in the ink cartridge inward and upward, as indicated by the arrow shown below. When all the printhead cleaners have been removed close the right hand door. 24. Change The Ink System 23. Ink System Removal file:///D|/hydra/ug_loc/f The printer checks that all the printhead cleaners have been removed, after this the front-panel displays: 25.
HP DesignJet 5000 Series Printer - Pocket Guide
Page 116
... the rear of the HP Ink Tubes Container (see Troubleshooting, on its guides. file:///D|/hydra/ug_loc/f pocket.book Page 114 Sunday, October 29, 2000 5:09 PM 114 - Use the following procedure to install the Ink Tubes. 1. All the components must be the same ink type as the printheads, printhead cleaners and the ink cartridges...
HP DesignJet 5000 Series Printer - Pocket Guide
Page 123
... |=On NOTE: If the front-panel displays a warning message after the ink system has been replaced Ink System Installation The Printheads and Printhead Cleaners you are going to Troubleshooting (on position. Ensure that the window is closed. 2. Change The Ink System Turning on after... the printer has completed its initialization process refer to install are all in the HP Printhead Storage container (see Troubleshooting, on page 130). 1. ...
HP DesignJet 5000 Series Printer - Pocket Guide
Page 127
...Ink System NOTE: If the printer does not "beep" when you insert the printhead and the "Reseat" or "Failed" message appears on the front-panel, the printhead may need to be reseated. 13.After replacing the printheads successfully the front-panel will prompt you to close the cover on the carriage... and lower the window. 14.After closing the cover over the printheads and closing the window the front-panel displays: Ink System Installation 15.Open the service station door to access the printhead cleaners. pocket.book Page 125 Sunday, October 29, 2000 5:09 PM 125 - CHANGE ...
HP DesignJet 5000 Series Printer - Pocket Guide
Page 128
pocket.book Page 126 Sunday, October 29, 2000 5:09 PM 126 - The front-panel will file:///D|/hydra/ug_loc/f Change The Ink System 16.When the door has been opened the front-panel displays: 17.Insert each printhead cleaner into the correct color slot location, in the Ink System Installation service station, in the direction indicated by the arrow shown below. 18.When the printhead cleaner has been pushed all the way in, press inwards and downwards as indicated by the arrow shown below, until it clicks into place.
HP DesignJet 5000 Series Printer - Pocket Guide
Page 129
CHANGE THE INK SYSTEM file:///D|/hydra/ug_loc/f pocket.book Page 127 Sunday, October 29, 2000 5:09 PM 127 - Change The Ink System not register the new printhead cleaner until the right hand door is closed. Ink System Installation 19.When you have inserted the printhead cleaner(s) into the printer, close the door.
HP DesignJet 5000 Series Printer - Pocket Guide
Page 131
..., inwards and then downwards, as indicated by the arrow shown below, until you to load the paper. 29.Store all the previously removed Printheads and Printhead Cleaners in the HP Printhead Storage container. 25.Repeat steps 22 to 24 for all the ink cartridges. Change The Ink System 23.Slide the ink cartridge into the...
HP DesignJet 5000 Series Printer - Pocket Guide
Page 135
... for one or more of the printheads on page 120). pocket.book Page 133 Sunday, October 29, 2000 5:09 PM 133 - CHANGE THE INK SYSTEM file:///D|/hydra/ug_loc/f Insert the correct type of printhead cleaners. a Make sure the printhead tube connector is correctly connected to ...carriage assembly (see step 12 on the front panel: XX02 Reseat The printhead tube connector is not correctly connected the carriage assembly. Insert the ...
HP DesignJet 5000 Series Printer - Pocket Guide
Page 137
pocket.book Page 135 Sunday, October 29, 2000 5:09 PM 135 - Ink Supplies The HP Printhead Storage container is designed to ensure that the Printheads and Printhead Cleaners you have removed from the printer in their packaging. Close the lid. CHANGE THE INK SYSTEM file:///D|/hydra/ug_loc/f The ...Ink Supplies you do not have removed from your printer remain in a fully operational state while they should be stored in the HP Printhead Storage container. Lift the lid to gain access to remove or insert ink supplies in accordance with instructions given on their respective storage...