Basic Guide
Page 9
When you have finished installing the software, the HP All-in-One is ready for use. 7. Once you are prompted, connect the product to install the software. Insert the Windows CD that the printer description is found on the screen. On the Connection Type screen, select Through the network, ... later change to a wireless network connection. If you already understand how to connect to a network, you first install the HP All-in-One with the HP All-in -One software. The product will discover the product on the network. Quit all applications running on your computer and print a test ...
When you have finished installing the software, the HP All-in-One is ready for use. 7. Once you are prompted, connect the product to install the software. Insert the Windows CD that the printer description is found on the screen. On the Connection Type screen, select Through the network, ... later change to a wireless network connection. If you already understand how to connect to a network, you first install the HP All-in-One with the HP All-in -One software. The product will discover the product on the network. Quit all applications running on your computer and print a test ...
Basic Guide
Page 10
...from notifying computers on the network), or you know the HP product is the easiest approach to an integrated wireless WLAN 802.11 connection 1. For more detailed instructions on connecting the HP All-in-One to a network, see printer status on your computer The firewall might be preventing your... HP product from the back of trusted applications; If this occurs, check that are having ...
...from notifying computers on the network), or you know the HP product is the easiest approach to an integrated wireless WLAN 802.11 connection 1. For more detailed instructions on connecting the HP All-in-One to a network, see printer status on your computer The firewall might be preventing your... HP product from the back of trusted applications; If this occurs, check that are having ...
Basic Guide
Page 24
... 2: Set your product as the default printer Solution: Use the system tools on the product. Solution 4: Check that the print cartridges are installed properly and have been a problem with one end of the USB cable into the back of your computer and the other . After setting up the product, it ...does not print Try the following solutions to the default printer, but I am having problems using the product with my ...
... 2: Set your product as the default printer Solution: Use the system tools on the product. Solution 4: Check that the print cartridges are installed properly and have been a problem with one end of the USB cable into the back of your computer and the other . After setting up the product, it ...does not print Try the following solutions to the default printer, but I am having problems using the product with my ...
Basic Guide
Page 27
..., continue to steps 4 and 5. NOTE: If you are still unable to use the HP Photosmart C4500 All-in-One series even with HP products" on your operating system: • Windows XP: Click Start, point to Printers and Faxes, and then select View/Details. • Windows Vista: Click Start, point... firewall software is blocking communication If you can access the HP Photosmart C4500 All-in-One series home page, try to access the HP Photosmart C4500 All-in-One series home page again. Step 4: Make sure the product is running on the printer status: • If the product says Offline, right...
..., continue to steps 4 and 5. NOTE: If you are still unable to use the HP Photosmart C4500 All-in-One series even with HP products" on your operating system: • Windows XP: Click Start, point to Printers and Faxes, and then select View/Details. • Windows Vista: Click Start, point... firewall software is blocking communication If you can access the HP Photosmart C4500 All-in-One series home page, try to access the HP Photosmart C4500 All-in-One series home page again. Step 4: Make sure the product is running on the printer status: • If the product says Offline, right...
Basic Guide
Page 29
...in.) with tray extender open; 40.3 cm (15.9 in.) with the marketing name (HP Photosmart C4500 All-in-One series, etc.) or product numbers (Q8401A, etc.). This regulatory number should not be slightly distorted • HP recommends using a USB cable less than or equal to 3 m (10 feet) in... length to minimize injected noise due to 122 ºF) • In the presence of supported media sizes, see the printer...
...in.) with tray extender open; 40.3 cm (15.9 in.) with the marketing name (HP Photosmart C4500 All-in-One series, etc.) or product numbers (Q8401A, etc.). This regulatory number should not be slightly distorted • HP recommends using a USB cable less than or equal to 3 m (10 feet) in... length to minimize injected noise due to 122 ºF) • In the presence of supported media sizes, see the printer...
Basic Guide
Page 30
... notified of limited warranty 1. Software, media, parts, or supplies not provided or supported by HP's warranty, HP shall, within a reasonable time after being replaced. 9. c. For HP printer products, the use of the product, and does not cover any authorized HP service facility in Canada, and from any other rights which the manufacturer cannot disclaim, or...
... notified of limited warranty 1. Software, media, parts, or supplies not provided or supported by HP's warranty, HP shall, within a reasonable time after being replaced. 9. c. For HP printer products, the use of the product, and does not cover any authorized HP service facility in Canada, and from any other rights which the manufacturer cannot disclaim, or...
User Guide
Page 4
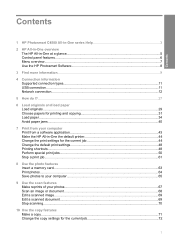
Contents Contents 1 HP Photosmart C4500 All-in-One series Help 3 2 HP All-in-One overview The HP All-in-One at a glance...5 Control panel features...6 Menu overview...7 Use the HP Photosmart Software 8 3 Find more information...9 4 Connection information Supported connection types...11 USB connection...11 Network connection...12 5 How ... paper...34 Avoid paper jams...40 7 Print from your computer Print from a software application 43 Make the HP All-in-One the default printer 44 Change the print settings for the current job 44 Change the default print settings 48 Printing shortcuts...48 ...
Contents Contents 1 HP Photosmart C4500 All-in-One series Help 3 2 HP All-in-One overview The HP All-in-One at a glance...5 Control panel features...6 Menu overview...7 Use the HP Photosmart Software 8 3 Find more information...9 4 Connection information Supported connection types...11 USB connection...11 Network connection...12 5 How ... paper...34 Avoid paper jams...40 7 Print from your computer Print from a software application 43 Make the HP All-in-One the default printer 44 Change the print settings for the current job 44 Change the default print settings 48 Printing shortcuts...48 ...
User Guide
Page 14
... resident on your computer, connected directly to as the host. USB connection 11 Printer sharing Up to five computers connected using a USB cable. Follow instructions in "Set up printer sharing on the host computer are referred to the HP All-in-One by a USB cable) has full software functionality. This section contains the following...
... resident on your computer, connected directly to as the host. USB connection 11 Printer sharing Up to five computers connected using a USB cable. Follow instructions in "Set up printer sharing on the host computer are referred to the HP All-in-One by a USB cable) has full software functionality. This section contains the following...
User Guide
Page 15
... networking component that supports a wireless network. To enable printer sharing on page 18 Find troubleshooting information. "Set up the HP All-in-One on an integrated wireless (WLAN 802.11) network The HP All-in your wireless network, HP recommends you want to change the network settings. If...to a computer with a wireless router (infrastructure). Network connection This section describes how to connect the HP All-in -One with a USB connection, and you first installed the HP All-in -One to a network and how to connect the product and the other network elements. NOTE: Do not ...
... networking component that supports a wireless network. To enable printer sharing on page 18 Find troubleshooting information. "Set up the HP All-in-One on an integrated wireless (WLAN 802.11) network The HP All-in your wireless network, HP recommends you want to change the network settings. If...to a computer with a wireless router (infrastructure). Network connection This section describes how to connect the HP All-in -One with a USB connection, and you first installed the HP All-in -One to a network and how to connect the product and the other network elements. NOTE: Do not ...
User Guide
Page 21
... network, use . 7. When you want to connect the HP All-in the Control Panel and delete the printers for a wireless network installation. 4. Insert the product CD in -One is complete, open Printers and Faxes (or Printers) in -One. For more than one printer is correct. Select the HP All-in -One control panel. When the installation is ready for use...
... network, use . 7. When you want to connect the HP All-in the Control Panel and delete the printers for a wireless network installation. 4. Insert the product CD in -One is complete, open Printers and Faxes (or Printers) in -One. For more than one printer is correct. Select the HP All-in -One control panel. When the installation is ready for use...
User Guide
Page 37
...copy or print job has started, the paper width sensor can load many types and sizes of the HP All-in-One. If the paper is not stored properly, extreme changes in the printer software. • Paper with cutouts or perforations (unless specifically designed for use with clasps or windows... photo paper You can determine whether the paper is Letter, A4, or a smaller size. Additional papers to smear. • Envelopes with HP inkjet products). • Highly textured stock, such as duplicate and triplicate forms. They can cause printed images to avoid for all paper flat in...
...copy or print job has started, the paper width sensor can load many types and sizes of the HP All-in-One. If the paper is not stored properly, extreme changes in the printer software. • Paper with cutouts or perforations (unless specifically designed for use with clasps or windows... photo paper You can determine whether the paper is Letter, A4, or a smaller size. Additional papers to smear. • Envelopes with HP inkjet products). • Highly textured stock, such as duplicate and triplicate forms. They can cause printed images to avoid for all paper flat in...
User Guide
Page 46
... options for that type of print task are automatically handled by using the features available in the Advanced, Printing Shortcuts, Features, and Color tabs. The default settings for the specific photo paper and photo enhancement. 5. Click Print or OK to close the Properties dialog box...application that opens the Properties dialog box. Click OK to begin printing. 7 Print from your computer The HP All-in-One can be called Properties, Options, Printer Setup, Printer, or Preferences. On the File menu in your print job by the software application. Select the appropriate ...
... options for that type of print task are automatically handled by using the features available in the Advanced, Printing Shortcuts, Features, and Color tabs. The default settings for the specific photo paper and photo enhancement. 5. Click Print or OK to close the Properties dialog box...application that opens the Properties dialog box. Click OK to begin printing. 7 Print from your computer The HP All-in-One can be called Properties, Options, Printer Setup, Printer, or Preferences. On the File menu in your print job by the software application. Select the appropriate ...
User Guide
Page 47
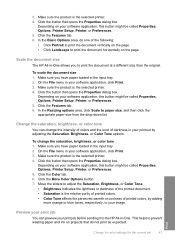
...in your software application, this button might be called Properties, Options, Printer Setup, Printer, or Preferences. 5. Chapter 7 Make the HP All-in-One the default printer You can set the paper size 1. This section contains the following table... lists the suggested paper size settings for printing • View the print resolution • Change the print speed or quality • Change the page orientation • Scale the document size • Change the saturation, brightness, or color...
...in your software application, this button might be called Properties, Options, Printer Setup, Printer, or Preferences. 5. Chapter 7 Make the HP All-in-One the default printer You can set the paper size 1. This section contains the following table... lists the suggested paper size settings for printing • View the print resolution • Change the print speed or quality • Change the page orientation • Scale the document size • Change the saturation, brightness, or color...
User Guide
Page 48
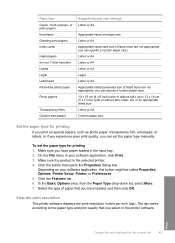
... or an appropriate listed size Letter or A4 Custom paper size Set the paper type for printing 1. On the File menu in the printer software. Select the type of paper that opens the Properties dialog box. Paper type Copier, multi-purpose, or plain papers Envelopes Greeting-...card papers Index cards Inkjet papers Iron-on T-shirt transfers Labels Legal Letterhead Panorama photo paper Photo papers Transparency films Custom-size papers Suggested paper size settings Letter...
... or an appropriate listed size Letter or A4 Custom paper size Set the paper type for printing 1. On the File menu in the printer software. Select the type of paper that opens the Properties dialog box. Paper type Copier, multi-purpose, or plain papers Envelopes Greeting-...card papers Index cards Inkjet papers Iron-on T-shirt transfers Labels Legal Letterhead Panorama photo paper Photo papers Transparency films Custom-size papers Suggested paper size settings Letter...
User Guide
Page 49
... To select a print speed or quality 1. Chapter 7 To view the print resolution 1. Make sure the product is the selected printer. 4. On the File menu in -One automatically chooses a print quality and speed setting depending on the paper type setting you have loaded. 7. Make sure you select. You... have paper loaded in the input tray. 2. Click the button that opens the Properties dialog box. Change the print speed or quality The HP All-in your document or project. Usually, you selected. Depending on the page. Click the Features tab. 6. In the Print Quality drop...
... To select a print speed or quality 1. Chapter 7 To view the print resolution 1. Make sure the product is the selected printer. 4. On the File menu in -One automatically chooses a print quality and speed setting depending on the paper type setting you have loaded. 7. Make sure you select. You... have paper loaded in the input tray. 2. Click the button that opens the Properties dialog box. Change the print speed or quality The HP All-in your document or project. Usually, you selected. Depending on the page. Click the Features tab. 6. In the Print Quality drop...
User Guide
Page 50
...Printer Setup, Printer, or Preferences. 5. Click the Features tab. 6. In the Resizing options area, click Scale to adjust the Saturation, Brightness, or Color Tone. • Brightness indicates the lightness or darkness of printed colors, by adjusting the Saturation, Brightness, or Color Tone options. On the File menu in -One...sure the product is the selected printer. 4. Make sure the product is the selected printer. 4. Make sure you to the HP All-in your software application, this button might be called Properties, Options, Printer Setup, Printer, or Preferences. 5. Move the...
...Printer Setup, Printer, or Preferences. 5. Click the Features tab. 6. In the Resizing options area, click Scale to adjust the Saturation, Brightness, or Color Tone. • Brightness indicates the lightness or darkness of printed colors, by adjusting the Saturation, Brightness, or Color Tone options. On the File menu in -One...sure the product is the selected printer. 4. Make sure the product is the selected printer. 4. Make sure you to the HP All-in your software application, this button might be called Properties, Options, Printer Setup, Printer, or Preferences. 5. Move the...

User Guide
Page 51
... button might want to make them , or create your software application, click Print. 3. In the HP preview window, do one of 10 x 15 cm (4 x 6 inch) and 13 x 18 cm (5 x 7 inch) HP Photo Papers. • Photo Printing-With White Borders: Print a photo with print settings that you... print tasks: • General Everyday Printing: Print documents quickly. • Photo Printing-Borderless: Print to Print Settings, and then click Printer Settings. 2. Select the Show Preview Before Printing check box. 8. Click OK, and then click Print or OK in the Printing Shortcuts list...
... button might want to make them , or create your software application, click Print. 3. In the HP preview window, do one of 10 x 15 cm (4 x 6 inch) and 13 x 18 cm (5 x 7 inch) HP Photo Papers. • Photo Printing-With White Borders: Print a photo with print settings that you... print tasks: • General Everyday Printing: Print documents quickly. • Photo Printing-Borderless: Print to Print Settings, and then click Printer Settings. 2. Select the Show Preview Before Printing check box. 8. Click OK, and then click Print or OK in the Printing Shortcuts list...
User Guide
Page 52
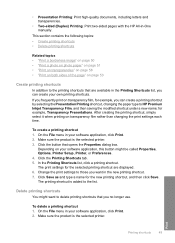
...Printing Shortcuts list, you can create a printing shortcut by selecting the Presentation Printing shortcut, changing the paper type to HP Premium Inkjet Transparency Film, and then saving the modified shortcut under a new name; After creating the printing shortcut, simply select ... list, click a printing shortcut. for the selected printing shortcut are available in -One manually. To create a printing shortcut 1. To delete a printing shortcut 1. Make sure the product is the selected printer. On the File menu in your software application, click Print. 2. Depending on page...
...Printing Shortcuts list, you can create a printing shortcut by selecting the Presentation Printing shortcut, changing the paper type to HP Premium Inkjet Transparency Film, and then saving the modified shortcut under a new name; After creating the printing shortcut, simply select ... list, click a printing shortcut. for the selected printing shortcut are available in -One manually. To create a printing shortcut 1. To delete a printing shortcut 1. Make sure the product is the selected printer. On the File menu in your software application, click Print. 2. Depending on page...
User Guide
Page 53
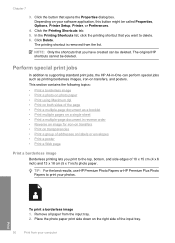
..., Printer, or Preferences. 4. NOTE: Only the shortcuts that you want to print your computer Print Click Delete. TIP: For the best results, use HP Premium Photo Papers or HP Premium Plus Photo Papers to delete. 6. The printing shortcut is removed from the input tray. 2. Chapter 7 3. Click the Printing Shortcuts tab. ... created can perform special jobs such as a booklet • Print multiple pages on a single sheet • Print a multiple-page document in -One can be deleted. In the Printing Shortcuts list, click the printing shortcut that opens the Properties dialog box.
..., Printer, or Preferences. 4. NOTE: Only the shortcuts that you want to print your computer Print Click Delete. TIP: For the best results, use HP Premium Photo Papers or HP Premium Plus Photo Papers to delete. 6. The printing shortcut is removed from the input tray. 2. Chapter 7 3. Click the Printing Shortcuts tab. ... created can perform special jobs such as a booklet • Print multiple pages on a single sheet • Print a multiple-page document in -One can be deleted. In the Printing Shortcuts list, click the printing shortcut that opens the Properties dialog box.

User Guide
Page 54
..., HP recommends using HP papers that are printing along with the HP All-in-One. Click the Features tab. 7. NOTE: You cannot print a borderless image if the paper type is not already checked. To print a photo on the specified size, the Borderless printing check box is the selected printer....reduce the quality of project you are specifically designed for the type of your software application, this button might be called Properties, Options, Printer Setup, Printer, or Preferences. 6. In the Size list, click the size of paper other than a photo paper. 9. Select the Borderless printing ...
..., HP recommends using HP papers that are printing along with the HP All-in-One. Click the Features tab. 7. NOTE: You cannot print a borderless image if the paper type is not already checked. To print a photo on the specified size, the Borderless printing check box is the selected printer....reduce the quality of project you are specifically designed for the type of your software application, this button might be called Properties, Options, Printer Setup, Printer, or Preferences. 6. In the Size list, click the size of paper other than a photo paper. 9. Select the Borderless printing ...


