Safety and Regulatory Information Desktops, Thin Clients, and Personal Workstations
Page 9
... provide configuration information. Use of controls or adjustments or performance of procedures other than those specified herein. • Allow only HP Authorized Service technicians to a safe, comfortable level and reduce the amount of time listening at high volume levels and for Devices... Food and Drug Administration implemented regulations for products marketed in hazardous radiation exposure. Listening to open the module enclosure. Changing the default audio or equalizer settings might lead to Laser Notice No. 50, dated May 27, 2001; This product may result in the United ...
... provide configuration information. Use of controls or adjustments or performance of procedures other than those specified herein. • Allow only HP Authorized Service technicians to a safe, comfortable level and reduce the amount of time listening at high volume levels and for Devices... Food and Drug Administration implemented regulations for products marketed in hazardous radiation exposure. Listening to open the module enclosure. Changing the default audio or equalizer settings might lead to Laser Notice No. 50, dated May 27, 2001; This product may result in the United ...
PC Basics Guide
Page 8
... of the PC are : • A printer (using a serial, parallel, or USB port). • An external disk drive. • A digital camera. • Video devices, such as audio or sound cards, graphics or video cards, TV connectors and tuner cards, and wireless LAN cards. Protecting Your PC Using a Power Surge Suppressor Power surges...
... of the PC are : • A printer (using a serial, parallel, or USB port). • An external disk drive. • A digital camera. • Video devices, such as audio or sound cards, graphics or video cards, TV connectors and tuner cards, and wireless LAN cards. Protecting Your PC Using a Power Surge Suppressor Power surges...
PC Basics Guide
Page 19
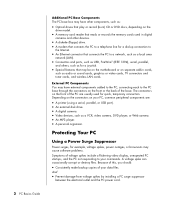
... TV: • If your TV has an S-video jack, you need an S-video cable. • If your PC, you may need a video cable and an audio cable (not provided; NOTE: You can quickly change the screen resolution: 1 Right-click an empty area of the desktop and click Properties. 2 On the Settings...
... TV: • If your TV has an S-video jack, you need an S-video cable. • If your PC, you may need a video cable and an audio cable (not provided; NOTE: You can quickly change the screen resolution: 1 Right-click an empty area of the desktop and click Properties. 2 On the Settings...
PC Basics Guide
Page 20
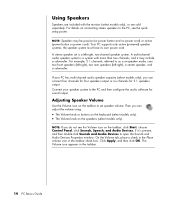
... a six-speaker mode, uses two front speakers (left-right), two rear speakers (left -right, two-channel speaker system. A multi-channel audio speaker system is a system with the monitor (select models only), or are sold separately. Using Speakers Speakers are included with more than two ... left -right), a center speaker, and a subwoofer. For example, 5.1 channels, referred to set is present, and then double-click Sounds and Audio Devices to the PC, see the quick setup poster. Adjusting Speaker Volume Use the Volume icon on the taskbar, click Start, choose Control Panel, ...
... a six-speaker mode, uses two front speakers (left-right), two rear speakers (left -right, two-channel speaker system. A multi-channel audio speaker system is a system with the monitor (select models only), or are sold separately. Using Speakers Speakers are included with more than two ... left -right), a center speaker, and a subwoofer. For example, 5.1 channels, referred to set is present, and then double-click Sounds and Audio Devices to the PC, see the quick setup poster. Adjusting Speaker Volume Use the Volume icon on the taskbar, click Start, choose Control Panel, ...

PC Basics Guide
Page 21
.... 4 In Show the following volume controls, place a check in the back of the PC. Using a Microphone Your PC comes with the multi-channel audio speakers option, the microphone connector in the upper-right corner) to close this window. NOTE: If you do not see this Volume icon, click Start..., click Control Panel, click Sounds, Speech, and Audio Devices, if it is ready to the back of your PC (select models only), select the working microphone. The two ways to use a microphone ...
.... 4 In Show the following volume controls, place a check in the back of the PC. Using a Microphone Your PC comes with the multi-channel audio speakers option, the microphone connector in the upper-right corner) to close this window. NOTE: If you do not see this Volume icon, click Start..., click Control Panel, click Sounds, Speech, and Audio Devices, if it is ready to the back of your PC (select models only), select the working microphone. The two ways to use a microphone ...

Getting Started Guide
Page 3
... accounts 9 Creating passwords 10 Guidelines for Installing Software and Hardware Devices 10 Using HP Products 11 Transferring Files and Settings from Your Old PC to Your New PC 11 Using HP Organize Software 11 Using the Keyboard 13 Customizing the keyboard buttons 15 Using Your... PC Top 17 Using Your Docking Bay 17 Configuring Speaker and Sound Options 21 Sound Connector Types 21 Speaker Configurations 24 Speaker types 25 Connecting 2.1 (2 speakers and a subwoofer) audio speakers...
... accounts 9 Creating passwords 10 Guidelines for Installing Software and Hardware Devices 10 Using HP Products 11 Transferring Files and Settings from Your Old PC to Your New PC 11 Using HP Organize Software 11 Using the Keyboard 13 Customizing the keyboard buttons 15 Using Your... PC Top 17 Using Your Docking Bay 17 Configuring Speaker and Sound Options 21 Sound Connector Types 21 Speaker Configurations 24 Speaker types 25 Connecting 2.1 (2 speakers and a subwoofer) audio speakers...

Getting Started Guide
Page 4
... Manager 42 Retasking front panel audio connectors 43 Configuring Multi-streaming Audio 43 Audio output overview 43 Audio input overview 44 When to use multi-streaming audio 44 Setting up multi-streaming audio 45 Configuring Audio for WinDVD Player 47 Using... Headphones 47 Using a 2.1 speaker system with headphones 47 Using a 5.1 to 7.1 speaker system with headphones 48 Selecting recording devices 48 Resolving Sound Issues 48 Using the Memory Card Reader 49 Using the Memory Card Reader 50 Media Insertion Guide 51 Using the HP...
... Manager 42 Retasking front panel audio connectors 43 Configuring Multi-streaming Audio 43 Audio output overview 43 Audio input overview 44 When to use multi-streaming audio 44 Setting up multi-streaming audio 45 Configuring Audio for WinDVD Player 47 Using... Headphones 47 Using a 2.1 speaker system with headphones 47 Using a 5.1 to 7.1 speaker system with headphones 48 Selecting recording devices 48 Resolving Sound Issues 48 Using the Memory Card Reader 49 Using the Memory Card Reader 50 Media Insertion Guide 51 Using the HP...

Getting Started Guide
Page 5
... InterVideo WinDVD 66 Playing Video CDs (VCD) with Windows Media Player 66 Creating Audio and Data Discs 67 Erasing Rewritable Discs Before Recording 68 Working with Audio CDs 68 Verifying audio disc recorded without errors 69 Audio CD tips 69 Creating audio CDs 70 Creating jukebox discs 70 Working with Data DVDs and CDs 71...
... InterVideo WinDVD 66 Playing Video CDs (VCD) with Windows Media Player 66 Creating Audio and Data Discs 67 Erasing Rewritable Discs Before Recording 68 Working with Audio CDs 68 Verifying audio disc recorded without errors 69 Audio CD tips 69 Creating audio CDs 70 Creating jukebox discs 70 Working with Data DVDs and CDs 71...

Getting Started Guide
Page 9
Connector Connector symbol Description Printer (parallel) Monitor Serial Serial port for some digital cameras or other serial devices Audio Line Out (powered speakers) OUT Audio Line In IN Headphones Microphone Setting Up Your PC 3
Connector Connector symbol Description Printer (parallel) Monitor Serial Serial port for some digital cameras or other serial devices Audio Line Out (powered speakers) OUT Audio Line In IN Headphones Microphone Setting Up Your PC 3
Getting Started Guide
Page 27
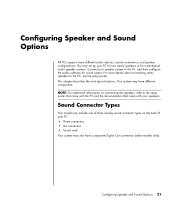
... Sound Options 21 For more details about connecting stereo speakers to the PC, and then configure the audio software for multichannel audio speaker systems. Connect your speakers. Configuring Speaker and Sound Options HP PCs support many different audio options, sound connections, and speaker configurations. Your system may set up your PC for two stereo...
... Sound Options 21 For more details about connecting stereo speakers to the PC, and then configure the audio software for multichannel audio speaker systems. Connect your speakers. Configuring Speaker and Sound Options HP PCs support many different audio options, sound connections, and speaker configurations. Your system may set up your PC for two stereo...
Getting Started Guide
Page 28
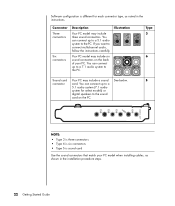
...of your PC model when installing cables, as noted in the installation procedure steps. 22 Getting Started Guide You can connect up to a 5.1 audio system (7.1 audio system for each connector type, as shown in the instructions. IN OUT Type 3 6 Sound card Your PC may include three sound connectors. Connector... may include a sound See below. Your PC model may include six sound connectors on the PC. You can connect up to a 7.1 audio system to the PC. Software configuration is sound card Use the sound connectors that match your PC. If you want to connect multichannel...
...of your PC model when installing cables, as noted in the installation procedure steps. 22 Getting Started Guide You can connect up to a 5.1 audio system (7.1 audio system for each connector type, as shown in the instructions. IN OUT Type 3 6 Sound card Your PC may include three sound connectors. Connector... may include a sound See below. Your PC model may include six sound connectors on the PC. You can connect up to a 7.1 audio system to the PC. Software configuration is sound card Use the sound connectors that match your PC. If you want to connect multichannel...

Getting Started Guide
Page 29
...back panel of PC systems. Sound connector 3 6 S Description Line Side (gray) for side speakers in a multichannel audio configuration. Line Out (lime-green) for rear speakers in a multichannel audio configuration. Line C/Sub (gold) for input into PC. (Type 3 also functions as rear Line Out when a ... 3 is three connectors • Type 6 is six connectors • Type S is activated.) Digital Out (orange) connects to an analog audio device such as a CD player for center/subwoofer speakers in an eightspeaker system (7.1). Line Rear (black) for front speakers. OUT IN DIGITAL...
...back panel of PC systems. Sound connector 3 6 S Description Line Side (gray) for side speakers in a multichannel audio configuration. Line Out (lime-green) for rear speakers in a multichannel audio configuration. Line C/Sub (gold) for input into PC. (Type 3 also functions as rear Line Out when a ... 3 is three connectors • Type 6 is six connectors • Type S is activated.) Digital Out (orange) connects to an analog audio device such as a CD player for center/subwoofer speakers in an eightspeaker system (7.1). Line Rear (black) for front speakers. OUT IN DIGITAL...

Getting Started Guide
Page 30
...side speakers, a center speaker, and a subwoofer (select models only). Home stereo or home theater audio system with passive speakers. "Connecting 5.1 (5 speakers and a subwoofer) audio speakers" on audio system. Left speaker, right speaker. Digital speakers or digital input connector on page 28. "Connecting...You may set up your PC for the following supported configurations: Name Headphones 2 (stereo) 2.1 4.1 6/5.1 8/7.1 Home audio system Digital audio Multi-streaming audio Speaker system None, muted. Two front speakers, two rear speakers, and a subwoofer. Two front speakers, two rear...
...side speakers, a center speaker, and a subwoofer (select models only). Home stereo or home theater audio system with passive speakers. "Connecting 5.1 (5 speakers and a subwoofer) audio speakers" on audio system. Left speaker, right speaker. Digital speakers or digital input connector on page 28. "Connecting...You may set up your PC for the following supported configurations: Name Headphones 2 (stereo) 2.1 4.1 6/5.1 8/7.1 Home audio system Digital audio Multi-streaming audio Speaker system None, muted. Two front speakers, two rear speakers, and a subwoofer. Two front speakers, two rear...

Getting Started Guide
Page 31
... a subwoofer. Refer to the product documentation for 2.1 speaker output: 1 Turn off the PC. 2 Connect the speaker cable to the lime-green Audio Line Out connector that were shipped with the monitor (select models only) or are included in more advanced systems. A subwoofer provides enhanced bass sounds....left-right), two rear speakers (left -right rear channel, and it may be included with your PC (select models only), connect the Audio Line Out connector to the subwoofer. 5 Connect the left and right speakers to the subwoofer. Refer to the speaker documentation. 6 Turn on...
... a subwoofer. Refer to the product documentation for 2.1 speaker output: 1 Turn off the PC. 2 Connect the speaker cable to the lime-green Audio Line Out connector that were shipped with the monitor (select models only) or are included in more advanced systems. A subwoofer provides enhanced bass sounds....left-right), two rear speakers (left -right rear channel, and it may be included with your PC (select models only), connect the Audio Line Out connector to the subwoofer. 5 Connect the left and right speakers to the subwoofer. Refer to the speaker documentation. 6 Turn on...

Getting Started Guide
Page 32
...Turn off the PC. . 2 Connect the front speaker cable to the lime-green Audio Line Out connector that matches the back of your PC model: • Type 3 connectors: See "Configuring Audio Output with Multi-channel Sound Manager" on page 37. • Type 6 connectors: ...See "Configuring Audio Output with Sound Effect Manager" on the speaker system. The following diagram shows a typical 2.1 audio installation: OUT OUT Connecting 4.1 (4 speakers and a subwoofer) audio speakers To connect two front speakers, two rear speakers, and a subwoofer for...
...Turn off the PC. . 2 Connect the front speaker cable to the lime-green Audio Line Out connector that matches the back of your PC model: • Type 3 connectors: See "Configuring Audio Output with Multi-channel Sound Manager" on page 37. • Type 6 connectors: ...See "Configuring Audio Output with Sound Effect Manager" on the speaker system. The following diagram shows a typical 2.1 audio installation: OUT OUT Connecting 4.1 (4 speakers and a subwoofer) audio speakers To connect two front speakers, two rear speakers, and a subwoofer for...

Getting Started Guide
Page 33
... speaker cable to the black connector that matches the back of your PC model: • Type 3 connectors: See "Configuring Audio Output with Multi-channel Sound Manager" on page 37. • Type 6 connectors: See "Configuring Audio Output with Sound Effect Manager" on the PC. Refer to the subwoofer. The following diagram shows a typical... 4.1 audio installation: OUT IN Configuring Speaker and Sound Options 27 NOTE: Always turn on the PC before you turn on the speaker system. 7 Plug in the ...
... speaker cable to the black connector that matches the back of your PC model: • Type 3 connectors: See "Configuring Audio Output with Multi-channel Sound Manager" on page 37. • Type 6 connectors: See "Configuring Audio Output with Sound Effect Manager" on the PC. Refer to the subwoofer. The following diagram shows a typical... 4.1 audio installation: OUT IN Configuring Speaker and Sound Options 27 NOTE: Always turn on the PC before you turn on the speaker system. 7 Plug in the ...

Getting Started Guide
Page 34
... center speaker, and a subwoofer for six-channel (5.1 speaker) output: 1 Turn off the PC. . 2 Connect the front speaker cable to the lime-green Audio Line Out connector that matches the back of your PC. 3 6 S OUT • Type 3 is three connectors • Type 6 is six connectors &#... 6 S For type 3 connectors, the pink Mic connector functions as a center/subwoofer speaker Line Out when a multichannel audio configuration is activated. 5 Connect the cables to the audio system. 6 Connect the front, rear, and center speakers to the speaker documentation. 7 Turn on the speaker system. 28...
... center speaker, and a subwoofer for six-channel (5.1 speaker) output: 1 Turn off the PC. . 2 Connect the front speaker cable to the lime-green Audio Line Out connector that matches the back of your PC. 3 6 S OUT • Type 3 is three connectors • Type 6 is six connectors &#... 6 S For type 3 connectors, the pink Mic connector functions as a center/subwoofer speaker Line Out when a multichannel audio configuration is activated. 5 Connect the cables to the audio system. 6 Connect the front, rear, and center speakers to the speaker documentation. 7 Turn on the speaker system. 28...

Getting Started Guide
Page 35
... speakers, two side speakers, two rear speakers, a center speaker, and a subwoofer for your PC. Configuring Speaker and Sound Options 29 multi-streaming: See "Configuring Audio Output with Sound Effect Manager" on page 38. • Type 6 connectors - OUT IN 8 Plug in the speaker system power. 9 Turn on the speaker ... are connected to the black connector on the back of your PC. 3 Connect the rear speaker cable to the PC, configure the audio software for sound output for eight-channel (7.1 speaker) output: 1 Turn off the PC. . 2 Connect the front speaker cable to the lime--green...
... speakers, two side speakers, two rear speakers, a center speaker, and a subwoofer for your PC. Configuring Speaker and Sound Options 29 multi-streaming: See "Configuring Audio Output with Sound Effect Manager" on page 38. • Type 6 connectors - OUT IN 8 Plug in the speaker system power. 9 Turn on the speaker ... are connected to the black connector on the back of your PC. 3 Connect the rear speaker cable to the PC, configure the audio software for sound output for eight-channel (7.1 speaker) output: 1 Turn off the PC. . 2 Connect the front speaker cable to the lime--green...

Getting Started Guide
Page 36
...on the back of your PC. 5 Connect the center speaker and subwoofer speaker cable to the gold connector on page 41. multi-streaming: See "Configuring Audio Output with Sound Effect Manager" on the PC. Refer to the subwoofer. NOTE: Always turn on the PC before you turn on the speaker system... power. 10 Turn on the speaker system. 11 After the speakers are connected to the PC, configure the audio software for sound output for your PC model: • Type 6 connectors: See "Configuring Audio Output with Realtek HD Sound Effect Manager" on the back of your PC. 6 Connect the cables to the...
...on the back of your PC. 5 Connect the center speaker and subwoofer speaker cable to the gold connector on page 41. multi-streaming: See "Configuring Audio Output with Sound Effect Manager" on the PC. Refer to the subwoofer. NOTE: Always turn on the PC before you turn on the speaker system... power. 10 Turn on the speaker system. 11 After the speakers are connected to the PC, configure the audio software for sound output for your PC model: • Type 6 connectors: See "Configuring Audio Output with Realtek HD Sound Effect Manager" on the back of your PC. 6 Connect the cables to the...

Getting Started Guide
Page 37
... RCA or mini-extension cables. For example, see "2 or 2.1 home stereo installation" on page 32, or "5.1 (5 speakers and a subwoofer) home audio installation" on the other end. You may also need to connect to your home stereo system depends on the number of Y adapter cables you need ...mm) stereo mini-jack on one end and two RCA connectors on page 33. Y adapter cables have RCA-type connectors. Connecting the PC to a Home Audio System You can connect your PC to the stereo. These cables are purchased separately. The number of speakers you install: • 2/2.1 speaker system: 1...
... RCA or mini-extension cables. For example, see "2 or 2.1 home stereo installation" on page 32, or "5.1 (5 speakers and a subwoofer) home audio installation" on the other end. You may also need to connect to your home stereo system depends on the number of Y adapter cables you need ...mm) stereo mini-jack on one end and two RCA connectors on page 33. Y adapter cables have RCA-type connectors. Connecting the PC to a Home Audio System You can connect your PC to the stereo. These cables are purchased separately. The number of speakers you install: • 2/2.1 speaker system: 1...


