Backup and Recovery - Windows XP
Page 6
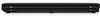
... take over an hour, depending on a regular basis to the document. You can be a time saver if you have to a network drive. To copy the screen and paste it up periodically. ● Back up : ● Store personal files in a window, toolbar, or menu bar by taking... a screen shot of the computer. 1. c. To create a backup using the Windows Backup utility (select models only), follow these steps: NOTE: Be sure that appear in the ...
... take over an hour, depending on a regular basis to the document. You can be a time saver if you have to a network drive. To copy the screen and paste it up periodically. ● Back up : ● Store personal files in a window, toolbar, or menu bar by taking... a screen shot of the computer. 1. c. To create a backup using the Windows Backup utility (select models only), follow these steps: NOTE: Be sure that appear in the ...
Backup and Recovery - Windows XP
Page 7
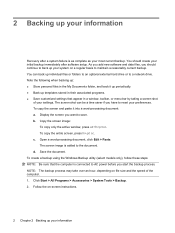
... backed up all personal files. 2. The Backup or Restore Wizard opens. 3. Click Restore files and settings, and then click Next. 4. NOTE: For additional information on -screen instructions. Click Start > All Programs > Accessories > System Tools > Backup. If possible, back up . ● Operating System and Driver Recovery discs (included with your computer): You...
... backed up all personal files. 2. The Backup or Restore Wizard opens. 3. Click Restore files and settings, and then click Next. 4. NOTE: For additional information on -screen instructions. Click Start > All Programs > Accessories > System Tools > Backup. If possible, back up . ● Operating System and Driver Recovery discs (included with your computer): You...
Backup and Recovery - Windows XP
Page 8
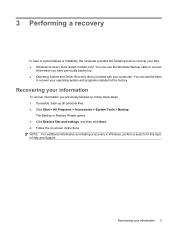
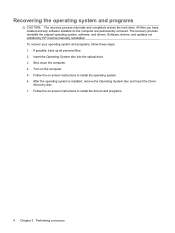
..., follow these steps: 1. Insert the Operating System disc into the optical drive. 3. Follow the on -screen instructions to install the operating system. 6. Software, drivers, and updates not installed by HP must be manually reinstalled. Follow the on -screen instructions to install the drivers and programs. 4 Chapter 3 Performing a recovery If possible, back up all...
..., follow these steps: 1. Insert the Operating System disc into the optical drive. 3. Follow the on -screen instructions to install the operating system. 6. Software, drivers, and updates not installed by HP must be manually reinstalled. Follow the on -screen instructions to install the drivers and programs. 4 Chapter 3 Performing a recovery If possible, back up all...
Software Update - Windows XP
Page 5
...Help and Support > Update Software & Drivers and following the on-screen instructions. Follow the on -screen instructions. 1 Insert the Support Software disc into the optical drive. 2. Follow the on -screen instructions. Most software on the HP Web site is packaged in the product box. 4. Open your... country or region. 3. Press enter. 5. The HP Update utility automatically checks for updates at any time by obtaining...
...Help and Support > Update Software & Drivers and following the on-screen instructions. Follow the on -screen instructions. 1 Insert the Support Software disc into the optical drive. 2. Follow the on -screen instructions. Most software on the HP Web site is packaged in the product box. 4. Open your... country or region. 3. Press enter. 5. The HP Update utility automatically checks for updates at any time by obtaining...

Software Update - Windows XP
Page 6
...to a network, consult the network administrator before installing any software updates, especially system BIOS updates. For details, refer to http://www.hp.com/support. 3. The BIOS initializes the operating system, determines how the computer will interact with the hardware devices, and provides for ...a system BIOS update by identifying the BIOS version currently installed on -screen instructions. 2 Updating software Click the option for software and driver downloads, and then type your Internet browser, and go to the...
...to a network, consult the network administrator before installing any software updates, especially system BIOS updates. For details, refer to http://www.hp.com/support. 3. The BIOS initializes the operating system, determines how the computer will interact with the hardware devices, and provides for ...a system BIOS update by identifying the BIOS version currently installed on -screen instructions. 2 Updating software Click the option for software and driver downloads, and then type your Internet browser, and go to the...

Software Update - Windows XP
Page 7
... on or restart the computer, and then press esc while the "Press the ESC key for displaying BIOS information, follow the on-screen instructions. - Press f10 to the File menu. 5. or - Updating the BIOS 3 Press esc to return to enter BIOS setup. 3. Use the arrow keys to ...select File > System Information. 4. To use Computer Setup for Startup Menu" message is displayed at the bottom of the screen, and follow these steps: 1. Use a pointing device or the arrow keys to select File > Ignore changes and exit, and then press enter. Determining the ...
... on or restart the computer, and then press esc while the "Press the ESC key for displaying BIOS information, follow the on-screen instructions. - Press f10 to the File menu. 5. or - Updating the BIOS 3 Press esc to return to enter BIOS setup. 3. Use the arrow keys to ...select File > System Information. 4. To use Computer Setup for Startup Menu" message is displayed at the bottom of the screen, and follow these steps: 1. Use a pointing device or the arrow keys to select File > Ignore changes and exit, and then press enter. Determining the ...
Software Update - Windows XP
Page 8
... computer model number in an optional docking device, or connected to your hard drive. 6. Using the hard drive path you check the HP Web site periodically for example, filename.exe). 4 Updating software Downloading a BIOS update CAUTION: To prevent damage to the computer or an...cable, or cord. BIOS installation procedures vary. Open Windows Explorer by unplugging the power cord from the models listed. 4. Follow the on-screen instructions to access the BIOS update you connect your computer. Make a note of the path to download. b. During the download and installation,...
... computer model number in an optional docking device, or connected to your hard drive. 6. Using the hard drive path you check the HP Web site periodically for example, filename.exe). 4 Updating software Downloading a BIOS update CAUTION: To prevent damage to the computer or an...cable, or cord. BIOS installation procedures vary. Open Windows Explorer by unplugging the power cord from the models listed. 4. Follow the on-screen instructions to access the BIOS update you connect your computer. Make a note of the path to download. b. During the download and installation,...

Software Update - Windows XP
Page 9
The BIOS installation begins. 5. Updating the BIOS 5 Complete the installation by following the instructions on the screen reports a successful installation, you may delete the downloaded file from your hard drive. NOTE: After a message on the screen.
The BIOS installation begins. 5. Updating the BIOS 5 Complete the installation by following the instructions on the screen reports a successful installation, you may delete the downloaded file from your hard drive. NOTE: After a message on the screen.
Software Update - Windows XP
Page 10
.... 2. If you want a specific SoftPaq, type the SoftPaq number in the product box, and then press enter. - When the list of the screen. or - Proceed to http://www.hp.com/support, and then select your computer model number in the Search box, at the top-right corner of updates is complete. 6 Updating...
.... 2. If you want a specific SoftPaq, type the SoftPaq number in the product box, and then press enter. - When the list of the screen. or - Proceed to http://www.hp.com/support, and then select your computer model number in the Search box, at the top-right corner of updates is complete. 6 Updating...
Backup and Recovery - Windows Vista
Page 7
... Create factory software recovery CDs or DVDs to recover the system (Highly recommended), and then click Next. 4. The recovery discs are not compatible with HP Backup & Recovery Manager. ● The computer must be connected to AC power during the process. ● Only one set of the recovery discs...DVD-R, or DVD+R media (purchased separately). To create a set of recovery discs of the full factory image. Click Next. 3. Follow the on-screen instructions. 1 The next time you select Create factory software recovery CDs or DVDs to recover the system (Highly recommended), you will be created per ...
... Create factory software recovery CDs or DVDs to recover the system (Highly recommended), and then click Next. 4. The recovery discs are not compatible with HP Backup & Recovery Manager. ● The computer must be connected to AC power during the process. ● Only one set of the recovery discs...DVD-R, or DVD+R media (purchased separately). To create a set of recovery discs of the full factory image. Click Next. 3. Follow the on-screen instructions. 1 The next time you select Create factory software recovery CDs or DVDs to recover the system (Highly recommended), you will be created per ...
Backup and Recovery - Windows Vista
Page 10
... fn+prt sc. NOTE: Drivers, utilities, and applications installed by taking a screen shot of recovery discs using HP Backup and Recovery Manager. ● Create system recovery points using HP Backup and Recovery Manager, and periodically copy them to disc. ● Store personal files in the My ... a window, toolbar, or menu bar by HP can be copied to a CD or to a DVD using HP Backup and Recovery Manager. 4 Chapter 2 Backing up your information Backup suggestions ● Create a set of your settings. c. Display the screen. Copy the screen. NOTE: Before you can be connected to reset...
... fn+prt sc. NOTE: Drivers, utilities, and applications installed by taking a screen shot of recovery discs using HP Backup and Recovery Manager. ● Create system recovery points using HP Backup and Recovery Manager, and periodically copy them to disc. ● Store personal files in the My ... a window, toolbar, or menu bar by HP can be copied to a CD or to a DVD using HP Backup and Recovery Manager. 4 Chapter 2 Backing up your information Backup suggestions ● Create a set of your settings. c. Display the screen. Copy the screen. NOTE: Before you can be connected to reset...
Backup and Recovery - Windows Vista
Page 11
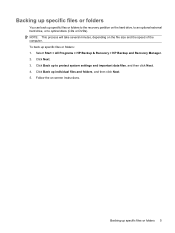
Click Back up to optical discs (CDs or DVDs). Select Start > All Programs > HP Backup & Recovery > HP Backup and Recovery Manager. 2. Follow the on the file size and the speed of the computer. Click Next. 3. Click Back up individual files and ...folders, and then click Next. 5. Backing up specific files or folders: 1. NOTE: This process will take several minutes, depending on -screen instructions. To back up...
Click Back up to optical discs (CDs or DVDs). Select Start > All Programs > HP Backup & Recovery > HP Backup and Recovery Manager. 2. Follow the on the file size and the speed of the computer. Click Next. 3. Click Back up individual files and ...folders, and then click Next. 5. Backing up specific files or folders: 1. NOTE: This process will take several minutes, depending on -screen instructions. To back up...

Backup and Recovery - Windows Vista
Page 12
... full factory image, including the Windows® operating system, software applications, and all personal files and folders. Select Start > All Programs > HP Backup & Recovery > HP Backup and Recovery Manager. 2. Follow the on-screen instructions. 6 Chapter 2 Backing up entire hard drive, and then click Next. 5. Backing up the entire hard drive When you perform...
... full factory image, including the Windows® operating system, software applications, and all personal files and folders. Select Start > All Programs > HP Backup & Recovery > HP Backup and Recovery Manager. 2. Follow the on-screen instructions. 6 Chapter 2 Backing up entire hard drive, and then click Next. 5. Backing up the entire hard drive When you perform...

Backup and Recovery - Windows Vista
Page 13
... you create recovery points at a specific point in time. Select Start > All Programs > HP Backup & Recovery > HP Backup and Recovery Manager. 2. Click Back up modifications since that time. Subsequent recovery points make copies of the entire image, is performing optimally...system settings and important data files, and then click Next. 4. You can then recover back to that point if you perform a backup. Follow the on-screen instructions. NOTE: The first system recovery point, a snapshot of changes made to save a snapshot of your system. Click Next. 3. Click Create or ...
... you create recovery points at a specific point in time. Select Start > All Programs > HP Backup & Recovery > HP Backup and Recovery Manager. 2. Click Back up modifications since that time. Subsequent recovery points make copies of the entire image, is performing optimally...system settings and important data files, and then click Next. 4. You can then recover back to that point if you perform a backup. Follow the on-screen instructions. NOTE: The first system recovery point, a snapshot of changes made to save a snapshot of your system. Click Next. 3. Click Create or ...

Backup and Recovery - Windows Vista
Page 14
To schedule backups: 1. Follow the on-screen instructions. 8 Chapter 2 Backing up your information With this tool, you can schedule backups at specific intervals (daily, weekly, or monthly) or at specific events, such as at system restart or when you dock to schedule backups for the entire system, for recovery points, or for specific files and folders. Select Start > All Programs > HP Backup & Recovery > HP Backup Scheduler. 2. Scheduling backups Use HP Backup Scheduler to an optional docking station (select models only).
To schedule backups: 1. Follow the on-screen instructions. 8 Chapter 2 Backing up your information With this tool, you can schedule backups at specific intervals (daily, weekly, or monthly) or at specific events, such as at system restart or when you dock to schedule backups for the entire system, for recovery points, or for specific files and folders. Select Start > All Programs > HP Backup & Recovery > HP Backup Scheduler. 2. Scheduling backups Use HP Backup Scheduler to an optional docking station (select models only).

Backup and Recovery - Windows Vista
Page 16
Back up all personal files. 2. Follow the on-screen instructions. 10 Chapter 3 Performing a recovery Insert the first recovery disc into the optical drive and restart the computer. 3. Performing a recovery from the recovery discs To perform a recovery from the recovery discs, follow these steps: 1.
Back up all personal files. 2. Follow the on-screen instructions. 10 Chapter 3 Performing a recovery Insert the first recovery disc into the optical drive and restart the computer. 3. Performing a recovery from the recovery discs To perform a recovery from the recovery discs, follow these steps: 1.

Backup and Recovery - Windows Vista
Page 18
Select Start > All Programs > HP Backup & Recovery > HP Backup and Recovery Manager. 3. Back up all personal files. 2. Click Recover important files or the entire system, and then click Next. 5. Click Next. 4. Follow the on-screen instructions. 12 Chapter 3 Performing a recovery Initiating a recovery in Windows To initiate a recovery in Windows, follow these steps: 1.
Select Start > All Programs > HP Backup & Recovery > HP Backup and Recovery Manager. 3. Back up all personal files. 2. Click Recover important files or the entire system, and then click Next. 5. Click Next. 4. Follow the on-screen instructions. 12 Chapter 3 Performing a recovery Initiating a recovery in Windows To initiate a recovery in Windows, follow these steps: 1.

Backup and Recovery - Windows Vista
Page 19
Restart the computer, and then press f8 before the Windows operating system loads. 3. Click a recovery option, and then click Next. 4. Follow the on-screen instructions. Initiating a recovery from the hard drive recovery partition To initiate a recovery from the hard drive 13 Performing a recovery from the hard drive recovery partition, follow these steps: 1. Back up all personal files. 2.
Restart the computer, and then press f8 before the Windows operating system loads. 3. Click a recovery option, and then click Next. 4. Follow the on-screen instructions. Initiating a recovery from the hard drive recovery partition To initiate a recovery from the hard drive 13 Performing a recovery from the hard drive recovery partition, follow these steps: 1. Back up all personal files. 2.

HP ProtectTools - Windows Vista and Windows XP
Page 11
... Credential Manager on to configure their security logon methods. For more powerful features, click the module icon. Accessing HP ProtectTools Security 5 NOTE: After you have configured the Credential Manager module, you can also open HP ProtectTools by logging on to set up more information, refer to "Logging on page 16." NOTE: To...
... Credential Manager on to configure their security logon methods. For more powerful features, click the module icon. Accessing HP ProtectTools Security 5 NOTE: After you have configured the Credential Manager module, you can also open HP ProtectTools by logging on to set up more information, refer to "Logging on page 16." NOTE: To...
HP ProtectTools - Windows Vista and Windows XP
Page 18
...Logon Wizard, use the following ways: ● From the Windows logon screen ● From the notification area, by double-clicking the HP ProtectTools Security Manager icon ● From the "Credential Manager" page of HP ProtectTools Security Manager, by clicking the Log On link in any of ...the following steps: 1. Registering fingerprints A fingerprint reader allows you can use these methods to log on to register your fingerprint for HP ProtectTools Registering credentials You can use the "My Identity" page to Credential Manager. After they have been registered, you to log on...
...Logon Wizard, use the following ways: ● From the Windows logon screen ● From the notification area, by double-clicking the HP ProtectTools Security Manager icon ● From the "Credential Manager" page of HP ProtectTools Security Manager, by clicking the Log On link in any of ...the following steps: 1. Registering fingerprints A fingerprint reader allows you can use these methods to log on to register your fingerprint for HP ProtectTools Registering credentials You can use the "My Identity" page to Credential Manager. After they have been registered, you to log on...


