Software Update - Windows XP
Page 8
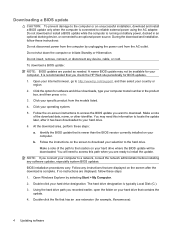
... to the location on -screen instructions to access the BIOS update you are displayed on the screen after it has been downloaded to your specific product from the AC outlet. Follow any instructions that has an .exe extension (for software and driver downloads, type your computer. The... to a network, consult the network administrator before installing any device, cable, or cord. b. Identify the BIOS update that you check the HP Web site periodically for your computer model number in an optional docking device, or connected to an optional power source. Using the hard drive ...
... to the location on -screen instructions to access the BIOS update you are displayed on the screen after it has been downloaded to your specific product from the AC outlet. Follow any instructions that has an .exe extension (for software and driver downloads, type your computer. The... to a network, consult the network administrator before installing any device, cable, or cord. b. Identify the BIOS update that you check the HP Web site periodically for your computer model number in an optional docking device, or connected to an optional power source. Using the hard drive ...
Software Update - Windows XP
Page 10
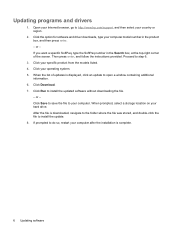
... to install the update. 8. After the file is displayed, click an update to step 6. 3. Updating programs and drivers 1. If you want a specific SoftPaq, type the SoftPaq number in the product box, and then press enter. - If prompted to do so, restart your operating system. 5. Open... country or region. 2. Proceed to open a window containing additional information. 6. Click Download. 7. Click Save to save the file to http://www.hp.com/support, and then select your computer. Click the option for software and driver downloads, type your hard drive. or - When prompted, select ...
... to install the update. 8. After the file is displayed, click an update to step 6. 3. Updating programs and drivers 1. If you want a specific SoftPaq, type the SoftPaq number in the product box, and then press enter. - If prompted to do so, restart your operating system. 5. Open... country or region. 2. Proceed to open a window containing additional information. 6. Click Download. 7. Click Save to save the file to http://www.hp.com/support, and then select your computer. Click the option for software and driver downloads, type your hard drive. or - When prompted, select ...
Backup and Recovery - Windows Vista
Page 5
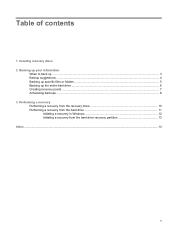
Table of contents 1 Creating recovery discs 2 Backing up your information When to back up ...3 Backup suggestions ...4 Backing up specific files or folders ...5 Backing up the entire hard drive ...6 Creating recovery points ...7 Scheduling backups ...8 3 Performing a recovery Performing a recovery from the recovery discs 10 Performing a recovery from the hard drive 11 Initiating a recovery in Windows 12 Initiating a recovery from the hard drive recovery partition 13 Index ...14 v
Table of contents 1 Creating recovery discs 2 Backing up your information When to back up ...3 Backup suggestions ...4 Backing up specific files or folders ...5 Backing up the entire hard drive ...6 Creating recovery points ...7 Scheduling backups ...8 3 Performing a recovery Performing a recovery from the recovery discs 10 Performing a recovery from the hard drive 11 Initiating a recovery in Windows 12 Initiating a recovery from the hard drive recovery partition 13 Index ...14 v
Backup and Recovery - Windows Vista
Page 8
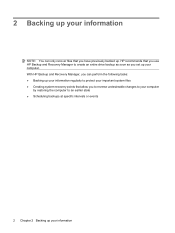
With HP Backup and Recovery Manager, you can only recover files that allow you to reverse undesireable changes to your computer by restoring the computer to an earlier state ● Scheduling backups at specific intervals or events 2 Chapter 2 Backing up your... information 2 Backing up your information NOTE: You can perform the following tasks: ● Backing up your information regularly to protect your important system files ● Creating system recovery points that you have previously backed up. HP recommends that you use HP...
With HP Backup and Recovery Manager, you can only recover files that allow you to reverse undesireable changes to your computer by restoring the computer to an earlier state ● Scheduling backups at specific intervals or events 2 Chapter 2 Backing up your... information 2 Backing up your information NOTE: You can perform the following tasks: ● Backing up your information regularly to protect your important system files ● Creating system recovery points that you have previously backed up. HP recommends that you use HP...
Backup and Recovery - Windows Vista
Page 11
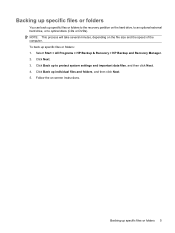
...Next. 3. Follow the on the file size and the speed of the computer. Click Back up specific files or folders 5 Backing up to optical discs (CDs or DVDs). Click Back up specific files or folders to the recovery partition on the hard drive, to an optional external hard drive,... or to protect system settings and important data files, and then click Next. 4. Select Start > All Programs > HP Backup & Recovery > HP Backup and Recovery Manager. 2. Backing up specific files or folders You can back up individual files and folders, and then click Next. 5. To back up...
...Next. 3. Follow the on the file size and the speed of the computer. Click Back up specific files or folders 5 Backing up to optical discs (CDs or DVDs). Click Back up specific files or folders to the recovery partition on the hard drive, to an optional external hard drive,... or to protect system settings and important data files, and then click Next. 4. Select Start > All Programs > HP Backup & Recovery > HP Backup and Recovery Manager. 2. Backing up specific files or folders You can back up individual files and folders, and then click Next. 5. To back up...

Backup and Recovery - Windows Vista
Page 13
..., a snapshot of your hard drive at the following times: ● Before you are creating system recovery points. HP recommends that you create recovery points at a specific point in time. Click Back up modifications since your last backup, you add or extensively modify software or hardware ...to an earlier recovery point does not affect data files or e-mails created since that recovery point. Select Start > All Programs > HP Backup & Recovery > HP Backup and Recovery Manager. 2. This allows you to protect system settings and important data files, and then click Next. 4. Creating ...
..., a snapshot of your hard drive at the following times: ● Before you are creating system recovery points. HP recommends that you create recovery points at a specific point in time. Click Back up modifications since your last backup, you add or extensively modify software or hardware ...to an earlier recovery point does not affect data files or e-mails created since that recovery point. Select Start > All Programs > HP Backup & Recovery > HP Backup and Recovery Manager. 2. This allows you to protect system settings and important data files, and then click Next. 4. Creating ...

Backup and Recovery - Windows Vista
Page 14
With this tool, you can schedule backups at specific intervals (daily, weekly, or monthly) or at specific events, such as at system restart or when you dock to schedule backups for the entire system, for recovery points, or for specific files and folders. Select Start > All Programs > HP Backup & Recovery > HP Backup Scheduler. 2. Follow the on-screen instructions. 8 Chapter 2 Backing up your information To schedule backups: 1. Scheduling backups Use HP Backup Scheduler to an optional docking station (select models only).
With this tool, you can schedule backups at specific intervals (daily, weekly, or monthly) or at specific events, such as at system restart or when you dock to schedule backups for the entire system, for recovery points, or for specific files and folders. Select Start > All Programs > HP Backup & Recovery > HP Backup Scheduler. 2. Follow the on-screen instructions. 8 Chapter 2 Backing up your information To schedule backups: 1. Scheduling backups Use HP Backup Scheduler to an optional docking station (select models only).
HP ProtectTools - Windows Vista and Windows XP
Page 6
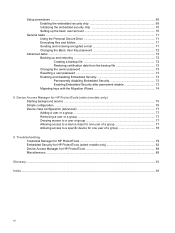
... Embedded Security 73 Enabling Embedded Security after permanent disable 73 Migrating keys with the Migration Wizard 74 8 Device Access Manager for HP ProtectTools (select models only) Starting background service ...75 Simple configuration ...76 Device class configuration (advanced 77 Adding a user or... of a group 77 Allowing access to a specific device for one user of a group 78 9 Troubleshooting Credential Manager for HP ProtectTools 79 Embedded Security for HP ProtectTools (select models only 82 Device Access Manager for HP ProtectTools 88 Miscellaneous ...89 Glossary ...92 Index ...
... Embedded Security 73 Enabling Embedded Security after permanent disable 73 Migrating keys with the Migration Wizard 74 8 Device Access Manager for HP ProtectTools (select models only) Starting background service ...75 Simple configuration ...76 Device class configuration (advanced 77 Adding a user or... of a group 77 Allowing access to a specific device for one user of a group 78 9 Troubleshooting Credential Manager for HP ProtectTools 79 Embedded Security for HP ProtectTools (select models only 82 Device Access Manager for HP ProtectTools 88 Miscellaneous ...89 Glossary ...92 Index ...

HP ProtectTools - Windows Vista and Windows XP
Page 9
... unauthorized access to writeable devices for specific individuals or groups of a personal secure drive (PSD), which is useful in protecting user file and folder information. ● Embedded Security supports third-party applications (such as Microsoft Outlook and Internet Explorer) for HP ProtectTools (select ● Device Access... system from external media. ● The administrator can disable access to sensitive user data or credentials stored locally on a PC. ● Embedded Security allows creation of users. Device Access Manager for protected digital certificate operations.
... unauthorized access to writeable devices for specific individuals or groups of a personal secure drive (PSD), which is useful in protecting user file and folder information. ● Embedded Security supports third-party applications (such as Microsoft Outlook and Internet Explorer) for HP ProtectTools (select ● Device Access... system from external media. ● The administrator can disable access to sensitive user data or credentials stored locally on a PC. ● Embedded Security allows creation of users. Device Access Manager for protected digital certificate operations.
HP ProtectTools - Windows Vista and Windows XP
Page 16
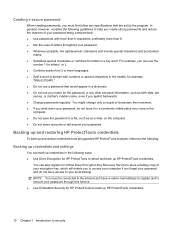
... commonly visible place very close to the computer. ● Do not save the password in the following guidelines to security Backing up and restoring HP ProtectTools credentials To back up and restore credentials from 2 or more languages. ● Split a word or phrase with more than 6 characters,... preferably more than 8. ● Mix the case of letters throughout your name for the password, or any specifications that increment. ● If you write down your password, do not have a valid e-mail address to register and to recover your password ...
... commonly visible place very close to the computer. ● Do not save the password in the following guidelines to security Backing up and restoring HP ProtectTools credentials To back up and restore credentials from 2 or more languages. ● Split a word or phrase with more than 6 characters,... preferably more than 8. ● Mix the case of letters throughout your name for the password, or any specifications that increment. ● If you write down your password, do not have a valid e-mail address to register and to recover your password ...
HP ProtectTools - Windows Vista and Windows XP
Page 47
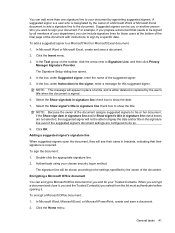
... the date and/or title in place of a title, and is either deleted or replaced by the user's title when the document is designated by a specific date. For example, if you or another person who is signed. 6. In Microsoft Word or Microsoft Excel, create and save a document. 2. To sign the document...
... the date and/or title in place of a title, and is either deleted or replaced by the user's title when the document is designated by a specific date. For example, if you or another person who is signed. 6. In Microsoft Word or Microsoft Excel, create and save a document. 2. To sign the document...
HP ProtectTools - Windows Vista and Windows XP
Page 51
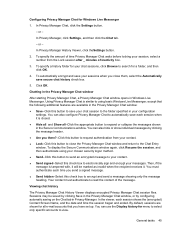
... tab. - To specify the amount of time Privacy Manager Chat waits before locking your chat sessions, click Browse to search for menu to select only specific accounts to view. Your contact must authenticate each session shows the (encrypted) Contact Screen Name, and the date and time the session began and ended...
... tab. - To specify the amount of time Privacy Manager Chat waits before locking your chat sessions, click Browse to search for menu to select only specific accounts to view. Your contact must authenticate each session shows the (encrypted) Contact Screen Name, and the date and time the session began and ended...
HP ProtectTools - Windows Vista and Windows XP
Page 52
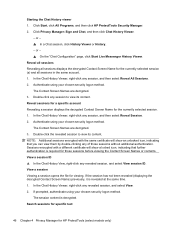
... Sessions. 2. If prompted, authenticate using your chosen security logon method. Search sessions for specific text 46 Chapter 4 Privacy Manager for the currently selected session. 1. Reveal sessions for a specific account Revealing a session displays the decrypted Contact Screen Name for HP ProtectTools (select models only) In the Chat History Viewer, right-click any session, and...
... Sessions. 2. If prompted, authenticate using your chosen security logon method. Search sessions for specific text 46 Chapter 4 Privacy Manager for the currently selected session. 1. Reveal sessions for a specific account Revealing a session displays the decrypted Contact Screen Name for HP ProtectTools (select models only) In the Chat History Viewer, right-click any session, and...

HP ProtectTools - Windows Vista and Windows XP
Page 53
... viewer window. You can remove columns from the display. Delete a session 1. Right-click on any desired search parameters, and then click OK. Displaying sessions for a specific account ▲ In the Chat History Viewer, select an account from the display: 1. Select the Display only sessions within specified date range check box. 3. Click...
... viewer window. You can remove columns from the display. Delete a session 1. Right-click on any desired search parameters, and then click OK. Displaying sessions for a specific account ▲ In the Chat History Viewer, select an account from the display: 1. Select the Display only sessions within specified date range check box. 3. Click...
HP ProtectTools - Windows Vista and Windows XP
Page 58
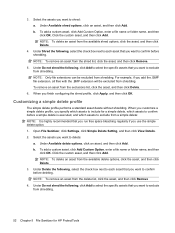
...options, click the asset, and then click Delete. 3. Under Do not shred the following , click Add to select the specific assets that you specify which assets to include for HP ProtectTools Under Available delete options, click an asset, and then click Add. To add a custom asset, click Add Custom... from the available shred options, click the asset, and then click Delete. 4. Under Do not shred the following , click Add to select the specific assets that you want to exclude from shredding. 3. NOTE: To remove an asset from the exclusions list, click the asset, and then click Delete...
...options, click the asset, and then click Delete. 3. Under Do not shred the following , click Add to select the specific assets that you specify which assets to include for HP ProtectTools Under Available delete options, click an asset, and then click Add. To add a custom asset, click Add Custom... from the available shred options, click the asset, and then click Delete. 4. Under Do not shred the following , click Add to select the specific assets that you want to exclude from shredding. 3. NOTE: To remove an asset from the exclusions list, click the asset, and then click Delete...

HP ProtectTools - Windows Vista and Windows XP
Page 60
...following , select the check box next to exclude from shredding. 54 Chapter 5 File Sanitizer for shredding, which assets to include for HP ProtectTools You can click the View Details button to view the list of time; Specify the number of shred cycles, which assets ... File Sanitizer, and click Settings, click Advanced Security Settings, and then click View Details. 2. Under Shred the following , click Add to select the specific assets that you choose the higher security shred cycles, shredding may take a significant length of assets that obscures the data is . 3. b. To add...
...following , select the check box next to exclude from shredding. 54 Chapter 5 File Sanitizer for shredding, which assets to include for HP ProtectTools You can click the View Details button to view the list of time; Specify the number of shred cycles, which assets ... File Sanitizer, and click Settings, click Advanced Security Settings, and then click View Details. 2. Under Shred the following , click Add to select the specific assets that you choose the higher security shred cycles, shredding may take a significant length of assets that obscures the data is . 3. b. To add...

HP ProtectTools - Windows Vista and Windows XP
Page 61
... you finish configuring the simple delete profile, click Apply, and then click OK. Setup procedures 55 Under Delete the following , click Add to select the specific assets that you want to exclude from a simple delete: NOTE: It is highly recommended that you want to delete: ● Under Available delete options, click...
... you finish configuring the simple delete profile, click Apply, and then click OK. Setup procedures 55 Under Delete the following , click Add to select the specific assets that you want to exclude from a simple delete: NOTE: It is highly recommended that you want to delete: ● Under Available delete options, click...
HP ProtectTools - Windows Vista and Windows XP
Page 67
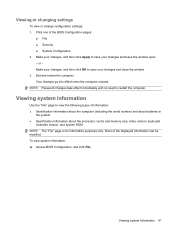
... window open. - keyboard controller version; None of information: ● Identification information about the computer (including the serial number) and about batteries in the system ● Specification information about the processor; Viewing system information Use the "File" page to restart the computer. cache and memory size; To view system information: ▲ Access...
... window open. - keyboard controller version; None of information: ● Identification information about the computer (including the serial number) and about batteries in the system ● Specification information about the processor; Viewing system information Use the "File" page to restart the computer. cache and memory size; To view system information: ▲ Access...

HP ProtectTools - Windows Vista and Windows XP
Page 83
... 6. Click Deny next to the user or group to remove, and then click Remove. 5. Click Start, click All Programs, and then click HP ProtectTools Security Manager. 2. Device class configuration (advanced) 77 Device class configuration (advanced) More selections are available to allow one user but not the ...to a device class while denying access to all other members of a group You can allow specific users or groups of users to be denied access. 5. Click Start, click All Programs, and then click HP ProtectTools Security Manager. 2. Allowing access to a user or group 1. Denying access to a ...
... 6. Click Deny next to the user or group to remove, and then click Remove. 5. Click Start, click All Programs, and then click HP ProtectTools Security Manager. 2. Device class configuration (advanced) 77 Device class configuration (advanced) More selections are available to allow one user but not the ...to a device class while denying access to all other members of a group You can allow specific users or groups of users to be denied access. 5. Click Start, click All Programs, and then click HP ProtectTools Security Manager. 2. Allowing access to a user or group 1. Denying access to a ...

HP ProtectTools - Windows Vista and Windows XP
Page 84
...denied access. 5. Click a user to be allowed access, and then click OK. 10. Click Deny next to the group to be allowed for HP ProtectTools (select models only) Navigate to be denied access. 6. In the left pane, click Device Access Manager, and then click Device Class Configuration.... 3. Click Deny next to the group to be denied access. 5. Navigate to the specific device to the folder below that. 4. Click Allow to add. 9. 4. Click Apply, and then click OK. The Select Users or Groups dialog box...
...denied access. 5. Click a user to be allowed access, and then click OK. 10. Click Deny next to the group to be allowed for HP ProtectTools (select models only) Navigate to be denied access. 6. In the left pane, click Device Access Manager, and then click Device Class Configuration.... 3. Click Deny next to the group to be denied access. 5. Navigate to the specific device to the folder below that. 4. Click Allow to add. 9. 4. Click Apply, and then click OK. The Select Users or Groups dialog box...


