HP 5100tn Printer Maintenance Kit - LaserJet B W Laser
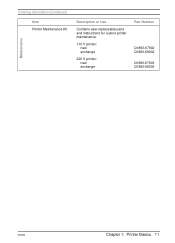
HP 5100tn Printer Maintenance Kit
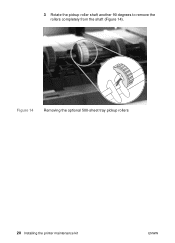
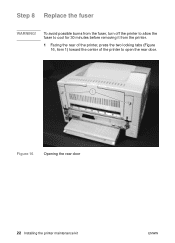
Related Manual Pages


Similar Questions

How To Clear 79.00 Fe Printer Error On Hp 5100
How To Clear 79.00 Fe Printer Error On Hp 5100
How To Clear 79.00 Fe Printer Error On Hp 5100
(Posted by easyprinter97 1 year ago)


How To Change Hp P2055 Printer Maintenance Kit
(Posted by srKi 10 years ago)

How Many Copies Can I Print With One Printer Maintenance Kit
(Posted by Anonymous-68404 11 years ago)

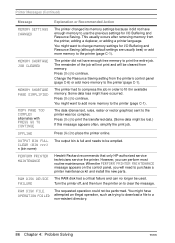
59.0 Printer Error
when the printer is not printing but giving you the error code 59.0 printer error
when the printer is not printing but giving you the error code 59.0 printer error
(Posted by billlaryea 12 years ago)