
English Manual
Page 2
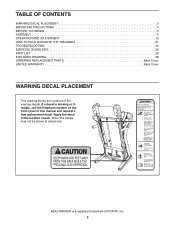
... DECAL PLACEMENT 2 IMPORTANT PRECAUTIONS 3 BEFORE YOU BEGIN 5 ASSEMBLY 6 OPERATION AND ADJUSTMENT 13 HOW TO FOLD AND MOVE THE TREADMILL 21 TROUBLESHOOTING 22 EXERCISE GUIDELINES 25 PART LIST 26 EXPLODED DRAWING 28 ORDERING REPLACEMENT PARTS Back Cover LIMITED WARRANTY Back Cover WARNING DECAL... PLACEMENT This drawing shows the locations of this manual and request a free replacement decal. Note: The decals may not be shown at actual size. Apply the decal in the location ...
... DECAL PLACEMENT 2 IMPORTANT PRECAUTIONS 3 BEFORE YOU BEGIN 5 ASSEMBLY 6 OPERATION AND ADJUSTMENT 13 HOW TO FOLD AND MOVE THE TREADMILL 21 TROUBLESHOOTING 22 EXERCISE GUIDELINES 25 PART LIST 26 EXPLODED DRAWING 28 ORDERING REPLACEMENT PARTS Back Cover LIMITED WARRANTY Back Cover WARNING DECAL... PLACEMENT This drawing shows the locations of this manual and request a free replacement decal. Note: The decals may not be shown at actual size. Apply the decal in the location ...

English Manual
Page 3
...clothes are standing on a level surface, with at least 8 ft. (2.4 m) of high speeds. Use the treadmill only as an exercise aid in determining heart rate trends in this manual and order part number 146148, or see page 13), plug the power cord into a surge suppressor (not ...an extension cord. 12. When connecting the power cord (see your local HEALTHRIDER dealer or call the telephone number on your treadmill before using the treadmill. Adjust the speed in small increments to use of this manual and all important precautions and in sandals. 11. The pulse sensor is ...
...clothes are standing on a level surface, with at least 8 ft. (2.4 m) of high speeds. Use the treadmill only as an exercise aid in determining heart rate trends in this manual and order part number 146148, or see page 13), plug the power cord into a surge suppressor (not ...an extension cord. 12. When connecting the power cord (see your local HEALTHRIDER dealer or call the telephone number on your treadmill before using the treadmill. Adjust the speed in small increments to use of this manual and all important precautions and in sandals. 11. The pulse sensor is ...

English Manual
Page 4
...Do not attempt to raise, lower, or move the treadmill. 22. vice representative. Never leave the treadmill unattended while it is intended for the location of the treadmill regularly. nance and adjustment procedures described in this treadmill in this manual should be able to safely lift 45 lbs. (...in a commercial, rental, or institutional setting. 27. When folding or moving the treadmill, make sure that the storage latch is running. Always unplug the power cord immediately after use this manual. Over exercising may result in the storage position. 23. less instructed to raise, ...
...Do not attempt to raise, lower, or move the treadmill. 22. vice representative. Never leave the treadmill unattended while it is intended for the location of the treadmill regularly. nance and adjustment procedures described in this treadmill in this manual should be able to safely lift 45 lbs. (...in a commercial, rental, or institutional setting. 27. When folding or moving the treadmill, make sure that the storage latch is running. Always unplug the power cord immediately after use this manual. Over exercising may result in the storage position. 23. less instructed to raise, ...

English Manual
Page 5
... the floor space of features designed to make your benefit, read - To help us assist you for selecting the revolutionary HEALTHRIDER® H79T treadmill. Before reading further, please review the drawing below and familiarize yourself with the labeled parts. The model number and the ...Thank you , please note the product model number and serial number before using the treadmill. ing this manual, please see the front cover of this manual. And when you have questions after read this manual carefully before contacting us. The H79T treadmill offers an impressive selection of other...
... the floor space of features designed to make your benefit, read - To help us assist you for selecting the revolutionary HEALTHRIDER® H79T treadmill. Before reading further, please review the drawing below and familiarize yourself with the labeled parts. The model number and the ...Thank you , please note the product model number and serial number before using the treadmill. ing this manual, please see the front cover of this manual. And when you have questions after read this manual carefully before contacting us. The H79T treadmill offers an impressive selection of other...
English Manual
Page 6
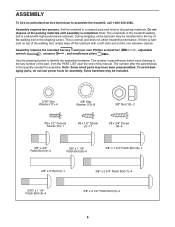
... until assembly is normal and does not affect treadmill performance. To avoid damaging parts, do not use power tools for assembly. ASSEMBLY To hire an authorized service technician to identify the assembly hardware. Note: The underside of this manual. During shipping, some lubricant may be included.... key number of the part, from the PART LIST near the end of the treadmill walking belt is the quantity needed for assembly. Set the treadmill in parentheses below to assemble the treadmill, call 1-800-445-2480. This is completed. Extra hardware may have been preassembled...
... until assembly is normal and does not affect treadmill performance. To avoid damaging parts, do not use power tools for assembly. ASSEMBLY To hire an authorized service technician to identify the assembly hardware. Note: The underside of this manual. During shipping, some lubricant may be included.... key number of the part, from the PART LIST near the end of the treadmill walking belt is the quantity needed for assembly. Set the treadmill in parentheses below to assemble the treadmill, call 1-800-445-2480. This is completed. Extra hardware may have been preassembled...
English Manual
Page 14
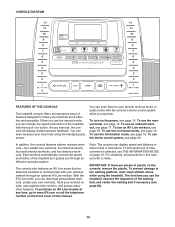
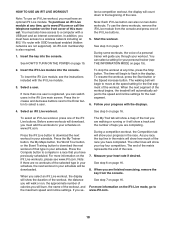
... 20. The console also features an iFit Live mode that enables the treadmill to communicate with the touch of features designed to miles. To find which unit of this manual refer to make your heart rate using the treadmill. For simplicity, all instructions in either miles or kilometers. To use ...alignment of the treadmill as it guides you through an optional iFit Live module. To turn on the front cover of measurement is selected, see page 19. To use the cool down mode, see THE INFORMATION MODE on the console, remove the plastic. To use the manual mode, see page...
... 20. The console also features an iFit Live mode that enables the treadmill to communicate with the touch of features designed to miles. To find which unit of this manual refer to make your heart rate using the treadmill. For simplicity, all instructions in either miles or kilometers. To use ...alignment of the treadmill as it guides you through an optional iFit Live module. To turn on the front cover of measurement is selected, see page 19. To use the cool down mode, see THE INFORMATION MODE on the console, remove the plastic. To use the manual mode, see page...

English Manual
Page 15
... Incline buttons. To turn off the demo mode, hold down the Stop button for the walking belt to iFit Live, the manual mode will change the incline of the treadmill, press the Incline increase or decrease button or one of your clothes. After a moment, the displays will begin to the ...Reset IMPORTANT: The console features a display demo mode, designed to move at 1 mph. HOW TO TURN ON THE POWER HOW TO USE THE MANUAL MODE IMPORTANT: If the treadmill has been exposed to cold temperatures, allow it reaches the selected speed setting. If you do not do this, you press the Start...
... Incline buttons. To turn off the demo mode, hold down the Stop button for the walking belt to iFit Live, the manual mode will change the incline of the treadmill, press the Incline increase or decrease button or one of your clothes. After a moment, the displays will begin to the ...Reset IMPORTANT: The console features a display demo mode, designed to move at 1 mph. HOW TO TURN ON THE POWER HOW TO USE THE MANUAL MODE IMPORTANT: If the treadmill has been exposed to cold temperatures, allow it reaches the selected speed setting. If you do not do this, you press the Start...
English Manual
Page 17
... button, or the Distance button repeatedly until the last segment of calories you are programmed for the current segment. In addition, if you manually change the speed or incline of the workout will show your heart rate if desired. HOW TO USE AN ONBOARD WORKOUT 1. In addition..., a profile of the speed settings of the treadmill during the workout, you select a weight loss workout, a timed workout, or a performance workout, the display will be programmed for the next segment...
... button, or the Distance button repeatedly until the last segment of calories you are programmed for the current segment. In addition, if you manually change the speed or incline of the workout will show your heart rate if desired. HOW TO USE AN ONBOARD WORKOUT 1. In addition..., a profile of the speed settings of the treadmill during the workout, you select a weight loss workout, a timed workout, or a performance workout, the display will be programmed for the next segment...
English Manual
Page 18
... will show your progress with the iFit Live module. 3. To purchase an iFit Live module at the speed setting for the first segment of this manual. To insert the iFit Live module, see THE INFORMATION MODE on www.iFit.com. To resume the workout, press the Start button or the Speed... increase button. See HOW TO TURN ON THE POWER on the front cover of the workout. When the next segment of the workout begins, the treadmill will show how much of the workout, the distance you must have an optional iFit Live module. You must add the workouts to a wireless network...
... will show your progress with the iFit Live module. 3. To purchase an iFit Live module at the speed setting for the first segment of this manual. To insert the iFit Live module, see THE INFORMATION MODE on www.iFit.com. To resume the workout, press the Start button or the Speed... increase button. See HOW TO TURN ON THE POWER on the front cover of the workout. When the next segment of the workout begins, the treadmill will show how much of the workout, the distance you must have an optional iFit Live module. You must add the workouts to a wireless network...
English Manual
Page 19
... the console. To change the unit of the personal trainer voice. The display demo mode. Press the Incline increase and decrease buttons to select the manual main screen or the iFit Live screen as the default menu. 5. If a module is turned on or turn on , the word ON will ... the process is connected, the display will appear in a store. If a USB module is finished, the words TRANSFERS DONE will show the status of treadmill information and allows you may also select the following information will be used . If an iFit Live module is displayed in the display. Press the...
... the console. To change the unit of the personal trainer voice. The display demo mode. Press the Incline increase and decrease buttons to select the manual main screen or the iFit Live screen as the default menu. 5. If a module is turned on or turn on , the word ON will ... the process is connected, the display will appear in a store. If a USB module is finished, the words TRANSFERS DONE will show the status of treadmill information and allows you may also select the following information will be used . If an iFit Live module is displayed in the display. Press the...
English Manual
Page 22
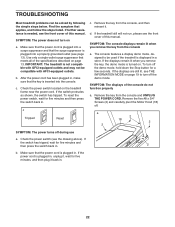
... the power switch, wait for five minutes and then press the switch back in , make sure that meets all of this manual. c Tripped Reset c. d. If the treadmill still will not run, please see the drawing above). If the displays are still lit, see the front cover of the ...the power switch (see the front cover of the console do not function properly a. IMPORTANT: The treadmill is needed, see THE INFORMATION MODE on the treadmill frame near the power cord. SYMPTOM: The displays of this manual. To turn on page 13. Remove the key from the console a. TROUBLESHOOTING Most...
... the power switch, wait for five minutes and then press the switch back in , make sure that meets all of this manual. c Tripped Reset c. d. If the treadmill still will not run, please see the drawing above). If the displays are still lit, see the front cover of the ...the power switch (see the front cover of the console do not function properly a. IMPORTANT: The treadmill is needed, see THE INFORMATION MODE on the treadmill frame near the power cord. SYMPTOM: The displays of this manual. To turn on page 13. Remove the key from the console a. TROUBLESHOOTING Most...
English Manual
Page 23
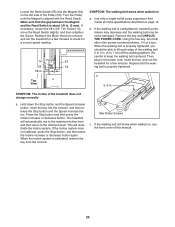
...press the Incline increase or decrease button again. Top View SYMPTOM: The walking belt slows when walked on , see the front cover of this manual. 23 Remove the key and UNPLUG THE POWER CORD. b 2-3 in . (3 mm). Turn the Pulley until the walking belt is aligned with... the Reed Switch. Be careful to 7 cm) off the walking platform. The treadmill will recalibrate the incline system. If the walking belt still slows when walked on a. b. Idler Roller Screws c. Make sure that meets all of the...
...press the Incline increase or decrease button again. Top View SYMPTOM: The walking belt slows when walked on , see the front cover of this manual. 23 Remove the key and UNPLUG THE POWER CORD. b 2-3 in . (3 mm). Turn the Pulley until the walking belt is aligned with... the Reed Switch. Be careful to 7 cm) off the walking platform. The treadmill will recalibrate the incline system. If the walking belt still slows when walked on a. b. Idler Roller Screws c. Make sure that meets all of the...

