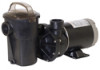
Models: SP1575LXTL SP1580TL and SP1580X15TL
Page 4
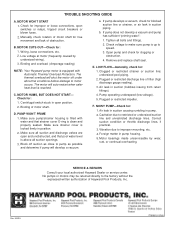
... firmly in suction (bubbles issuing from return fittings). 4. SERVICE & REPAIRS Consult your local authorized Hayward dealer or service center. Wiring, loose connections, etc. 2. Binding and overload. (Amperage reading) NOTE: Your Hayward pump motor is equipped with water and that pool water level is... filled with Automatic Thermal Overload Protection. Make sure pump/strainer housing is above all suction and discharge valves are free from freezing. b. Tighten all electric power. Remove and ...
... firmly in suction (bubbles issuing from return fittings). 4. SERVICE & REPAIRS Consult your local authorized Hayward dealer or service center. Wiring, loose connections, etc. 2. Binding and overload. (Amperage reading) NOTE: Your Hayward pump motor is equipped with water and that pool water level is... filled with Automatic Thermal Overload Protection. Make sure pump/strainer housing is above all suction and discharge valves are free from freezing. b. Tighten all electric power. Remove and ...
SP1575X15
Page 4
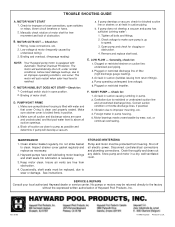
...and check for : 1. Air leak in suction causing rumbling in suction (bubbles issuing from return fittings). 4. SERVICE & REPAIRS Consult your local authorized Hayward Dealer or service center. MOTOR CUTS OUT-Check for clogging or obstruction. 4. The thermal overload will shut the motor off ...pool piping. 2. Correct suction condition or throttle discharge lines, if practical. 3. MOTOR WON'T START 1. Check for free movement and lack of Hayward Pool Products, Inc. a. Tighten all suction openings. 3. E. Plugged or restricted impeller. No pumps or motors may be returned directly to ...
...and check for : 1. Air leak in suction causing rumbling in suction (bubbles issuing from return fittings). 4. SERVICE & REPAIRS Consult your local authorized Hayward Dealer or service center. MOTOR CUTS OUT-Check for clogging or obstruction. 4. The thermal overload will shut the motor off ...pool piping. 2. Correct suction condition or throttle discharge lines, if practical. 3. MOTOR WON'T START 1. Check for free movement and lack of Hayward Pool Products, Inc. a. Tighten all suction openings. 3. E. Plugged or restricted impeller. No pumps or motors may be returned directly to ...
Owners Manual
Page 5
... motor is less than 90% or more than 110% of GFCI required and test procedures for GFCI, see manufacturer's instructions. USE ONLY HAYWARD GENUINE REPLACEMENT PARTS 5 For better efficiency, use conduit when wiring motor, be performed by code. Failure to motor before connecting to local... all electrical equipment, metal piping or conduit within 5 ft. (1.5 m) of inside walls of a power outage, check GFCI for the H.P. (KW) rating and distance from external bonding lug to inspect and repair electrical system. In case of swimming pool, spa, or hot tub. Reset if necessary. NOTE:...
... motor is less than 90% or more than 110% of GFCI required and test procedures for GFCI, see manufacturer's instructions. USE ONLY HAYWARD GENUINE REPLACEMENT PARTS 5 For better efficiency, use conduit when wiring motor, be performed by code. Failure to motor before connecting to local... all electrical equipment, metal piping or conduit within 5 ft. (1.5 m) of inside walls of a power outage, check GFCI for the H.P. (KW) rating and distance from external bonding lug to inspect and repair electrical system. In case of swimming pool, spa, or hot tub. Reset if necessary. NOTE:...
Owners Manual
Page 7
...ring and replace on strainer 'C' clip and remove. Install strainer 'C' clip by disengaging and removing the strainer cover. Open all electrical power service to base. 4. B. Carefully insert the motor shaft through bolts removed in step #3. Be sure motor base and pump discharge ... the "motor" side. 9. Insert basket and fasten strainer cover. 16. USE ONLY HAYWARD GENUINE REPLACEMENT PARTS 7 Inspect all intake and output fittings and piping. 5. Have a qualified serviceman repair/replace wiring as these can contribute to proper water level. 6. Exercise extreme care in ...
...ring and replace on strainer 'C' clip and remove. Install strainer 'C' clip by disengaging and removing the strainer cover. Open all electrical power service to base. 4. B. Carefully insert the motor shaft through bolts removed in step #3. Be sure motor base and pump discharge ... the "motor" side. 9. Insert basket and fasten strainer cover. 16. USE ONLY HAYWARD GENUINE REPLACEMENT PARTS 7 Inspect all intake and output fittings and piping. 5. Have a qualified serviceman repair/replace wiring as these can contribute to proper water level. 6. Exercise extreme care in ...
Owners Manual
Page 11
... components manufactured by the respective manufacturer will be responsible for cartage, removal, repair or installation labor or any other such costs incurred in obtaining warranty replacements or repair. Hayward shall not be the sole determination of the purchase date. USE ONLY HAYWARD GENUINE REPLACEMENT PARTS 11 For such products, the warranty established by others...
... components manufactured by the respective manufacturer will be responsible for cartage, removal, repair or installation labor or any other such costs incurred in obtaining warranty replacements or repair. Hayward shall not be the sole determination of the purchase date. USE ONLY HAYWARD GENUINE REPLACEMENT PARTS 11 For such products, the warranty established by others...


