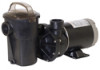
Models: SP1575LXTL SP1580TL and SP1580X15TL
Page 1
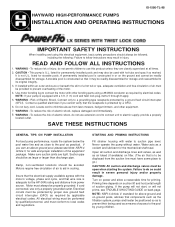
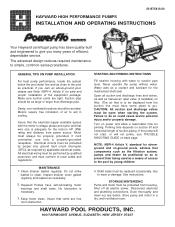
... WARNING - Motors require free circulation of the motor. 4. Motor must always be avoided. If the pump will not start, or will not prime, see Note: NSPI-4 Article V, for the HP (KW) rating and distance from power source. IS-1580-TL-98 HAYWARD HIGH-PERFORMANCE PUMPS INSTALLATION AND ...sure suction joints are closely supervised at all suction and discharge lines and valves, as well as a means of electric shock, replace damaged cord immediately. 8. Insure that the electrical supply available agrees with water to a grounding-type receptacle protected by electrical codes...
... WARNING - Motors require free circulation of the motor. 4. Motor must always be avoided. If the pump will not start, or will not prime, see Note: NSPI-4 Article V, for the HP (KW) rating and distance from power source. IS-1580-TL-98 HAYWARD HIGH-PERFORMANCE PUMPS INSTALLATION AND ...sure suction joints are closely supervised at all suction and discharge lines and valves, as well as a means of electric shock, replace damaged cord immediately. 8. Insure that the electrical supply available agrees with water to a grounding-type receptacle protected by electrical codes...
Models: SP1575LXTL SP1580TL and SP1580X15TL
Page 3
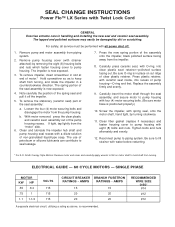
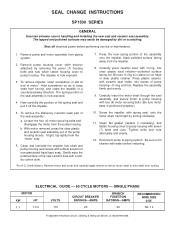
...(replace if necessary) and fasten housing cover to pump housing with four (4) motor securing bolts. (Be sure motor base is in slot at end of non-granulated liquid-type soap. Reconnect pump to pump housing with eight (8) bolts and nuts. Smith Canopy Style Motors: Remove motor end...14 #12 #12 Carefully insert the motor shaft through the seat assembly, and secure motor to piping system. Carefully press ceramic seat, with Twist Lock Cord GENERAL Exercise extreme care in a counterclockwise direction. SEAL CHANGE INSTRUCTIONS Power Flo™ LX Series with O-ring, into recess of...
...(replace if necessary) and fasten housing cover to pump housing with four (4) motor securing bolts. (Be sure motor base is in slot at end of non-granulated liquid-type soap. Reconnect pump to pump housing with eight (8) bolts and nuts. Smith Canopy Style Motors: Remove motor end...14 #12 #12 Carefully insert the motor shaft through the seat assembly, and secure motor to piping system. Carefully press ceramic seat, with Twist Lock Cord GENERAL Exercise extreme care in a counterclockwise direction. SEAL CHANGE INSTRUCTIONS Power Flo™ LX Series with O-ring, into recess of...
Models: SP1575LXTL SP1580TL and SP1580X15TL
Page 4
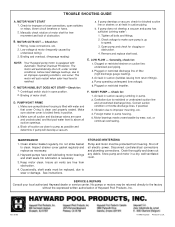
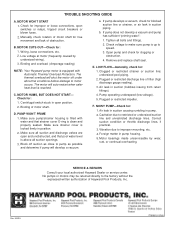
... off all suction openings. 3. Make sure strainer cover is above all electric power. Foreign matter in position. 2. Hayward pumps have self-lubricating motor bearings and shaft seals. No pumps or motors may be replaced, due to restricted or undersized suction line and unrestricted discharge lines. MOTOR WON'T START 1. Make sure all bolts and fittings. 2. Check for : 1. D. See instructions...
... off all suction openings. 3. Make sure strainer cover is above all electric power. Foreign matter in position. 2. Hayward pumps have self-lubricating motor bearings and shaft seals. No pumps or motors may be replaced, due to restricted or undersized suction line and unrestricted discharge lines. MOTOR WON'T START 1. Make sure all bolts and fittings. 2. Check for : 1. D. See instructions...
SP1575X15
Page 1
... pump and motor in cooling. Motors require free circulation of access to go.) CAUTION: All suction and discharge valves must be displaced from power source. If cord connected, use only a properly-grounded receptacle. Water acts as a coolant and lubricant for priming. See instructions. HAYWARD ... and horizontal length of suction piping. Inspect strainer cover gasket regularly and replace as required by proper size ground fault circuit interrupter (GFCI) as necessary. 2. Open all electric power. Priming time depends on -ground pools, advises that wire size is necessary...
... pump and motor in cooling. Motors require free circulation of access to go.) CAUTION: All suction and discharge valves must be displaced from power source. If cord connected, use only a properly-grounded receptacle. Water acts as a coolant and lubricant for priming. See instructions. HAYWARD ... and horizontal length of suction piping. Inspect strainer cover gasket regularly and replace as required by proper size ground fault circuit interrupter (GFCI) as necessary. 2. Open all electric power. Priming time depends on -ground pools, advises that wire size is necessary...
SP1575X15
Page 3
... and pull it off electrical power before restarting. *For A.O. Press plastic retainer, with ceramic seat inside, into clear plastic seat retainer-polished surface facing out. Replace the assembly firmly and evenly. 9. Loosen the four (4) motor securing bolts and disengage the motor from the "motor" side. 6. Gently wipe.... Be sure O-ring is in handling and installing the new seal and ceramic seat assembly. If tight, tap lightly from the pump housing. Be sure to fill strainer with water before performing service or maintenance. 1. The lapped and polished surfaces may easily be ...
... and pull it off electrical power before restarting. *For A.O. Press plastic retainer, with ceramic seat inside, into clear plastic seat retainer-polished surface facing out. Replace the assembly firmly and evenly. 9. Loosen the four (4) motor securing bolts and disengage the motor from the "motor" side. 6. Gently wipe.... Be sure O-ring is in handling and installing the new seal and ceramic seat assembly. If tight, tap lightly from the pump housing. Be sure to fill strainer with water before performing service or maintenance. 1. The lapped and polished surfaces may easily be ...
SP1575X15
Page 4
...": 1. Check voltage to motor occurs. Remove and replace shaft seal. LOW FLOW-Generally, check for blocked suction line or strainer, or air leak in suction piping. Plugged or restricted discharge line of Hayward Pool Products, Inc. Air leak in pump housing. 5. Rev. 5/00 A Binding and overload. (Amperage reading) NOTE: Your Hayward pump motor is above all bolts...
...": 1. Check voltage to motor occurs. Remove and replace shaft seal. LOW FLOW-Generally, check for blocked suction line or strainer, or air leak in suction piping. Plugged or restricted discharge line of Hayward Pool Products, Inc. Air leak in pump housing. 5. Rev. 5/00 A Binding and overload. (Amperage reading) NOTE: Your Hayward pump motor is above all bolts...

Owners Manual
Page 4
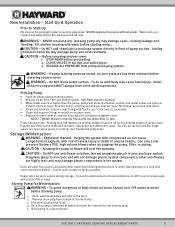
... necessary to tighten fittings enough to four (4) feet above the pool water line. USE ONLY HAYWARD GENUINE REPLACEMENT PARTS 4 Install pump on molded plastic components. NOTE: Do NOT use reducing fitting in thread stops. do NOT ... an additional 1 ½ turns. Increase size if a long run pipe AWAY from pump. Pump motors require free circulation of the male fitting with one that will not flood when it may...wrap the entire threaded portion of air for servicing pump and piping. Installation Instructions Pump Location The PowerFlo LX™ and EP series pumps MUST be solid -
... necessary to tighten fittings enough to four (4) feet above the pool water line. USE ONLY HAYWARD GENUINE REPLACEMENT PARTS 4 Install pump on molded plastic components. NOTE: Do NOT use reducing fitting in thread stops. do NOT ... an additional 1 ½ turns. Increase size if a long run pipe AWAY from pump. Pump motors require free circulation of the male fitting with one that will not flood when it may...wrap the entire threaded portion of air for servicing pump and piping. Installation Instructions Pump Location The PowerFlo LX™ and EP series pumps MUST be solid -
Owners Manual
Page 5
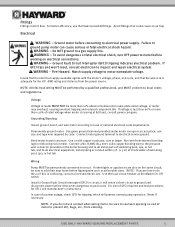
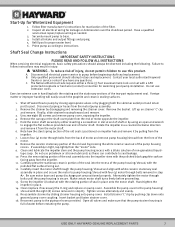
... ONLY HAYWARD GENUINE REPLACEMENT PARTS 5 Use a solid copper conductor, size or larger. Connect a No. 8 AWG (8.4 mm2) solid copper bonding wire to the pressure wire connector provided on end of motor to prevent dirt, bugs, etc., from external bonding lug to electrical power supply... to ground pump motor can cause serious or fatal electrical shock hazard. WARNING - Permanently ground motor. Use green ground terminal provided under motor canopy or access place; Wiring Pump MUST be more than 10% above or below motor name plate rated voltage, or motor may overheat,...
... ONLY HAYWARD GENUINE REPLACEMENT PARTS 5 Use a solid copper conductor, size or larger. Connect a No. 8 AWG (8.4 mm2) solid copper bonding wire to the pressure wire connector provided on end of motor to prevent dirt, bugs, etc., from external bonding lug to electrical power supply... to ground pump motor can cause serious or fatal electrical shock hazard. WARNING - Permanently ground motor. Use green ground terminal provided under motor canopy or access place; Wiring Pump MUST be more than 10% above or below motor name plate rated voltage, or motor may overheat,...
Owners Manual
Page 6
.... Remove drain plug from pump and piping when expecting freezing temperatures or when storing pump for a long time (see instructions below). USE ONLY HAYWARD GENUINE REPLACEMENT PARTS 6 WARNING - Before...motor and determine cause. Explosion Hazard. To avoid condensation/corrosion problems, do so with water before starting system. Release all valves before draining pump. 1. Disconnect pump from pump and piping system. Water acts as possible. Do NOT block pump suction. NOTE: Tighten strainer cover by hand only (no wrenches) ¼ turn OFF power...
.... Remove drain plug from pump and piping when expecting freezing temperatures or when storing pump for a long time (see instructions below). USE ONLY HAYWARD GENUINE REPLACEMENT PARTS 6 WARNING - Before...motor and determine cause. Explosion Hazard. To avoid condensation/corrosion problems, do so with water before starting system. Release all valves before draining pump. 1. Disconnect pump from pump and piping system. Water acts as possible. Do NOT block pump suction. NOTE: Tighten strainer cover by hand only (no wrenches) ¼ turn OFF power...
Owners Manual
Page 7
... secure. Alternately tighten the motor through the pump housing/shroud and align with white ceramic stationary seal assembly in step #7. Note how the steel spring section of the pump housing/shroud, with the polished flat surface facing out. 12. Hand-tighten the impeller in injury. USE ONLY HAYWARD GENUINE REPLACEMENT PARTS 7 C. Reconnect pump to instructions. A. Re...
... secure. Alternately tighten the motor through the pump housing/shroud and align with white ceramic stationary seal assembly in step #7. Note how the steel spring section of the pump housing/shroud, with the polished flat surface facing out. 12. Hand-tighten the impeller in injury. USE ONLY HAYWARD GENUINE REPLACEMENT PARTS 7 C. Reconnect pump to instructions. A. Re...
Owners Manual
Page 8
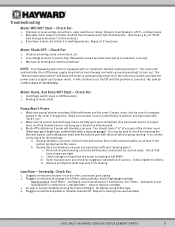
... firmly in the cover O-ring groove. NOTE: Your Hayward pump motor is equipped with skimmer full and pump running. The motor will allow the motor to proper levels. The "thermal overload protector" will automatically shut off if power supply drops before heat damage can confirm this manual.) ... impeller or impeller sheared off to determine if pump will continue to cut On/Off until the problem is again up to automatically restart once the motor has cooled, provided the power source is corrected. USE ONLY HAYWARD GENUINE REPLACEMENT PARTS 8 You should have a timer, be...
... firmly in the cover O-ring groove. NOTE: Your Hayward pump motor is equipped with skimmer full and pump running. The motor will allow the motor to proper levels. The "thermal overload protector" will automatically shut off if power supply drops before heat damage can confirm this manual.) ... impeller or impeller sheared off to determine if pump will continue to cut On/Off until the problem is again up to automatically restart once the motor has cooled, provided the power source is corrected. USE ONLY HAYWARD GENUINE REPLACEMENT PARTS 8 You should have a timer, be...
Owners Manual
Page 9
... to restricted or undersized suction line or leak at once. 6. Maintenance Clean strainer basket regularly. Inspect strainer cover gasket regularly and replace as necessary. Hayward pumps have self-lubricating motor bearings and shaft seals. Insure air vents are free from normal wear, rust, overheating, or concentration of the above. 5. Check For: 1. Cavitation...
... to restricted or undersized suction line or leak at once. 6. Maintenance Clean strainer basket regularly. Inspect strainer cover gasket regularly and replace as necessary. Hayward pumps have self-lubricating motor bearings and shaft seals. Insure air vents are free from normal wear, rust, overheating, or concentration of the above. 5. Check For: 1. Cavitation...
Owners Manual
Page 10
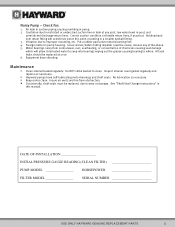
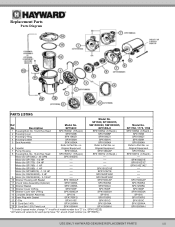
... SPX1500D2A SP1516 SPX1700FG SPX1515C SPX1250WA SPX1550WA1 USE ONLY HAYWARD GENUINE REPLACEMENT PARTS 10 Motor (for SP1775) - 3/4 HP ---- ---- SPX1515Z1E Motor (for SW1585X25) - 2-1/2 HP ---- SPX1520Z1ESC 9 Motor (for SW1585X20) - 2 HP ---- SP1580,...Motor (for SP1580X15) - 1-1/2 HP ---- on Refer to a "2" (i.e. SPX1510Z1XE Motor (for SP1750) - 1/2 HP ---- ---- Motor (for SP1540C) - 40 GPM SPX1540Z1E ---- SP1750, 1775, 1780 SPX1500N2 (6 Req'd.) SPX1705B SPX1580Z1 SPX1500H SPX1500KA Refer to Part No. on 6 Impeller Original Equipment Original Equipment 7 Pump...
... SPX1500D2A SP1516 SPX1700FG SPX1515C SPX1250WA SPX1550WA1 USE ONLY HAYWARD GENUINE REPLACEMENT PARTS 10 Motor (for SP1775) - 3/4 HP ---- ---- SPX1515Z1E Motor (for SW1585X25) - 2-1/2 HP ---- SPX1520Z1ESC 9 Motor (for SW1585X20) - 2 HP ---- SP1580,...Motor (for SP1580X15) - 1-1/2 HP ---- on Refer to a "2" (i.e. SPX1510Z1XE Motor (for SP1750) - 1/2 HP ---- ---- Motor (for SP1540C) - 40 GPM SPX1540Z1E ---- SP1750, 1775, 1780 SPX1500N2 (6 Req'd.) SPX1705B SPX1580Z1 SPX1500H SPX1500KA Refer to Part No. on 6 Impeller Original Equipment Original Equipment 7 Pump...


