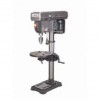
Harbor Freight Tools 38142 - 13 in. Bench Mount Drill Press Support and Manuals
Get Help and Manuals for this Harbor Freight Tools item
View All Support Options Below
Free Harbor Freight Tools 38142 manuals!
Problems with Harbor Freight Tools 38142?
Ask a Question
Free Harbor Freight Tools 38142 manuals!
Problems with Harbor Freight Tools 38142?
Ask a Question
Popular Harbor Freight Tools 38142 Manual Pages
User Manual - Page 2

... injury. REMOVE ADJUSTING KEYS AND WRENCHES. Form habit of Contents
Safety 2 Specifications 6 Setup 6 Operation 9
Maintenance 12 Parts Lists and Diagrams 14 Warranty 16
SAFETY
SETUP
OPERATION
WARNING SYMBOLS AND DEFINITIONS This is used to alert you to see that follow the warnings and instructions may result in damp or wet locations, or expose them to...
User Manual - Page 3

...PARTS. A guard or other jewelry which may get caught in moving parts, breakage of injury to use .
9.
SETUP... are NOT safety glasses.
12. Follow instructions for best and safest performance. DIRECTION OF...manual for alignment of moving parts, binding of improper accessories may affect its intended function -
It's safer than using an extension cord, be properly repaired or replaced...
User Manual - Page 4

... to a live terminal.
4. Moving guards must be properly installed and grounded in accordance with or without yellow stripes is equipped with a qualified electrician or service personnel if the grounding instructions are not completely understood, or if in 125 V~ 3-Prong Plug and Outlet. 8.
Grounding Instructions
SAFETY
SETUP
OPERATION
TO PREVENT ELECTRIC SHOCK AND DEATH FROM...
User Manual - Page 5

...manual. Page 5 WARNING: Some dust created by the operator. Wash hands after handling. (California Health & Safety Code § 25249.5, et seq.)
18. The warnings, precautions, and instructions...or for a replacement.
14. To reduce your exposure to ensure medical problems are tired or..., maintain the tool as possible.
2. SAFETY
SETUP
Drill Press Safety Warnings (cont.)
11. Stay...
User Manual - Page 6

...Support (4B) using the four M10x40mm Hex Head screws (5B).
2. For heavy-duty use . Verify that installation surface has no hidden utility lines before set screws (3B).
Tighten firmly.
3. Setup...the following pages, refer to a flat, level, solid workbench capable of supporting the weight of this manual.
OPERATION
MAINTENANCE
Page 6
For technical questions, please call 1-800-444-...
User Manual - Page 7

...be attached in this position. SAFETY
SETUP
Table and Support Arm to give a greater working ... to protect the Chuck Nose.
4. Installing the Chuck
3. The rack is firmly...it in this position while replacing the collar on the arm ..., without binding.
9. Ensuring all parts are thoroughly clean and dry and burr...the Collar Set Screw.
Firmly secure the Collar (19B) with the Set Screws ...
User Manual - Page 8

Lock the motor in this manual), and install the belts in the positions corresponding to the belts (see Head Assembly diagram).... Item 38142 Lubricate the Idler Pivot Shaft (20) and Idler Pulley (19), with light grease, and install in this position with ease.
2. SETUP
OPERATION
MAINTENANCE
Page 8
For technical questions, please call 1-800-444-3353. Consult the chart inside the ...
User Manual - Page 9

...slackening off clamp (D).
2.
Turn the table about the shaft, and may be set up to assist in four directions.
1. For all text under subheadings therein before...Set Up
TO PREVENT SERIOUS INJURY FROM ACCIDENTAL OPERATION: Turn the Power Switch of this manual including all normal operations the table should be locked in place by a Locking Screw (B). SAFETY
SETUP
Operating Instructions...
User Manual - Page 10

... drill speeds (A full chart is centered within the jaws.
Bit Installation
Insert the drill into the jaws of the chuck approximately 1″,... approximately 1/2″ at its center when using reasonable thumb pressure. SETUP
OPERATION
MAINTENANCE
Page 10
For technical questions, please call 1-800-444...be replaced. Note: If the belt is switched OFF and UNPLUGGED.
1. Open the pulley...
User Manual - Page 11

...and clamp it down firmly against column
General Operating Instructions
1. Never hold the material with the Feed Knob to where the hole is set the depth of damage to prevent it should ...OPERATION
MAINTENANCE
Item 38142
For technical questions, please call 1-800-444-3353. SAFETY
SETUP
Workpiece and Work Area Set Up
1. Designate a work is flung out of the material as utility lines,...
User Manual - Page 12

... electrical outlet before further use damaged equipment. SAFETY
Maintenance and Servicing
Procedures not specifically explained in this manual must be performed only by a qualified service technician. TO PREVENT SERIOUS INJURY FROM ACCIDENTAL OPERATION: Turn the Power Switch of moving parts,
• cracked or broken parts,
• damaged electrical wiring, and
• any procedure in...
User Manual - Page 13

... MANUFACTURER AND/OR DISTRIBUTOR HAS PROVIDED THE PARTS LIST AND ASSEMBLY DIAGRAM IN THIS MANUAL AS A REFERENCE TOOL ONLY. THE BUYER ASSUMES ALL RISK AND LIABILITY ARISING OUT OF HIS OR HER REPAIRS TO THE ORIGINAL PRODUCT OR REPLACEMENT PARTS THERETO, OR ARISING OUT OF HIS OR HER INSTALLATION OF REPLACEMENT PARTS THERETO.
Overheating.
2. Eliminate use of purchase...
User Manual - Page 14

... Quill Gasket Quill Ball Bearing Spindle Shaft
Code 1505010 1302025 1305009-02 1302022 60203 1302023 17mm 11mm 60201 1303003 13030002B 60204 13003001A
Part # 14 15 16 17 18 19... Washer HD Screw Foam Washer "V" Belt M26
Code 1503007 1503009A 1503010A 1503008 60202 1505006-02 1705007 1505008
13050000A M16x12 0805009 1505011
SETUP
OPERATION
MAINTENANCE
Page 14
For technical questions, please...
User Manual - Page 15

Screw Adjusting Lever Motor Support Bracket Motor Support Bracket Motor Mount Lockwasher Nut Hex. Screw Set Motor Hex.
Head
Note: All part numbers shown in this diagram have an "A" suffix
Part # 1A 2A 3A 4A 5A 6A 7A 8A 9A 10A 11A 12A 13A 14A 15A 16A 17A 18A 19A 20A 21A 22A 23A
Description Head...
User Manual - Page 16

..., repairs or alterations outside our facilities, criminal activity, improper installation, normal wear and tear, or to the original purchaser that this warranty, the product or part must accompany the merchandise. Proof of purchase date and an explanation of maintenance. Head Screw Base Table Support w/indicator Crank Skt. Parts List and Diagram B - Socket Screw Set Column Support Hex...
Harbor Freight Tools 38142 Reviews
We have not received any reviews for Harbor Freight Tools yet.