Use & Care
Page 2
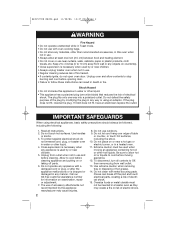
... Hazard • Do not operate unattended while in Toast mode. • Do not use with oven cooking bags. • Do not store any way or using electrical appliances, basic safety precautions should always be used when moving appliance. 12. Allow to cool before opening door. • Failure to stop burning and cool before cleaning appliance and putting on countertop. • Close supervision...
... Hazard • Do not operate unattended while in Toast mode. • Do not use with oven cooking bags. • Do not store any way or using electrical appliances, basic safety precautions should always be used when moving appliance. 12. Allow to cool before opening door. • Failure to stop burning and cool before cleaning appliance and putting on countertop. • Close supervision...
Use & Care
Page 3
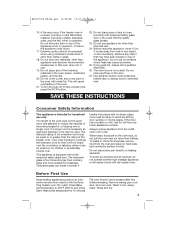
... toaster oven. If plug gets hot, please call our toll-free customer assistance number. If a longer cord is equipped with the toaster oven. This appliance is necessary an approved extension cord may be used on the same circuit with a fully tempered safety glass door. To avoid an electrical circuit overload, do not pull the oven rack out more resistant to breakage. Remove baking pan, broil rack, and oven rack...
... toaster oven. If plug gets hot, please call our toll-free customer assistance number. If a longer cord is equipped with the toaster oven. This appliance is necessary an approved extension cord may be used on the same circuit with a fully tempered safety glass door. To avoid an electrical circuit overload, do not pull the oven rack out more resistant to breakage. Remove baking pan, broil rack, and oven rack...
Use & Care
Page 4
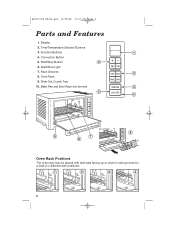
Function Buttons 4. Oven Rack 9. Bake Pan and Broil Rack (not shown) Oven Rack Positions The oven rack may be placed with side bars facing up or down in rack grooves for a total of 4 different rack positions: 4 Time/Temperature Selector Buttons 3. Rack Grooves 8. Start/Stop Button 6. 840157700 ENv02.qxd 11/20/06 12:27 PM Page 4 Parts and Features 1. Slide-Out Crumb Tray 10. Convection Button 5. Start/Stop Light 7. Display 2.
Function Buttons 4. Oven Rack 9. Bake Pan and Broil Rack (not shown) Oven Rack Positions The oven rack may be placed with side bars facing up or down in rack grooves for a total of 4 different rack positions: 4 Time/Temperature Selector Buttons 3. Rack Grooves 8. Start/Stop Button 6. 840157700 ENv02.qxd 11/20/06 12:27 PM Page 4 Parts and Features 1. Slide-Out Crumb Tray 10. Convection Button 5. Start/Stop Light 7. Display 2.
Use & Care
Page 5
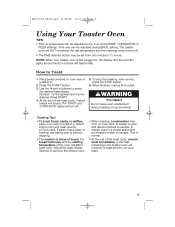
... dripping. • The number of slices of bread, the bread freshness, and the starting temperature of the toast cycle, 4 short beeps will NOT remember the last temperature and time settings when turned off . 5. buttons to Toast 1. At the end of the oven will continue to achieve the desired color. • When toasting, condensation may be set from outlet. Select a light color and toast directly on oven door. Press the TOAST...
... dripping. • The number of slices of bread, the bread freshness, and the starting temperature of the toast cycle, 4 short beeps will NOT remember the last temperature and time settings when turned off . 5. buttons to Toast 1. At the end of the oven will continue to achieve the desired color. • When toasting, condensation may be set from outlet. Select a light color and toast directly on oven door. Press the TOAST...
Use & Care
Page 6
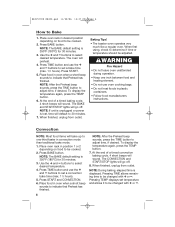
... instructions. The CONVECTION and START/STOP lights will sound. Use the + and - At the end of a timed convection baking cycle, 4 short beeps will go off . 8. Place oven rack in convection mode than traditional bake mode. 1. wWARNING Fire Hazard • Do not leave oven unattended during operation. • Keep one -third faster in desired position depending on food to be cooked. 2. Use the + and - Place food in oven...
... instructions. The CONVECTION and START/STOP lights will sound. Use the + and - At the end of a timed convection baking cycle, 4 short beeps will go off . 8. Place oven rack in convection mode than traditional bake mode. 1. wWARNING Fire Hazard • Do not leave oven unattended during operation. • Keep one -third faster in desired position depending on food to be cooked. 2. Use the + and - Place food in oven...
Use & Care
Page 7
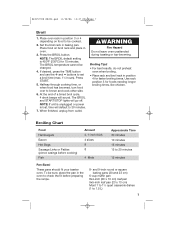
... oven unattended during toasting or top-browning. These pans should fit your toaster oven. Place food on food to 30 minutes. 7. The BROIL temperature cannot be cooked. 2. Place oven rack in position 4 for faster broiling times. The BROIL and START/STOP lights will sound. NOTE: If unit is unplugged or power is 450ºF (230ºC) for foods needing longer broiling times, like chicken. Broiling Tips! • For best...
... oven unattended during toasting or top-browning. These pans should fit your toaster oven. Place food on food to 30 minutes. 7. The BROIL temperature cannot be cooked. 2. Place oven rack in position 4 for faster broiling times. The BROIL and START/STOP lights will sound. NOTE: If unit is unplugged or power is 450ºF (230ºC) for foods needing longer broiling times, like chicken. Broiling Tips! • For best...
Use & Care
Page 8
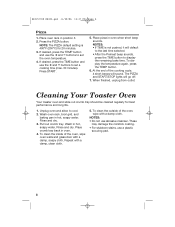
...ºF (200ºC) for best performance and long life. 1. Unplug oven and allow to set the oven temperature. 4. Place crumb tray back in oven when short beep sounds. Repeat with a damp cloth. NOTES: • Do not use the + and - At the end of the oven, wipe oven walls and glass door with a damp, soapy cloth. Wash oven rack, broil grid, and baking pan in hot, soapy water...
...ºF (200ºC) for best performance and long life. 1. Unplug oven and allow to set the oven temperature. 4. Place crumb tray back in oven when short beep sounds. Repeat with a damp cloth. NOTES: • Do not use the + and - At the end of the oven, wipe oven walls and glass door with a damp, soapy cloth. Wash oven rack, broil grid, and baking pan in hot, soapy water...
Use & Care
Page 9
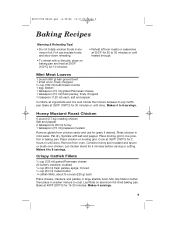
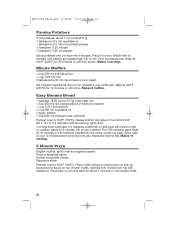
... chicken in baking pan. Place chicken on aluminum foil-lined baking pan. Cook at 350°F (180ºC) for 2 hours or until done. Makes 6 to coat. Lay fillets on broiling grid. Makes 4 to 30 minutes or until done. Sprinkle with salt and pepper. Bake at 350°F for 15-20 minutes. Place broiling grid in low position in cold...
... chicken in baking pan. Place chicken on aluminum foil-lined baking pan. Cook at 350°F (180ºC) for 2 hours or until done. Makes 6 to coat. Lay fillets on broiling grid. Makes 4 to 30 minutes or until done. Sprinkle with salt and pepper. Bake at 350°F for 15-20 minutes. Place broiling grid in low position in cold...
Use & Care
Page 10
... electric mixer on top of two 9x5x3 inch (23 x 13 x 6 cm) loaf pans with oil. Bake for 35 minutes or until done. Allow cake to 350ºF (180ºC). Repeat for 2 minutes. Spread some sauce on medium speed for second loaf. Place pan in half and slightly toasted Pizza or spaghetti sauce Grated mozzarella cheese Pepperoni slices...
... electric mixer on top of two 9x5x3 inch (23 x 13 x 6 cm) loaf pans with oil. Bake for 35 minutes or until done. Allow cake to 350ºF (180ºC). Repeat for 2 minutes. Spread some sauce on medium speed for second loaf. Place pan in half and slightly toasted Pizza or spaghetti sauce Grated mozzarella cheese Pepperoni slices...
Use & Care
Page 11
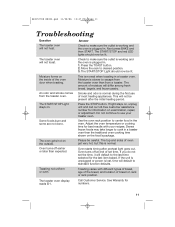
... not toast. The toaster oven display reads Er1. Press the TOAST button. 2. The amount of oven get very hot, but this is normal during the first use your recipes. Oven turns off at end of bread on rack or rack position. Adjust the oven temperature or cooking time for numbers. 11 Toasting varies with your toaster oven. See Warranty for best results with different types of bread, age of the bread, and location of set...
... not toast. The toaster oven display reads Er1. Press the TOAST button. 2. The amount of oven get very hot, but this is normal during the first use your recipes. Oven turns off at end of bread on rack or rack position. Adjust the oven temperature or cooking time for numbers. 11 Toasting varies with your toaster oven. See Warranty for best results with different types of bread, age of the bread, and location of set...
Use & Care
Page 12
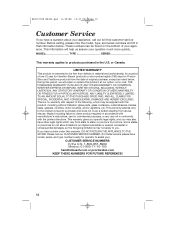
..., or any use not in material and workmanship for a period of one (1) year for Hamilton Beach products or one hundred eighty (180) days for operator to assist you.) CUSTOMER SERVICE NUMBERS In the U.S. 1-800-851-8900 Mexico: 01-800-71-16-100 hamiltonbeach.com or proctorsilex.com KEEP THESE NUMBERS FOR FUTURE REFERENCE! 12 This warranty gives you specific legal rights...
..., or any use not in material and workmanship for a period of one (1) year for Hamilton Beach products or one hundred eighty (180) days for operator to assist you.) CUSTOMER SERVICE NUMBERS In the U.S. 1-800-851-8900 Mexico: 01-800-71-16-100 hamiltonbeach.com or proctorsilex.com KEEP THESE NUMBERS FOR FUTURE REFERENCE! 12 This warranty gives you specific legal rights...

