User Manual
Page 2
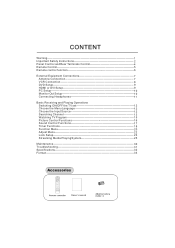
...5 Remote control function 6 External Equipment Connections 7 Antenna Connection 7 VCR Connection 8 DVD Setup 9 HDMI or DVI Setup 9 PC Setup 10 Monitor Out Setup 10 Connecting Headphones 11 Basic Receiving and Playing Operations Switching ON/OFF the TV set 12 Choose the Menu Language 12 Choose the Input Source 12 Searching Channel 13 Watching TV Program 15 Picture Control Functions 16 Sound Control Functions 17 Timer Functions 18 Function Menu 20 Adjust Menu 22 Lock Setup 23 Streaming Media Playing System 25 Maintenance 30 Troubleshooting 31 Specifications 32 Format 33...
...5 Remote control function 6 External Equipment Connections 7 Antenna Connection 7 VCR Connection 8 DVD Setup 9 HDMI or DVI Setup 9 PC Setup 10 Monitor Out Setup 10 Connecting Headphones 11 Basic Receiving and Playing Operations Switching ON/OFF the TV set 12 Choose the Menu Language 12 Choose the Input Source 12 Searching Channel 13 Watching TV Program 15 Picture Control Functions 16 Sound Control Functions 17 Timer Functions 18 Function Menu 20 Adjust Menu 22 Lock Setup 23 Streaming Media Playing System 25 Maintenance 30 Troubleshooting 31 Specifications 32 Format 33...

User Manual
Page 6
... VGA/DVI AUDIO VVGGAAININ 54 65 76 3 78 77 54 76 3 78 77 1.COMPONENT In Connect a component Video/Audio device to these jacks 2.VGA/DVI AUDIO Connect a VGA/DVI Audio device to these jacks 3.VGA IN: Connect the monitor output connector from a PC to the jack 4.AV1 In Connect Video/Audioout from an Video/Audio device to these jacks 5.S-VIDEO Connect S-Video out from a S-Video device to these jacks 6.AV OUT Video/Audio output terminal 7.ANT In Connect cable pr antenna signal to the TV, either directly or through your cable box 8.HDMI Connect a signal...
... VGA/DVI AUDIO VVGGAAININ 54 65 76 3 78 77 54 76 3 78 77 1.COMPONENT In Connect a component Video/Audio device to these jacks 2.VGA/DVI AUDIO Connect a VGA/DVI Audio device to these jacks 3.VGA IN: Connect the monitor output connector from a PC to the jack 4.AV1 In Connect Video/Audioout from an Video/Audio device to these jacks 5.S-VIDEO Connect S-Video out from a S-Video device to these jacks 6.AV OUT Video/Audio output terminal 7.ANT In Connect cable pr antenna signal to the TV, either directly or through your cable box 8.HDMI Connect a signal...
User Manual
Page 8
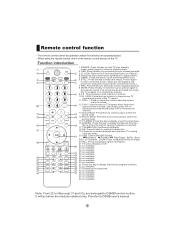
... return to normal screen. (Note: Do not display a still picture for quick switching of MO-Card. 3 SOURCE H.LOCK STILL ARC 4 .,@ abc def 6.STILL: Press this key to mute the sound, press it again to return to standby mode. 2.USB: Press this key to display the favorite program list menu. 31 33 32.no available 32 Fn DDS GAME BUSINESS 34 33.Displaying the sleep time. 35 37 34...
... return to normal screen. (Note: Do not display a still picture for quick switching of MO-Card. 3 SOURCE H.LOCK STILL ARC 4 .,@ abc def 6.STILL: Press this key to mute the sound, press it again to return to standby mode. 2.USB: Press this key to display the favorite program list menu. 31 33 32.no available 32 Fn DDS GAME BUSINESS 34 33.Displaying the sleep time. 35 37 34...

User Manual
Page 14
... no other operation, the signal source menu will light. 2. menu Language Blue Screen Menu Timeout AAA Picture Optimize DSM Eye Guard Mode Tetris English On 15s Demo Off 4. Source TV AV1 AV2 S-Video YPbPr/YCbCr1 YPbPr/YCbCr2 HDMI 1 HDMI 2 HDMI 3 PC USB If you want to exchange to normal viewing. When you satisfied with your choice, press MENU to return to standing by pressing repeatedly. Press POWER on the remote control again...
... no other operation, the signal source menu will light. 2. menu Language Blue Screen Menu Timeout AAA Picture Optimize DSM Eye Guard Mode Tetris English On 15s Demo Off 4. Source TV AV1 AV2 S-Video YPbPr/YCbCr1 YPbPr/YCbCr2 HDMI 1 HDMI 2 HDMI 3 PC USB If you want to exchange to normal viewing. When you satisfied with your choice, press MENU to return to standing by pressing repeatedly. Press POWER on the remote control again...
User Manual
Page 15
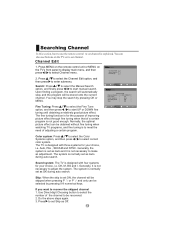
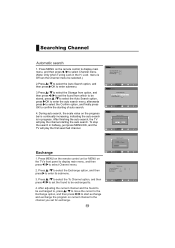
... programs, and fine tuning is normally set ON, the channel will be stored onto the current channel. Color system: Press / to select the Color Systems option, and then press / to adjust the system. The system is to be selected by pressing OK or MENU. Generally, it is not good enough. Use Direct-digit Choosing button to select the number of the channel to meet the need of a certain program...
... programs, and fine tuning is normally set ON, the channel will be stored onto the current channel. Color system: Press / to select the Color Systems option, and then press / to adjust the system. The system is to be selected by pressing OK or MENU. Generally, it is not good enough. Use Direct-digit Choosing button to select the number of the channel to meet the need of a certain program...
User Manual
Page 16
... program on the TV's front panel to display main menu, and then menu press / to enter its submenu. 3. Press MENU on the remote control unit or MENU on current channel to select Channel menu. (Note: Only when Tuning Lock in the H. Press / to select the Exchange option, and then press to select Channel menu. 2. After finishing the auto search, the TV will play the channel starting of auto search. 4. Press MENU on the remote control...
... program on the TV's front panel to display main menu, and then menu press / to enter its submenu. 3. Press MENU on the remote control unit or MENU on current channel to select Channel menu. (Note: Only when Tuning Lock in the H. Press / to select the Exchange option, and then press to select Channel menu. 2. After finishing the auto search, the TV will play the channel starting of auto search. 4. Press MENU on the remote control...

User Manual
Page 17
... return to adjust the volume level. Using CH+/- If to select a channel number in number decreasing direction. The range is turned off. 2. VIEW (Flashback)" once. 3. to select channel numbers of the TV set to Channel 8, just press "Q. If you want to return to recover the sound, press MUTE button again or directly press VOL+ button. buttons Press CH+ to select the desired program Using Program number buttons Directly enter the channel number with the numeric keypad on the screen. VIEW (Flashback...
... return to adjust the volume level. Using CH+/- If to select a channel number in number decreasing direction. The range is turned off. 2. VIEW (Flashback)" once. 3. to select channel numbers of the TV set to Channel 8, just press "Q. If you want to return to recover the sound, press MUTE button again or directly press VOL+ button. buttons Press CH+ to select the desired program Using Program number buttons Directly enter the channel number with the numeric keypad on the screen. VIEW (Flashback...
User Manual
Page 18
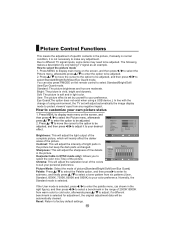
.../ User/Eye Guard mode. menu Contrast: This will adjust the sharpness of fine details in the picture. Normally, the Standard mode is soft and in light color. You can also press P.MODE on the screen, and then press / to select the Picture menu, afterwards press / to enter the option to factory default settings. Eye Guard(The option does not exist when using a USB device.): In line with the change...
.../ User/Eye Guard mode. menu Contrast: This will adjust the sharpness of fine details in the picture. Normally, the Standard mode is soft and in light color. You can also press P.MODE on the screen, and then press / to select the Picture menu, afterwards press / to enter the option to factory default settings. Eye Guard(The option does not exist when using a USB device.): In line with the change...

User Manual
Page 19
... the remote control to display main menu on the broadcast signals or signals from the Tv's speakers. Press MENU to select User, Standard, Music and Theater mode. SRS TS XT The surround sound feature expands the audio listening field wider and deeper to be adjusted. 2. Music: Designed the sound to best suit music programs. Theater: Enables extra bass and treble to customize your listening position. Press / to factory default settings. menu Sound Mode...
... the remote control to display main menu on the broadcast signals or signals from the Tv's speakers. Press MENU to select User, Standard, Music and Theater mode. SRS TS XT The surround sound feature expands the audio listening field wider and deeper to be adjusted. 2. Music: Designed the sound to best suit music programs. Theater: Enables extra bass and treble to customize your listening position. Press / to factory default settings. menu Sound Mode...

User Manual
Page 20
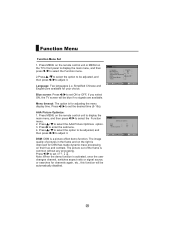
... 1min before the display disappears, the sleep time set your time zone; Press MENU on the remote control unit or MENU on the TV's front panel to display the main menu, and then press / to select the Time menu, afterwards press / to adjust the time. 4. If the Sleep function is set the sleep function by operating the SLEEP key. Sleep Setting 1. Press / to select the Sleep option. 2. During the 60s, the user may also set OFF, the function...
... 1min before the display disappears, the sleep time set your time zone; Press MENU on the remote control unit or MENU on the TV's front panel to display the main menu, and then press / to select the Time menu, afterwards press / to adjust the time. 4. If the Sleep function is set the sleep function by operating the SLEEP key. Sleep Setting 1. Press / to select the Sleep option. 2. During the 60s, the user may also set OFF, the function...

User Manual
Page 21
... turn on or enter standby mode upon reaching the On time, it automatically enters the preset channel. 1. Press MENU on the remote control unit or MENU on menu the TV's front panel to display the main menu, and then press / to select the Time menu, afterwards press / to set hour and minute. Press / to select the Remind Channel option, and press / to select the On Channel option. 2. Press MENU on the remote control...
... turn on or enter standby mode upon reaching the On time, it automatically enters the preset channel. 1. Press MENU on the remote control unit or MENU on menu the TV's front panel to display the main menu, and then press / to select the Time menu, afterwards press / to set hour and minute. Press / to select the Remind Channel option, and press / to select the On Channel option. 2. Press MENU on the remote control...
User Manual
Page 22
... user changes channel, switches aspect ratio or signal source, or searches for DSM has made dynamic trace processing on the remote control unit to display the main menu, and then press / to be automatically disabled. Note: When the demo function is common without any processing. menu Language Blue Screen Menu Timeout AAA Picture Optimize DSM Eye Guard Mode Tetris English On 15s Demo Off menu Press / to set the desired time (5-15s). Menu...
... user changes channel, switches aspect ratio or signal source, or searches for DSM has made dynamic trace processing on the remote control unit to display the main menu, and then press / to be automatically disabled. Note: When the demo function is common without any processing. menu Language Blue Screen Menu Timeout AAA Picture Optimize DSM Eye Guard Mode Tetris English On 15s Demo Off menu Press / to set the desired time (5-15s). Menu...
User Manual
Page 23
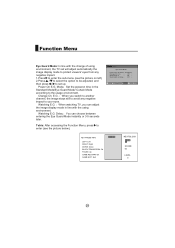
... TV, you switch to another channel, the image stays still to avoid any negative impact. 1.Press to enter the sub-menu (see the picture below). menu Eye Guard Mode Power On E.G. Tetris: After accessing the Function Menu, press to enter (see the picture on left) 2.Press / to select the option to be adjusted, and then press / to set will adjust automatically the image display mode to protect viewers...
... TV, you switch to another channel, the image stays still to avoid any negative impact. 1.Press to enter the sub-menu (see the picture below). menu Eye Guard Mode Power On E.G. Tetris: After accessing the Function Menu, press to enter (see the picture on left) 2.Press / to select the option to be adjusted, and then press / to set will adjust automatically the image display mode to protect viewers...
User Manual
Page 24
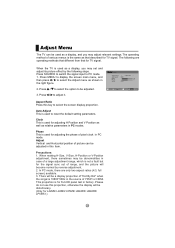
Press SOURCE to switch the signal input to adjust it. Press / to PC mode. 1. Aspect Ratio Press this item. Precautions: 1. This proportion is for Full-HD panel test in the source of YPbPr or HDMI. Press / to select the option to reset the default setting parameters. Auto Adjust This is used for adjusting the phase of pixel clock in PC mode. Phase This is used to be distortionary. (Only for...
Press SOURCE to switch the signal input to adjust it. Press / to PC mode. 1. Aspect Ratio Press this item. Precautions: 1. This proportion is for Full-HD panel test in the source of YPbPr or HDMI. Press / to select the option to reset the default setting parameters. Auto Adjust This is used for adjusting the phase of pixel clock in PC mode. Phase This is used to be distortionary. (Only for...
User Manual
Page 25
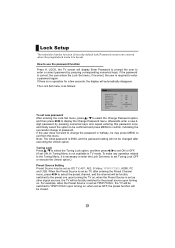
... required to change of password. If there is correct, the user enters the Lock Set menu; If the user does not want to enter a password again. if the password is no operation for a few seconds, the display will be forcibly switched to YPbPr/YCbCr upon turning on ; when set as TV, after executing the Unlock option. LOCK, the TV screen will be set as follows: menu To set as OFF...
... required to change of password. If there is correct, the user enters the Lock Set menu; If the user does not want to enter a password again. if the password is no operation for a few seconds, the display will be forcibly switched to YPbPr/YCbCr upon turning on ; when set as TV, after executing the Unlock option. LOCK, the TV screen will be set as follows: menu To set as OFF...
User Manual
Page 26
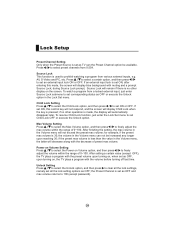
... TV plays a program with the preset volume upon turning on Volume option, and then press / to prohibit watching a program from 0-254. Press / to set ON, this mode, the screen will display Child Lock when the key is pressed; Press / to select a certain option, and then press / to select preset channels from various external inputs, e.g. To watch a program from a locked external input, just enter Source Lock submenu to freely adjust the max volume within...
... TV plays a program with the preset volume upon turning on Volume option, and then press / to prohibit watching a program from 0-254. Press / to set ON, this mode, the screen will display Child Lock when the key is pressed; Press / to select a certain option, and then press / to select preset channels from various external inputs, e.g. To watch a program from a locked external input, just enter Source Lock submenu to freely adjust the max volume within...
User Manual
Page 27
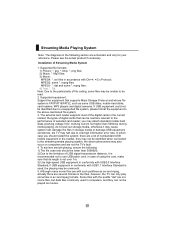
... files; 2) Music: *. Mp3 files; 3) Movie: MPEG4: *. mpeg files; The external card reader supports most of digital cards that supports Mass Storage Protocol and whose file system is used in the current market; the above -mentioned file system; 3. Please see the actual product if necessary. Installation of file coding, some files in accordance with the postfix "dat" are not the TV's fault. 4. Supported file formats: 1) Picture: *. bmp, *. avi files in...
... files; 2) Music: *. Mp3 files; 3) Movie: MPEG4: *. mpeg files; The external card reader supports most of digital cards that supports Mass Storage Protocol and whose file system is used in the current market; the above -mentioned file system; 3. Please see the actual product if necessary. Installation of file coding, some files in accordance with the postfix "dat" are not the TV's fault. 4. Supported file formats: 1) Picture: *. bmp, *. avi files in...
User Manual
Page 28
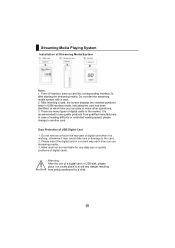
... many types of a digital card or USB disk, please place it is recommended to another card. Do not remove or touch the rear part of Streaming Media System Notes: 1. Time of digital cards. Please insert the digital card in the market. Streaming Media Playing System Installation of digital card when it in USB interface mode, indicating the card has been identified, at which time you use...
... many types of a digital card or USB disk, please place it is recommended to another card. Do not remove or touch the rear part of Streaming Media System Notes: 1. Time of digital cards. Please insert the digital card in the market. Streaming Media Playing System Installation of digital card when it in USB interface mode, indicating the card has been identified, at which time you use...
User Manual
Page 29
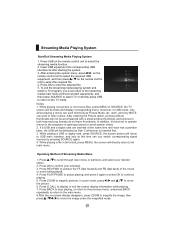
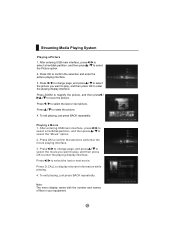
... menu at this time can work in both bmp and png formats do not have thumbnails. While playing a USB or digital card, press SOURCE, the screen picture will be defaulted as Picture Mode, etc. Press ZOOM to move the picture. 6. then press / / / to magnify pictures; While playing non-picture or non-movie files, press MENU or SOURCE, the TV screen will not be black and display corresponding menu; Press BACK to stop playing...
... menu at this time can work in both bmp and png formats do not have thumbnails. While playing a USB or digital card, press SOURCE, the screen picture will be defaulted as Picture Mode, etc. Press ZOOM to move the picture. 6. then press / / / to magnify pictures; While playing non-picture or non-movie files, press MENU or SOURCE, the TV screen will not be black and display corresponding menu; Press BACK to stop playing...
User Manual
Page 30
.... 3. Press OK to move the picture. Note: The menu display varies with the number and names of files in your equipment. Press / to display relevant information while playing. 4. Press D.CALL to rotate the picture. 4. Press / to select the last or next movie. To exit playing, just press BACK repeatedly. Press / to change page, and press / to select the movie you want to...
.... 3. Press OK to move the picture. Note: The menu display varies with the number and names of files in your equipment. Press / to display relevant information while playing. 4. Press D.CALL to rotate the picture. 4. Press / to select the last or next movie. To exit playing, just press BACK repeatedly. Press / to change page, and press / to select the movie you want to...


