Haier HWM96-0613S Support and Manuals
Get Help and Manuals for this Haier item
View All Support Options Below
Free Haier HWM96-0613S manuals!
Problems with Haier HWM96-0613S?
Ask a Question
Free Haier HWM96-0613S manuals!
Problems with Haier HWM96-0613S?
Ask a Question
Popular Haier HWM96-0613S Manual Pages
User Manual - Page 1

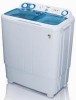
Twin-tub Washing Machine with Pump User's manual
This manual is for HWM96-0613S
• Please read this manual carefully before using.
• Retain it for future reference. Haier
0030802762B
User Manual - Page 2

Contents
i • Names of the parts
1
• Safety precautions
2
• Installation and adjustment
4
• Preparation before washing
7
• The musts in washing
8
• Usage of the detergent
8
• Washing sequence
9
• Disposal after washing
13
• Trouble-Shooting *Answers to question. 15
• Packing list
17
Specification
18
User Manual - Page 4

... must be inserted and extracted by the
0, technicians ofour special shop or the after-sale service department. Ventilation hole at the bottom of the power plug clean.
Keep the pin of ...In d
In case the washing machine is installed on the control panel. If the power plug is damaged, or the plugging into special receptacle with carpet. to replace it is idle. When the machine is ...
User Manual - Page 6

... to your security and correct operating the machine. It is very important to the requirement of the manual.
Install the lint filter
After opening the package,please take out the lint filter from the document bag,install it to the overflow filter of the drain hose shall be less than 1.2m ,
or the...
User Manual - Page 8

... inside the control panel significantly
and prolong the operating life of the laundries. • Set the water level adjusting lever
Water level indicator
to needed line. Med
Use the new...inlet hose
Select water level according to the
Minimurn---, Min
water faucet.Old hose sets should
not be reused.
1- Install the water inlet hose; It can fill water into the wash tub directly ...
User Manual - Page 9

... in unstable working or abnormal noise. b. d.
and loosen the
laundries before washing the laundries
Check if Clear the
the laundries has special
pocket. For the parts with buttons into the washing machine directly.
7 f. The quantity of discretion, please put those laundries difficult to followings before
putting them in advance, which can...
User Manual - Page 10

...color.
• The whitener shall not touch the laundries directly.
• Refer to the user's manual for one time. able to put in wash-
ing for the usage and quantity of the whitener...1.Prepare warm water of 30°C and a container. 2.Add the powder while stirring to the instruction
) of the cloth will influ- Laundries quantity in one washing cycle shall be turned round in ...
User Manual - Page 11

... 1
(
)
4 '\ iiir woo,
3 SPIN TIMER
1.Water-filling selector (1) Set the water-filling selector at "DRAIN". (Figure 5).
9 During active soaking, the ...service life of the timer). it can increase the service life of the timer). STROME'
a
3. Washing sequence
Water-filling selector handle
mm M
Wash timer (To set to below 1 minute, first set to the laundries.
6.After washing, set...
User Manual - Page 12

...
.(' Proper
No gland
(2) Close the inner and outer cover of the spin tub. Outer cover of The spin tub
Inner cover of the spin tub. (2) Set the water-filling selector control
rod at the "SPIN" side. Spin for 1-2 minutes. WASH SPIN WATER INLET SEL
10 Midway spinning
1.Put the laundries into...
User Manual - Page 13

Then fill suitable water continuously. Put the laundries into the wash tub. Select suitable current according to the laundries.
2.Adjust the water level Set the water level with water level adjusting lever according to preset water level.
3. Fill water to the laundries quantity. If you find water flowing out ...
User Manual - Page 15

Push down side") into the overflow filter , then push the upper part of the filter in ( marked with " up side "). (See to
take it off the overflow ... power plug from the receptacle before cleaning. Clean the lint
Put it in time after washing
• After using .
1. Install the lint filter After cleaning, insert the bottom of the lint filter (marked with "down to take it is
still wet.(...
User Manual - Page 16

... surface and inside the overflow filter ( as indicated in Figure 1). Water level adjusting lever
Corrugation Pipe
3. Install the overflow filter. (1),Install the corrugation pipe. (2),Insert the mounting plate at the left upper side. (4).Push the upper part in as indicated in Figure 2.
Hoo Figure 2
Disposal of the complete unit
• After washing, dismount...
User Manual - Page 17

... )
• After complete draining, set at "STRONG" or "STANDARD". If it is set the "WASH SELECTOR" at "DRAIN",... completely after using . The laundries may fall to the
lower part of the outer side of the spin tub (as indicated Spin...Install
After install the back edge of the spin tub frame to
proper position, push the four points marked with hands gently.
Please check carefully. Trouble...
User Manual - Page 18

Trouble-shooting Answer to repair. If there are not breakdowns sometimes.
Phenomena
The reason
The machine does not act.
• ...power plug before checking) The following phenomena are real breakdowns, please come to the special maintenance department or after-sale service department of
the spin tub? • Are the laundries in the factory inspection of
the spin tub? Please confirm...
User Manual - Page 19

Packing list
Name
• User's manual eaw......1
• Water inlet hose .4,4, ....... sammismill Mi iiiii 0 "
• Lint filter
-T-?c--
•Water-filling jointer
• Gland
-o -
• Twin-tub washing machine
Quantity • One piece • One piece
• One piece
• One piece • One piece • One set
17
Haier HWM96-0613S Reviews
We have not received any reviews for Haier yet.