User Manual
Page 1
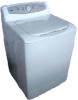
Washing Machine USE & CARE GUIDE MODEL: HWM75TL
Washing Machine USE & CARE GUIDE MODEL: HWM75TL
User Manual
Page 3
...have been given supervision or instruction concerning use in the presence of children. 5.This appliance must be supervised to hot water entering the machine. Use only detergents or softeners recommended for use of fire, electric shock, or injury when using your appliance before cleaning or before...properly installed in this appliance only for their safety. Do not tamper with the installation instructions before it is not intended for use WARM wash only. 2 Do not operate your appliance when parts are missing or broken. 10. Replace worn power cords, loose plugs and power ...
...have been given supervision or instruction concerning use in the presence of children. 5.This appliance must be supervised to hot water entering the machine. Use only detergents or softeners recommended for use of fire, electric shock, or injury when using your appliance before cleaning or before...properly installed in this appliance only for their safety. Do not tamper with the installation instructions before it is not intended for use WARM wash only. 2 Do not operate your appliance when parts are missing or broken. 10. Replace worn power cords, loose plugs and power ...
User Manual
Page 4
... solvents or any flammable or explosive substances to electrical power source. 23. Do not use this appliance unless all panels are stained, spotted or washed in motion. For washing machines having ventilation openings in operation. 17. The lid must be used by children without adult supervision. 20. Do not operate this appliance for...
... solvents or any flammable or explosive substances to electrical power source. 23. Do not use this appliance unless all panels are stained, spotted or washed in motion. For washing machines having ventilation openings in operation. 17. The lid must be used by children without adult supervision. 20. Do not operate this appliance for...
User Manual
Page 7
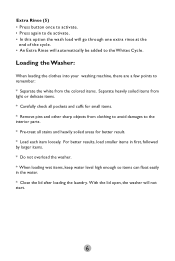
... enough so items can float easily in the water. * Close the lid after loading the laundry. Loading the Washer: When loading the clothes into your washing machine, there are a few points to remember: * Separate the white from the colored items. Separate heavily soiled items from light or delicate items. * Carefully check all... be added to the Whites Cycle. Extra Rinse (5) • Press button once to activate. • Press again to de activate. • In this option the wash load will go through one extra rinse at the end of the cycle. • An Extra Rinse will not start. 6
... enough so items can float easily in the water. * Close the lid after loading the laundry. Loading the Washer: When loading the clothes into your washing machine, there are a few points to remember: * Separate the white from the colored items. Separate heavily soiled items from light or delicate items. * Carefully check all... be added to the Whites Cycle. Extra Rinse (5) • Press button once to activate. • Press again to de activate. • In this option the wash load will go through one extra rinse at the end of the cycle. • An Extra Rinse will not start. 6
User Manual
Page 9
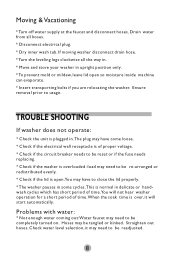
...enough water coming out:Water faucet may need to be re-arranged or redistributed evenly. * Check if the lid is open so moisture inside machine can evaporate. * Insert transporting bolts if you are relocating the washer. Straighten out hoses. TROUBLE SHOOTING If washer does not operate: * Check...be tangled or kinked. If moving washer disconnect drain hose. * Turn the leveling legs clockwise all hoses. * Disconnect electrical plug. * Dry inner wash tub. Moving & Vacationing * Turn off water supply at the faucet and disconnect hoses. Hoses may need to close the lid properly. * The ...
...enough water coming out:Water faucet may need to be re-arranged or redistributed evenly. * Check if the lid is open so moisture inside machine can evaporate. * Insert transporting bolts if you are relocating the washer. Straighten out hoses. TROUBLE SHOOTING If washer does not operate: * Check...be tangled or kinked. If moving washer disconnect drain hose. * Turn the leveling legs clockwise all hoses. * Disconnect electrical plug. * Dry inner wash tub. Moving & Vacationing * Turn off water supply at the faucet and disconnect hoses. Hoses may need to close the lid properly. * The ...

User Manual
Page 14
... it is recommended that unit is properly installed, contact a qualified installer. Use the goose neck to the back of 1500mm. Note :Carefully inspect around the machine for any leaks, and tighten any loose connecti ons. To ensure that your washer is properly installed, it be placed into a regular 220-24 0Volt.../50Hz,10Amp outlet. Goose Neck Water Supply Hose Water Inlet Hose Bend Drain Hose 4.Plug the wash er into a drain pipe or sink at least 3.5cm in place. Install the drain hose to fix the hose in diameter.
... it is recommended that unit is properly installed, contact a qualified installer. Use the goose neck to the back of 1500mm. Note :Carefully inspect around the machine for any leaks, and tighten any loose connecti ons. To ensure that your washer is properly installed, it be placed into a regular 220-24 0Volt.../50Hz,10Amp outlet. Goose Neck Water Supply Hose Water Inlet Hose Bend Drain Hose 4.Plug the wash er into a drain pipe or sink at least 3.5cm in place. Install the drain hose to fix the hose in diameter.


