User Manual
Page 2
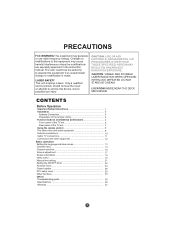
... set 6 Rear panel of the TV set 7 Using the remote control 8 The other video and audio equipment 9 Antenna connections 10 Cable TV connections 11 Connections the other equipment 12 Basic operation Setting the language and blue screen 13 Channel menu 14 Channel selection 16 Volume adjustment 17 Screen information 18 Video menu 19 Manual time setting 21 Setting the ON/OFF timer 22 Function menu 23 Closed caption 28 DTV setup menu 29 Other functions 33 Others Troubleshooting guide 35 Specifications 36 Warranty 37 1 LOCATION:INSIDE,NEAR THE DECK MECHANISM. Changes...
... set 6 Rear panel of the TV set 7 Using the remote control 8 The other video and audio equipment 9 Antenna connections 10 Cable TV connections 11 Connections the other equipment 12 Basic operation Setting the language and blue screen 13 Channel menu 14 Channel selection 16 Volume adjustment 17 Screen information 18 Video menu 19 Manual time setting 21 Setting the ON/OFF timer 22 Function menu 23 Closed caption 28 DTV setup menu 29 Other functions 33 Others Troubleshooting guide 35 Specifications 36 Warranty 37 1 LOCATION:INSIDE,NEAR THE DECK MECHANISM. Changes...

User Manual
Page 3
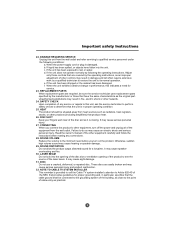
..., DO NOT REMOVE COVER (OR BACK). NO USER SERVICEABLE PARTS INSIDE. Important Safety Instructions 1 Read these instructions. 2 Keep these instructions. 3 Heed all warnings. 4 Follow all instructions. 5 Do not use by the manufacturer, or sold with the apparatus. REFER SERVICING TO QUALIFIED SERVICE PERSONNEL. CAUTION: These servicing instructions are provided for your Outlet, consult an electrician for long periods Of time. 2 The lightning flash with one...
..., DO NOT REMOVE COVER (OR BACK). NO USER SERVICEABLE PARTS INSIDE. Important Safety Instructions 1 Read these instructions. 2 Keep these instructions. 3 Heed all warnings. 4 Follow all instructions. 5 Do not use by the manufacturer, or sold with the apparatus. REFER SERVICING TO QUALIFIED SERVICE PERSONNEL. CAUTION: These servicing instructions are provided for your Outlet, consult an electrician for long periods Of time. 2 The lightning flash with one...
User Manual
Page 5
... often require extensive work by a qualified technician to restore the unit to this indicates a need for a longtime. HEAT The product should be sure the service technician uses replacement parts specified by following conditions: a. Important safety Instructions 22. e. When the power-supply cord or plug is closing. c. DAMAGE REQUIRING SERVICE Unplug this unit from the wall outlet and refer servicing to rain or water. Adjust only those...
... often require extensive work by a qualified technician to restore the unit to this indicates a need for a longtime. HEAT The product should be sure the service technician uses replacement parts specified by following conditions: a. Important safety Instructions 22. e. When the power-supply cord or plug is closing. c. DAMAGE REQUIRING SERVICE Unplug this unit from the wall outlet and refer servicing to rain or water. Adjust only those...
User Manual
Page 8
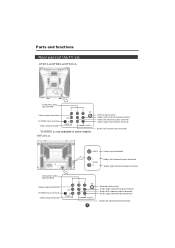
... Rear panel of the TV set HTR13-A/HTR20-A/HTF20-A Component video input terminal Video output terminal S-VIDEO input terminal Video input terminal Y Cb Cr OUT IN VIDEO1 L R AUDIO1 *S-VIDEO is only available in some models. HTF201-A Antenna input socket Audio right channel output terminal Audio left channel output terminal Audio right channel input terminal Audio left channel input terminal VIDEO Video input terminal L AUDIO R Audio left channel output terminal Audio right channel output terminal Component video input terminal Video output terminal S-VIDEO input terminal Video...
... Rear panel of the TV set HTR13-A/HTR20-A/HTF20-A Component video input terminal Video output terminal S-VIDEO input terminal Video input terminal Y Cb Cr OUT IN VIDEO1 L R AUDIO1 *S-VIDEO is only available in some models. HTF201-A Antenna input socket Audio right channel output terminal Audio left channel output terminal Audio right channel input terminal Audio left channel input terminal VIDEO Video input terminal L AUDIO R Audio left channel output terminal Audio right channel output terminal Component video input terminal Video output terminal S-VIDEO input terminal Video...
User Manual
Page 11
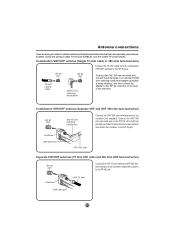
...jack. Antenna connections If you are using a flat UHF 300 ohm twin-lead wire, connect these flat wires to an optional 75/300 ohm matching transformer/adapter (available at many retailers), and then connect the adapter to the 'RF' IN connector on the back of the television. Combination VHF/UHF antenna (Single 75 ohm cable...to the RF IN jack. If you are using a cable TV service (CABLE), see the Cable TV connections. Combiner UHF 300 ohm VHF 300 ohm Separate VHF/UHF antennas (75 ohm VHF cable and 300 ohm UHF twin-lead wires) RF IN jack Connect the VHF 75 ohm cable and UHF 300 ohm...
...jack. Antenna connections If you are using a flat UHF 300 ohm twin-lead wire, connect these flat wires to an optional 75/300 ohm matching transformer/adapter (available at many retailers), and then connect the adapter to the 'RF' IN connector on the back of the television. Combination VHF/UHF antenna (Single 75 ohm cable...to the RF IN jack. If you are using a cable TV service (CABLE), see the Cable TV connections. Combiner UHF 300 ohm VHF 300 ohm Separate VHF/UHF antennas (75 ohm VHF cable and 300 ohm UHF twin-lead wires) RF IN jack Connect the VHF 75 ohm cable and UHF 300 ohm...
User Manual
Page 12
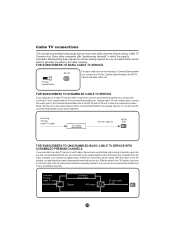
... any nonscrambled channels on your unit to the output of a converter/descrambler box, connect the incoming 75 ohm coaxial cable to select channels. Using another 75 ohm coaxial cable, connect the output jack of the unit. Set the unit to unit RF IN jack 11 Some cable companies offer "premium pay channels" in the "B" position, you can tune most cable channels without using a Cable TV Converter box. Follow the connections shown below...
... any nonscrambled channels on your unit to the output of a converter/descrambler box, connect the incoming 75 ohm coaxial cable to select channels. Using another 75 ohm coaxial cable, connect the output jack of the unit. Set the unit to unit RF IN jack 11 Some cable companies offer "premium pay channels" in the "B" position, you can tune most cable channels without using a Cable TV Converter box. Follow the connections shown below...
User Manual
Page 14
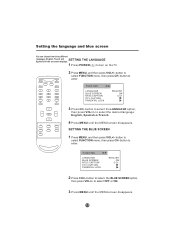
... SCREEN NTSC CAPTION DTV CAPTION PARENTAL LOCK ENGLISH ON C C1 3 Press CH- FUNCTION LANGUAGE BLUE SCREEN NTSC CAPTION DTV CAPTION PARENTAL LOCK ENGLISH ON C C1 2 Press CH+/- VOL + CC GUIDE EXIT SLEEP ARC FAV.LIST CH.LIST 2 Press MENU, and then press VOL+/- button to turn on the TV. Setting the language and blue screen You can choose from three different languages (English, French and SETTING THE LANGUAGE Spanish) for the on-screen displays. 1 Press POWER ( ) to select...
... SCREEN NTSC CAPTION DTV CAPTION PARENTAL LOCK ENGLISH ON C C1 3 Press CH- FUNCTION LANGUAGE BLUE SCREEN NTSC CAPTION DTV CAPTION PARENTAL LOCK ENGLISH ON C C1 2 Press CH+/- VOL + CC GUIDE EXIT SLEEP ARC FAV.LIST CH.LIST 2 Press MENU, and then press VOL+/- button to turn on the TV. Setting the language and blue screen You can choose from three different languages (English, French and SETTING THE LANGUAGE Spanish) for the on-screen displays. 1 Press POWER ( ) to select...
User Manual
Page 16
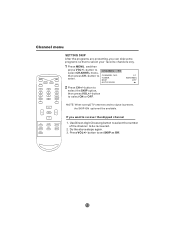
CH+ MENU CH- VOL + CC GUIDE EXIT SLEEP ARC FAV.LIST CH.LIST SETTING SKIP After the programs are presetting, you want to be available. button to enter. button to select CHANNEL menu, then press CH- button to set SKIP as Off. 15 Use Direct-digit Choosing button to select the number of the channel to recover the skipped channel 1. NOTE: When tuning DTV channels and no signal is present, the SKIP-ON option will be...
CH+ MENU CH- VOL + CC GUIDE EXIT SLEEP ARC FAV.LIST CH.LIST SETTING SKIP After the programs are presetting, you want to be available. button to enter. button to select CHANNEL menu, then press CH- button to set SKIP as Off. 15 Use Direct-digit Choosing button to select the number of the channel to recover the skipped channel 1. NOTE: When tuning DTV channels and no signal is present, the SKIP-ON option will be...
User Manual
Page 18
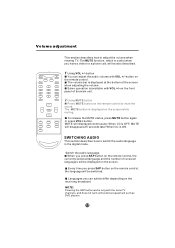
... is useful when you press SAP button on the remote control, the currently selected language and the number of the screen when adjusting the volume. When you have a visitor or a phone call, will be displayed on the remote control to mute the sound. Every time you can adjust the audio volume with external equipment such as DVD players. 17 NOTE: Pressing the SAP button works only with the some TV channels, and does not work with...
... is useful when you press SAP button on the remote control, the currently selected language and the number of the screen when adjusting the volume. When you have a visitor or a phone call, will be displayed on the remote control to mute the sound. Every time you can adjust the audio volume with external equipment such as DVD players. 17 NOTE: Pressing the SAP button works only with the some TV channels, and does not work with...
User Manual
Page 19
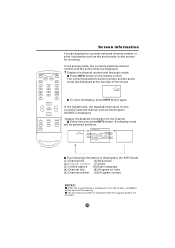
... (3) Closed caption (8) Audio language (4) Channel title (9) Program air time (5) Channel number (10) Program content NOTES: When the program guide is displayed. MUTE Q.VIEW INPUT INFO TV/DTV 1 2 3 4 5 6 7 8 9 SAP P.MODE 0 OK - In the digital mode, the detailed information for the channel. "No description provided" is displayed when the program guide is not provided. 18 Screen information You can display the currently selected channel number or other information such as the audio mode on the remote control. The currently selected channel number and...
... (3) Closed caption (8) Audio language (4) Channel title (9) Program air time (5) Channel number (10) Program content NOTES: When the program guide is displayed. MUTE Q.VIEW INPUT INFO TV/DTV 1 2 3 4 5 6 7 8 9 SAP P.MODE 0 OK - In the digital mode, the detailed information for the channel. "No description provided" is displayed when the program guide is not provided. 18 Screen information You can display the currently selected channel number or other information such as the audio mode on the remote control. The currently selected channel number and...
User Manual
Page 20
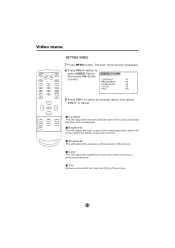
... This will mainly affect the darker areas of bright parts in the picture. VOL - to adjust. to select the desired option, then press VOL+/- CONTRAST 80 BRIGHTNESS 80 SHARPNESS 50 COLOR 50 TINT +00 3 Press CH+/- Brightness This will adjust the light output of the complete picture, which will adjust the intensity of the picture. VOL + CC GUIDE EXIT SLEEP ARC FAV.LIST CH.LIST SETTING VIDEO 1 Press MENU button.
... This will mainly affect the darker areas of bright parts in the picture. VOL - to adjust. to select the desired option, then press VOL+/- CONTRAST 80 BRIGHTNESS 80 SHARPNESS 50 COLOR 50 TINT +00 3 Press CH+/- Brightness This will adjust the light output of the complete picture, which will adjust the intensity of the picture. VOL + CC GUIDE EXIT SLEEP ARC FAV.LIST CH.LIST SETTING VIDEO 1 Press MENU button.
User Manual
Page 21
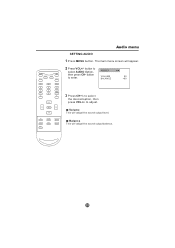
CH+ MENU CH- button to enter. VOL - VOL + CC GUIDE EXIT SLEEP ARC FAV.LIST CH.LIST Audio menu SETTING AUDIO 1 Press MENU button. Volume This will adjust the sound output balance. 20 Balance This will adjust the sound output level. The main menu screen will appear. 2 Press VOL+/- button to select AUDIO Option, AUDIO then press CH- to select the desired option, then press VOL+/- to adjust. VOLUME 80 BALANCE +00 3 Press CH+/- MUTE Q.VIEW INPUT INFO TV/DTV 1 2 3 4 5 6 7 8 9 SAP P.MODE 0 OK -
CH+ MENU CH- button to enter. VOL - VOL + CC GUIDE EXIT SLEEP ARC FAV.LIST CH.LIST Audio menu SETTING AUDIO 1 Press MENU button. Volume This will adjust the sound output balance. 20 Balance This will adjust the sound output level. The main menu screen will appear. 2 Press VOL+/- button to select AUDIO Option, AUDIO then press CH- to select the desired option, then press VOL+/- to adjust. VOLUME 80 BALANCE +00 3 Press CH+/- MUTE Q.VIEW INPUT INFO TV/DTV 1 2 3 4 5 6 7 8 9 SAP P.MODE 0 OK -
User Manual
Page 24
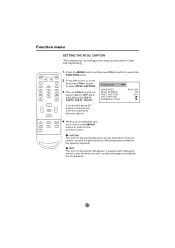
SLEEP FAV.LIST When you choose to view the captioning. MUTE Q.VIEW INPUT INFO TV/DTV 1 2 3 4 5 6 7 8 9 SAP P.MODE 0 OK - 1. Press CH- Function menu SETTING THE NTSC CAPTION This allows you to configure the way you are satisfied with GUIDE ARC CH.LIST your choice, press MENU button to return to the EXIT previous menu. button to select caption: OFF,CC1, CC2,CC3,CC4,TEXT1, TEXT2,TEXT3, TEXT4 . button to select the FUNCTION menu. 2. VOL...
SLEEP FAV.LIST When you choose to view the captioning. MUTE Q.VIEW INPUT INFO TV/DTV 1 2 3 4 5 6 7 8 9 SAP P.MODE 0 OK - 1. Press CH- Function menu SETTING THE NTSC CAPTION This allows you to configure the way you are satisfied with GUIDE ARC CH.LIST your choice, press MENU button to return to the EXIT previous menu. button to select caption: OFF,CC1, CC2,CC3,CC4,TEXT1, TEXT2,TEXT3, TEXT4 . button to select the FUNCTION menu. 2. VOL...

User Manual
Page 25
... RATING PARENTAL GUIDE CA ENG RATING CA FREN RATING DIGITAL LANGUAGE PARENTAL LOCK ON CHANGE PASSWORD NOTES: If you forget the password, you must register a password. The main menu screen will appear. to "TV RATING" and "MOVIE RATING". 2 to DTV CAPTION PARENTAL LOCK 1 2 3 enter the submenu. 4 5 6 7 8 9 SAP P.MODE 0 OK - to select the desired item. CC SLEEP FAV.LIST GUIDE ARC CH.LIST 5 After inputting password EXIT accurately, Press CH+/- CH+ MENU VOL + 4 Enter the password (4 digits) using the number buttons...
... RATING PARENTAL GUIDE CA ENG RATING CA FREN RATING DIGITAL LANGUAGE PARENTAL LOCK ON CHANGE PASSWORD NOTES: If you forget the password, you must register a password. The main menu screen will appear. to "TV RATING" and "MOVIE RATING". 2 to DTV CAPTION PARENTAL LOCK 1 2 3 enter the submenu. 4 5 6 7 8 9 SAP P.MODE 0 OK - to select the desired item. CC SLEEP FAV.LIST GUIDE ARC CH.LIST 5 After inputting password EXIT accurately, Press CH+/- CH+ MENU VOL + 4 Enter the password (4 digits) using the number buttons...

User Manual
Page 27
... DIGITAL LANGUAGE to the previous menu. PARENTAL LOCK ON CHANGE PASSWORD 4 When you are satisfied with your choice, press MENU button to return to set ON or OFF. D (Dialogue - VOL + CC GUIDE EXIT SLEEP ARC FAV.LIST CH.LIST 2 press CH+/- sexual dialogue) (applies to TV-PG, TV-14, TV-MA) 26 MUTE Q.VIEW INPUT INFO TV/DTV 1 2 3 4 5 6 7 8 9 SAP P.MODE 0 OK - VOL - Function menu TO SET PARENTAL LOCK ON/OFF 1 Enter the PARENT LOCK menu. button...
... DIGITAL LANGUAGE to the previous menu. PARENTAL LOCK ON CHANGE PASSWORD 4 When you are satisfied with your choice, press MENU button to return to set ON or OFF. D (Dialogue - VOL + CC GUIDE EXIT SLEEP ARC FAV.LIST CH.LIST 2 press CH+/- sexual dialogue) (applies to TV-PG, TV-14, TV-MA) 26 MUTE Q.VIEW INPUT INFO TV/DTV 1 2 3 4 5 6 7 8 9 SAP P.MODE 0 OK - VOL - Function menu TO SET PARENTAL LOCK ON/OFF 1 Enter the PARENT LOCK menu. button...
User Manual
Page 29
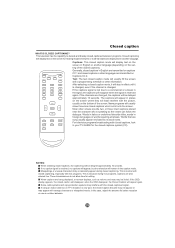
... GUIDE EXIT SLEEP ARC FAV.LIST CH.LIST Captions: This closed captioning, especially with closed caption mode will be delayed approximately 10 seconds. Some cable systems and copy protection systems may occasionally appear during live programs. This is speaking so the viewer can follow the dialogue. In this case, adjust the antenna for editing. Text: The text closed captions which scroll onto the screen. For television programs broadcasting with the picture...
... GUIDE EXIT SLEEP ARC FAV.LIST CH.LIST Captions: This closed captioning, especially with closed caption mode will be delayed approximately 10 seconds. Some cable systems and copy protection systems may occasionally appear during live programs. This is speaking so the viewer can follow the dialogue. In this case, adjust the antenna for editing. Text: The text closed captions which scroll onto the screen. For television programs broadcasting with the picture...

User Manual
Page 30
... program audio. VOL + CC GUIDE EXIT SLEEP ARC FAV.LIST CH.LIST 2 Press VOL+/- button to select DTV CAPTION and press VOL+/- The main menu screen will be available. 6 Press CH+/- There are not pre-assigned. It is up to utilize the remaining service channels. 29 button to select the CLOSED CAPTION:CC1,CC2,TEXT1, EDGE TYPE EDGE COLOR RESET TEXT2,OFF,SERVICE1,SERVICE2, SERVICE3,SERVICE4,SERVICE5,SERVICE6 OFF AUTO AUTO AUTO AUTO AUTO AUTO AUTO GREEN When setting...
... program audio. VOL + CC GUIDE EXIT SLEEP ARC FAV.LIST CH.LIST 2 Press VOL+/- button to select DTV CAPTION and press VOL+/- The main menu screen will be available. 6 Press CH+/- There are not pre-assigned. It is up to utilize the remaining service channels. 29 button to select the CLOSED CAPTION:CC1,CC2,TEXT1, EDGE TYPE EDGE COLOR RESET TEXT2,OFF,SERVICE1,SERVICE2, SERVICE3,SERVICE4,SERVICE5,SERVICE6 OFF AUTO AUTO AUTO AUTO AUTO AUTO AUTO GREEN When setting...

User Manual
Page 33
... you to select your local time zone. This is useful if you live in an area or state where daylight saving is automatically set by specially broadcasted signals. button to select your local time. 1 Press MENU. Broadcasted time information will correct the clock display for daylight saving time, based on the specially broadcasted signals. button to enter. DTV setup menu MUTE Q.VIEW INPUT INFO TV/DTV 1 2 3 4 5 6 7 8 9 SAP P.MODE 0 OK - button to select TIME option...
... you to select your local time zone. This is useful if you live in an area or state where daylight saving is automatically set by specially broadcasted signals. button to select your local time. 1 Press MENU. Broadcasted time information will correct the clock display for daylight saving time, based on the specially broadcasted signals. button to enter. DTV setup menu MUTE Q.VIEW INPUT INFO TV/DTV 1 2 3 4 5 6 7 8 9 SAP P.MODE 0 OK - button to select TIME option...
User Manual
Page 35
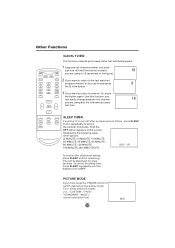
... to channel 18, press the button again. CH- MUTE Q.VIEW INPUT INFO TV/DTV 1 2 3 4 5 6 7 8 9 SAP P.MODE 0 OK - CC SLEEP TIMER SLEEP FAV.LIST GUIDE EXIT ARC CH.LIST To set the TV to turn off after a preset amount of time, press SLEEP button repeatedly to select the number of picture modes (i.e., "CUSTOM" ,"VIVID", "STANDARD" ,"MILD") can be displayed for a few seconds. To cancel the sleep timer, Press SLEEP repeatedly until the display turns to the last watched program. VOL...
... to channel 18, press the button again. CH- MUTE Q.VIEW INPUT INFO TV/DTV 1 2 3 4 5 6 7 8 9 SAP P.MODE 0 OK - CC SLEEP TIMER SLEEP FAV.LIST GUIDE EXIT ARC CH.LIST To set the TV to turn off after a preset amount of time, press SLEEP button repeatedly to select the number of picture modes (i.e., "CUSTOM" ,"VIVID", "STANDARD" ,"MILD") can be displayed for a few seconds. To cancel the sleep timer, Press SLEEP repeatedly until the display turns to the last watched program. VOL...
User Manual
Page 36
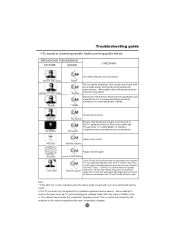
... that the power supply is normal and caused by cars, motorbikes etc, Fluorescent lamps and dirty insulators on . BREAKDOWN PHENOMENON PICTURE SOUND CHECKING Picture with your local authorized service center. 2.The TV set turned off over night. No color Adjust color control Normal volume Scramble Color Spot Adjust channel again Normal or Weak Volume Normal volume Color Purity is turned on /off with room temperature changes. 35 When the power is a fault...
... that the power supply is normal and caused by cars, motorbikes etc, Fluorescent lamps and dirty insulators on . BREAKDOWN PHENOMENON PICTURE SOUND CHECKING Picture with your local authorized service center. 2.The TV set turned off over night. No color Adjust color control Normal volume Scramble Color Spot Adjust channel again Normal or Weak Volume Normal volume Color Purity is turned on /off with room temperature changes. 35 When the power is a fault...


