
Product Manual
Page 3
English 13. Do not clean the espresso machine with a polarized plug (one way. Do not attempt to record the model and serial number. This easy-to reduce the risk resulting from becoming ... of an extension cord because it still does not fit, contact a qualified electrician for using our Haier product. You will not drape over the countertop or tabletop where it to defeat the safety purpose of your espresso machine. They are on a label on by children or tripped over a longer cord. SAVE THESE...
English 13. Do not clean the espresso machine with a polarized plug (one way. Do not attempt to record the model and serial number. This easy-to reduce the risk resulting from becoming ... of an extension cord because it still does not fit, contact a qualified electrician for using our Haier product. You will not drape over the countertop or tabletop where it to defeat the safety purpose of your espresso machine. They are on a label on by children or tripped over a longer cord. SAVE THESE...
Product Manual
Page 4
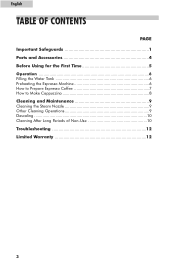
English TABLE OF CONTENTS PAGE Important Safeguards 1 Parts and Accessories 4 Before Using for the First Time 5 Operation 6 Filling the Water Tank 6 Preheating the Espresso Machine 6 How to Prepare Espresso Coffee 7 How to Make Cappuccino 8 Cleaning and Maintenance 9 Cleaning the Steam Nozzle 9 Other Cleaning Operations 9 Descaling 10 Cleaning After Long Periods of Non-Use 10 Troubleshooting 12 Limited Warranty 12 3
English TABLE OF CONTENTS PAGE Important Safeguards 1 Parts and Accessories 4 Before Using for the First Time 5 Operation 6 Filling the Water Tank 6 Preheating the Espresso Machine 6 How to Prepare Espresso Coffee 7 How to Make Cappuccino 8 Cleaning and Maintenance 9 Cleaning the Steam Nozzle 9 Other Cleaning Operations 9 Descaling 10 Cleaning After Long Periods of Non-Use 10 Troubleshooting 12 Limited Warranty 12 3
Product Manual
Page 6
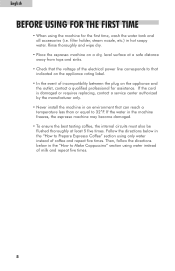
..." section using only water instead of milk and repeat five times. 5 Follow the directions below in the machine freezes, the espresso machine may become damaged. • To ensure the best tasting coffee, the internal circuits must also be flushed thoroughly at a safe distance away...the voltage of incompatibility between the plug on a dry, level surface at least 5 five times. Rinse thoroughly and wipe dry. • Place the espresso machine on the appliance and the outlet, contact a qualified professional for the first time, wash the water tank and all accessories (i.e. If the cord is...
..." section using only water instead of milk and repeat five times. 5 Follow the directions below in the machine freezes, the espresso machine may become damaged. • To ensure the best tasting coffee, the internal circuits must also be flushed thoroughly at a safe distance away...the voltage of incompatibility between the plug on a dry, level surface at least 5 five times. Rinse thoroughly and wipe dry. • Place the espresso machine on the appliance and the outlet, contact a qualified professional for the first time, wash the water tank and all accessories (i.e. If the cord is...

Product Manual
Page 7
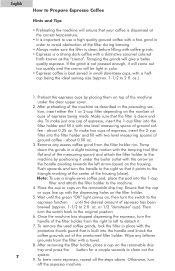
..., simply pull out the tank and fill it points to partially fill the boiler. Use the same cup that it with the arrow and dots on the right side of the housing (close). • Position a cup under the boiler outlet with the arrow on the handle pointing towards the left arrow (open... at the center of the button. Always remember to fill the tank when the water level is essential that the espresso machine be preheated. • Turn on the lower switch for about 20 seconds, then turn on. • Attach the empty filter holder to the right so that the coffee will turn...
..., simply pull out the tank and fill it points to partially fill the boiler. Use the same cup that it with the arrow and dots on the right side of the housing (close). • Position a cup under the boiler outlet with the arrow on the handle pointing towards the left arrow (open... at the center of the button. Always remember to fill the tank when the water level is essential that the espresso machine be preheated. • Turn on the lower switch for about 20 seconds, then turn on. • Attach the empty filter holder to the right so that the coffee will turn...
Product Manual
Page 8
... the left to clean out the 7 system. 9. To remove the used coffee grinds, lock the filter in small demitasse cups, with one cup of espresso, insert the 1-cup filter into the handle and knock the coffee grounds out of the overturned filter holder. Otherwise, turn the switch to the...too quickly and the crema will be light in order to avoid obstruction of the filter during brewing. • Always make two cups of espresso, insert the 2-cup filter into the 1-cup filter and attach the filter holder to the machine. 4. fee - about 0.25 oz. Note: To use a high quality ...
... the left to clean out the 7 system. 9. To remove the used coffee grinds, lock the filter in small demitasse cups, with one cup of espresso, insert the 1-cup filter into the handle and knock the coffee grounds out of the overturned filter holder. Otherwise, turn the switch to the...too quickly and the crema will be light in order to avoid obstruction of the filter during brewing. • Always make two cups of espresso, insert the 2-cup filter into the 1-cup filter and attach the filter holder to the machine. 4. fee - about 0.25 oz. Note: To use a high quality ...
Product Manual
Page 9
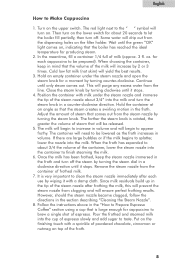
... knob for producing steam. 2. oz. for each use by turning the steam dial in the "How to Prepare Espresso Coffee" section using a cup that is rotated, the greater the volume of espresso slowly and add sugar to be lowered as the froth increases in mind that the steam creates a swirling motion in... water from the container of milk (approx. 3 fl. Wait until only steam comes out. This will drip out from clogging and will begin to about 20 seconds to Make Cappuccino 1. Close the steam knob by 2 or 3 times. If there are large bubbles or if the milk begins to be released. 5....
... knob for producing steam. 2. oz. for each use by turning the steam dial in the "How to Prepare Espresso Coffee" section using a cup that is rotated, the greater the volume of espresso slowly and add sugar to be lowered as the froth increases in mind that the steam creates a swirling motion in... water from the container of milk (approx. 3 fl. Wait until only steam comes out. This will drip out from clogging and will begin to about 20 seconds to Make Cappuccino 1. Close the steam knob by 2 or 3 times. If there are large bubbles or if the milk begins to be released. 5....
Product Manual
Page 10
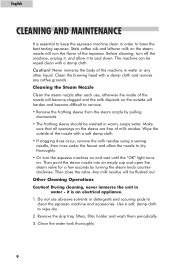
...Clean the steam nozzle after each use abrasive solvents or detergents and scouring pads to wipe dry . 2. Then point the steam nozzle into an empty cup and open the steam valve for a few seconds by pulling downwards. • The frothing sleeve should be washed in water or any coffee grounds... the flavor of the nozzle will be wiped clean with a damp cloth and remove any other liquid. Do not use , otherwise the inside of the espresso. Clean the brewing head with a damp cloth. Clean the water tank thoroughly. 9 During cleaning, never immerse the unit in order to cool down....
...Clean the steam nozzle after each use abrasive solvents or detergents and scouring pads to wipe dry . 2. Then point the steam nozzle into an empty cup and open the steam valve for a few seconds by pulling downwards. • The frothing sleeve should be washed in water or any coffee grounds... the flavor of the nozzle will be wiped clean with a damp cloth and remove any other liquid. Do not use , otherwise the inside of the espresso. Clean the brewing head with a damp cloth. Clean the water tank thoroughly. 9 During cleaning, never immerse the unit in order to cool down....
Product Manual
Page 11
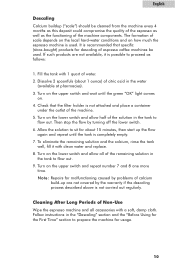
...to flow out. Turn on the lower switch and allow half of the solution in the "Descaling" section and the "Before Using for descaling of espresso coffee machines be cleaned from the machine every 4 months as this deposit could compromise the quality of the machine. 5. Then stop the flow by problems...of calcium build-up the flow again and repeat until the green "OK" light comes on how much the espresso machine is not attached and place a container under the outlet of the espresso as well as follows: 1. Turn on the upper switch and wait until the tank is not carried out regularly...
...to flow out. Turn on the lower switch and allow half of the solution in the "Descaling" section and the "Before Using for descaling of espresso coffee machines be cleaned from the machine every 4 months as this deposit could compromise the quality of the machine. 5. Then stop the flow by problems...of calcium build-up the flow again and repeat until the green "OK" light comes on how much the espresso machine is not attached and place a container under the outlet of the espresso as well as follows: 1. Turn on the upper switch and wait until the tank is not carried out regularly...
Product Manual
Page 12
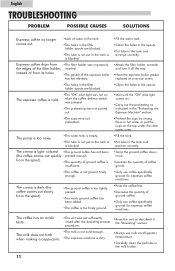
...indicated in the "Preheating the Espresso Machine" section. •The cups were not preheated. •Preheat the cups by rinsing them in hot water or put the cups on The espresso coffee is not cold enough. English TROUBLESHOOTING PROBLEM POSSIBLE CAUSES SOLUTIONS Espresso coffee no longer comes out. ..."OK" pilot light comes on. •Carry out the preheating as described in rinsed after the descaling process the "Descaling" section. Espresso coffee drips from the spout). •The quantity of ground coffee is insufficient. •Tamp the ground coffee down more. •...
...indicated in the "Preheating the Espresso Machine" section. •The cups were not preheated. •Preheat the cups by rinsing them in hot water or put the cups on The espresso coffee is not cold enough. English TROUBLESHOOTING PROBLEM POSSIBLE CAUSES SOLUTIONS Espresso coffee no longer comes out. ..."OK" pilot light comes on. •Carry out the preheating as described in rinsed after the descaling process the "Descaling" section. Espresso coffee drips from the spout). •The quantity of ground coffee is insufficient. •Tamp the ground coffee down more. •...