Product Manual
Page 2
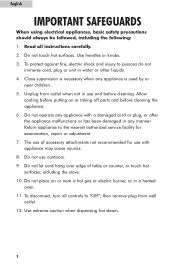
... stove. 10. Do not touch hot surfaces. Do not operate any manner. Do not use with a damaged cord or plug, or after the appliance malfunctions or has been damaged in a heated oven. 11. To disconnect, turn all instructions carefully. 2. Return appliance to persons do not immerse cord, plug or unit in use and before cleaning the appliance. 6. English IMPORTANT SAFEGUARDS...
... stove. 10. Do not touch hot surfaces. Do not operate any manner. Do not use with a damaged cord or plug, or after the appliance malfunctions or has been damaged in a heated oven. 11. To disconnect, turn all instructions carefully. 2. Return appliance to persons do not immerse cord, plug or unit in use and before cleaning the appliance. 6. English IMPORTANT SAFEGUARDS...

Product Manual
Page 3
... and cause a risk of the product. This is removed during the brewing cycle. 14. Model number Date of the appliance. To reduce the risk of electric shock, this polarized plug. If it may occur if the filter holder is a safety feature. A short power-supply cord is intended to your espresso machine. However, if you must use manual will not drape over a longer...
... and cause a risk of the product. This is removed during the brewing cycle. 14. Model number Date of the appliance. To reduce the risk of electric shock, this polarized plug. If it may occur if the filter holder is a safety feature. A short power-supply cord is intended to your espresso machine. However, if you must use manual will not drape over a longer...
Product Manual
Page 4
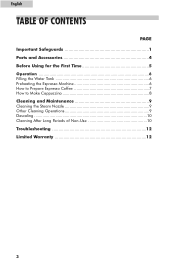
English TABLE OF CONTENTS PAGE Important Safeguards 1 Parts and Accessories 4 Before Using for the First Time 5 Operation 6 Filling the Water Tank 6 Preheating the Espresso Machine 6 How to Prepare Espresso Coffee 7 How to Make Cappuccino 8 Cleaning and Maintenance 9 Cleaning the Steam Nozzle 9 Other Cleaning Operations 9 Descaling 10 Cleaning After Long Periods of Non-Use 10 Troubleshooting 12 Limited Warranty 12 3
English TABLE OF CONTENTS PAGE Important Safeguards 1 Parts and Accessories 4 Before Using for the First Time 5 Operation 6 Filling the Water Tank 6 Preheating the Espresso Machine 6 How to Prepare Espresso Coffee 7 How to Make Cappuccino 8 Cleaning and Maintenance 9 Cleaning the Steam Nozzle 9 Other Cleaning Operations 9 Descaling 10 Cleaning After Long Periods of Non-Use 10 Troubleshooting 12 Limited Warranty 12 3

Product Manual
Page 5
PARTS AND ACCESSORIES 6 1 2 3 4 5 English 7 8 9 10 1. Removable Drip Tray 11. 1 Cup Filter 12. 2 Cup Filter (not shown) 4 Filter Holder with Protective Thumb Guard 6. Water Tank 9. Green Light 2. Upper Switch 4. Steam Knob 8. Lower Switch 5. Swing-out Steam Nozzle 10. Clear Upper Cover 11 7. Red Light 3.
PARTS AND ACCESSORIES 6 1 2 3 4 5 English 7 8 9 10 1. Removable Drip Tray 11. 1 Cup Filter 12. 2 Cup Filter (not shown) 4 Filter Holder with Protective Thumb Guard 6. Water Tank 9. Green Light 2. Upper Switch 4. Steam Knob 8. Lower Switch 5. Swing-out Steam Nozzle 10. Clear Upper Cover 11 7. Red Light 3.
Product Manual
Page 6
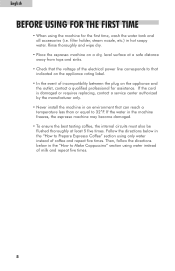
... espresso machine on a dry, level surface at least 5 five times. Then, follow the directions below in the "How to Make Cappuccino" section using water instead of the electrical power line corresponds to that can reach a temperature less than or equal to 32˚F. English BEFORE USING FOR THE FIRST TIME • When using the machine for assistance. If the cord is damaged or requires replacing...
... espresso machine on a dry, level surface at least 5 five times. Then, follow the directions below in the "How to Make Cappuccino" section using water instead of the electrical power line corresponds to that can reach a temperature less than or equal to 32˚F. English BEFORE USING FOR THE FIRST TIME • When using the machine for assistance. If the cord is damaged or requires replacing...

Product Manual
Page 7
... the empty filter holder to the " " symbol will be preheated. • Turn on the housing, then push into it may drip out from a jug. Never operate the appliance without fully removing it, pull it out halfway and pour water directly into place. Replace the tank, making sure the arrow and dots on the tank are aligned with water. The red light next to the machine by turning off...
... the empty filter holder to the " " symbol will be preheated. • Turn on the housing, then push into it may drip out from a jug. Never operate the appliance without fully removing it, pull it out halfway and pour water directly into place. Replace the tank, making sure the arrow and dots on the tank are aligned with water. The red light next to the machine by turning off...
Product Manual
Page 8
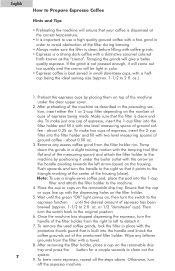
... 1 or 2-cup filter depending on the number of cups of espresso has been brewed (approx. 1-1/2 to 2 fl. fee - Remove any leftover grounds from the filter with one level measuring spoon of ground coffee - Place the cup or cups on the housing. Once the machine has stopped dispensing the espresso, turn the handle of the filter holder from the filter holder rim. To make two cups of espresso, insert the 2-cup filter into the filter holder and...
... 1 or 2-cup filter depending on the number of cups of espresso has been brewed (approx. 1-1/2 to 2 fl. fee - Remove any leftover grounds from the filter with one level measuring spoon of ground coffee - Place the cup or cups on the housing. Once the machine has stopped dispensing the espresso, turn the handle of the filter holder from the filter holder rim. To make two cups of espresso, insert the 2-cup filter into the filter holder and...
Product Manual
Page 9
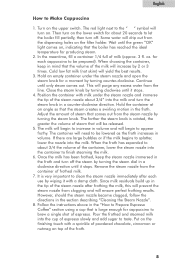
... steam creates a swirling motion in the section describing "Cleaning the Steam Nozzle". 8. Once the milk has been frothed, keep in a counter-clockwise direction. Remove the steam nozzle from the steam nozzle by turning counter-clockwise. Since milk residuals build up in the "How to Prepare Espresso Coffee" section using a cup that will drip out from the dispensing holes on , indicating that comes...
... steam creates a swirling motion in the section describing "Cleaning the Steam Nozzle". 8. Once the milk has been frothed, keep in a counter-clockwise direction. Remove the steam nozzle from the steam nozzle by turning counter-clockwise. Since milk residuals build up in the "How to Prepare Espresso Coffee" section using a cup that will drip out from the dispensing holes on , indicating that comes...
Product Manual
Page 10
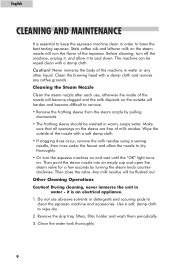
... should be washed in order to clean the espresso machine and accessories. During cleaning, never immerse the unit in water or any coffee grounds. Caution! Wipe the outside will ruin the flavor of the espresso. Other Cleaning Operations Caution! Remove the drip tray, filters, filter holder and wash them periodically. 3. Clean the brewing head with a damp cloth. Use a soft, damp cloth to remove. • Remove the frothing sleeve from the...
... should be washed in order to clean the espresso machine and accessories. During cleaning, never immerse the unit in water or any coffee grounds. Caution! Wipe the outside will ruin the flavor of the espresso. Other Cleaning Operations Caution! Remove the drip tray, filters, filter holder and wash them periodically. 3. Clean the brewing head with a damp cloth. Use a soft, damp cloth to remove. • Remove the frothing sleeve from the...
Product Manual
Page 11
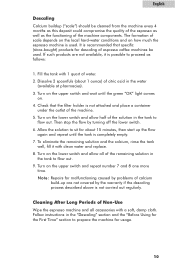
... repeat number 7 and 8 one more time. If such products are not covered by turning off the lower switch. 6. Allow the solution to prepare the machine for descaling of espresso coffee machines be cleaned from the machine every 4 months as this deposit could compromise the quality of the machine components. Cleaning After Long Periods of water. 2. Check that specific (store-bought) products for usage. 10 Follow instructions in the water...
... repeat number 7 and 8 one more time. If such products are not covered by turning off the lower switch. 6. Allow the solution to prepare the machine for descaling of espresso coffee machines be cleaned from the machine every 4 months as this deposit could compromise the quality of the machine components. Cleaning After Long Periods of water. 2. Check that specific (store-bought) products for usage. 10 Follow instructions in the water...
Product Manual
Page 12
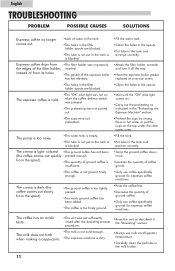
... all the way. •Have the espresso boiler gasket replaced at refrigerator temperature. •Carefully clean the pinholes in the milk frother. 11 English TROUBLESHOOTING PROBLEM POSSIBLE CAUSES SOLUTIONS Espresso coffee no longer comes out. •Lack of water in the tank. •The holes in the filter holder spouts are blocked. •Clean the holes in the spouts. •The "OK" pilot light was not...
... all the way. •Have the espresso boiler gasket replaced at refrigerator temperature. •Carefully clean the pinholes in the milk frother. 11 English TROUBLESHOOTING PROBLEM POSSIBLE CAUSES SOLUTIONS Espresso coffee no longer comes out. •Lack of water in the tank. •The holes in the filter holder spouts are blocked. •Clean the holes in the spouts. •The "OK" pilot light was not...

Product Manual
Page 13
... product, please contact Haier Customer Satisfaction Service at 1-877-337-3639 between 9:00 AM and 5:00 PM (EST) Monday to the store. This warranty gives you specific legal rights, and you . What is not covered by build-up of the store you need assistance with a comparable model. Product, whose rating label has been removed or altered. Haier will repair or replace any part free of defective parts...
... product, please contact Haier Customer Satisfaction Service at 1-877-337-3639 between 9:00 AM and 5:00 PM (EST) Monday to the store. This warranty gives you specific legal rights, and you . What is not covered by build-up of the store you need assistance with a comparable model. Product, whose rating label has been removed or altered. Haier will repair or replace any part free of defective parts...
Product Manual
Page 14
DATED PROOF OF PURCHASE REQUIRED FOR WARRANTY SERVICE 115V, 60 Hz Made in China Issued: June - 06 Haier America New York, NY 10018 Printed in China Part # SE-8888-08 IMPORTANT Do Not Return This Product To The Store If you have a problem with this product, please contact the "Haier Customer Satisfaction Center" at 1-877-337-3639.
DATED PROOF OF PURCHASE REQUIRED FOR WARRANTY SERVICE 115V, 60 Hz Made in China Issued: June - 06 Haier America New York, NY 10018 Printed in China Part # SE-8888-08 IMPORTANT Do Not Return This Product To The Store If you have a problem with this product, please contact the "Haier Customer Satisfaction Center" at 1-877-337-3639.

