
User Manual
Page 13
... 5.6 T-Mobile Address Book 95 5.7 Voice Recorder 95 5.8 Voice Notes...96 Chapter 6 Exchanging Messages 97 6.1 Messaging...98 6.2 Text Messages 99 Compose and send text messages 99 Receive text messages 99 6.3 Picture Messages 100 Create and send Picture Messages 100 View, reply to and block Picture Messages 101 6.4 Audio Postcards 102 6.5 Use Instant Messaging 104 AIM®...104 ICQ® ...105 Yahoo!® ...106 Windows Live™ Messenger 107 6.6 Set Up E-Mail 108 6.7 Use E-mail ...109 Create and reply to e-mails 109 Filter the Inbox message list...
... 5.6 T-Mobile Address Book 95 5.7 Voice Recorder 95 5.8 Voice Notes...96 Chapter 6 Exchanging Messages 97 6.1 Messaging...98 6.2 Text Messages 99 Compose and send text messages 99 Receive text messages 99 6.3 Picture Messages 100 Create and send Picture Messages 100 View, reply to and block Picture Messages 101 6.4 Audio Postcards 102 6.5 Use Instant Messaging 104 AIM®...104 ICQ® ...105 Yahoo!® ...106 Windows Live™ Messenger 107 6.6 Set Up E-Mail 108 6.7 Use E-mail ...109 Create and reply to e-mails 109 Filter the Inbox message list...

User Manual
Page 18
... Our Customer Care team can always access free online help for your account at www.support.t-mobile. In addition, you with detailed instructions on your device. Just dial 1-800-937-8997 or 611 on using your T-Mobile ShadowTM and services. You will also find information from the following sources: Windows Mobile® Web site (http://www.microsoft.com/windowsmobile) T-Mobile Customer Care The T-Mobile Customer Care team offers responsive...
... Our Customer Care team can always access free online help for your account at www.support.t-mobile. In addition, you with detailed instructions on your device. Just dial 1-800-937-8997 or 611 on using your T-Mobile ShadowTM and services. You will also find information from the following sources: Windows Mobile® Web site (http://www.microsoft.com/windowsmobile) T-Mobile Customer Care The T-Mobile Customer Care team offers responsive...
User Manual
Page 23
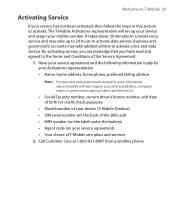
...; Model number of your device (T-Mobile Shadow) • SIM serial number (on your mobile number. Have your service agreement and the following information ready for your Activations representative: • Name, home address, home phone, preferred billing address Note For business and government accounts, your Activations representative will set up to 24 hours to activate voice and data service. Business and government accounts may take additional time to activate data service. It takes about 20 minutes to activate voice service and...
...; Model number of your device (T-Mobile Shadow) • SIM serial number (on your mobile number. Have your service agreement and the following information ready for your Activations representative: • Name, home address, home phone, preferred billing address Note For business and government accounts, your Activations representative will set up to 24 hours to activate voice and data service. Business and government accounts may take additional time to activate data service. It takes about 20 minutes to activate voice service and...

User Manual
Page 41
... work and personal email. Messaging Messenger Send and receive e-mails, text messages, and picture messages. phone numbers you call most in your PC. View and manage pictures, animated GIFs, and video files on any network, and have them with your life. PowerPoint Mobile View Microsoft® PowerPoint® presentation files. OneNote Mobile Create OneNote files on your phone and then synchronize them displayed on the Home Screen Shortcut Bar, you use it. Set Up E-Mail Enjoy unlimited access to hide Set Up E-mail on your e-mail...
... work and personal email. Messaging Messenger Send and receive e-mails, text messages, and picture messages. phone numbers you call most in your PC. View and manage pictures, animated GIFs, and video files on any network, and have them with your life. PowerPoint Mobile View Microsoft® PowerPoint® presentation files. OneNote Mobile Create OneNote files on your phone and then synchronize them displayed on the Home Screen Shortcut Bar, you use it. Set Up E-Mail Enjoy unlimited access to hide Set Up E-mail on your e-mail...

User Manual
Page 51
... Low battery Very low battery Battery charging No battery or battery fault Lowercase text input Uppercase text input, caps lock Uppercase text input Numeric or symbol input (labeled in blue color), locked Numeric or symbol input (labeled in brown color) T9 text input mode, lowercase T9 text input mode, uppercase T9 text input mode, caps lock EDGE in use GPRS in use New e-mail or text message (SMS, Short Message Service) New instant message from Live Messenger Signal strength Radio connected or no signal Radio off Vibrate call...
... Low battery Very low battery Battery charging No battery or battery fault Lowercase text input Uppercase text input, caps lock Uppercase text input Numeric or symbol input (labeled in blue color), locked Numeric or symbol input (labeled in brown color) T9 text input mode, lowercase T9 text input mode, uppercase T9 text input mode, caps lock EDGE in use GPRS in use New e-mail or text message (SMS, Short Message Service) New instant message from Live Messenger Signal strength Radio connected or no signal Radio off Vibrate call...

User Manual
Page 56
... CENTER SELECT again dials the associated number. To customize calls You can also select a contact in Contacts, select Menu > Find Contact. • To send a text message, select Menu > Send Text Message. • To send an e-mail, select Menu > E-mail. • To find the duration of a call, select Menu > View Timers. • To remove a call , and the length of calls or numbers from Call History, select Menu > Delete List. 56 Using Phone Features To specify the number to m (mobile), w (work), or h (home). Select a number and press or press...
... CENTER SELECT again dials the associated number. To customize calls You can also select a contact in Contacts, select Menu > Find Contact. • To send a text message, select Menu > Send Text Message. • To send an e-mail, select Menu > E-mail. • To find the duration of a call, select Menu > View Timers. • To remove a call , and the length of calls or numbers from Call History, select Menu > Delete List. 56 Using Phone Features To specify the number to m (mobile), w (work), or h (home). Select a number and press or press...

User Manual
Page 67
... use a Bluetooth connection. Notes • To preserve battery power, turn off Bluetooth when not in Bluetooth or be installed with the PC using Bluetooth. Make sure that Bluetooth on both your phone and the computer are turned on and set up the synchronization software (Windows Mobile® Device Center or ActiveSync) on your phone and set to Visible mode. Synchronizing Information with Your Computer 67 3.5 Synchronizing via Bluetooth You can connect and synchronize your phone with a Bluetooth...
... use a Bluetooth connection. Notes • To preserve battery power, turn off Bluetooth when not in Bluetooth or be installed with the PC using Bluetooth. Make sure that Bluetooth on both your phone and the computer are turned on and set up the synchronization software (Windows Mobile® Device Center or ActiveSync) on your phone and set to Visible mode. Synchronizing Information with Your Computer 67 3.5 Synchronizing via Bluetooth You can connect and synchronize your phone with a Bluetooth...

User Manual
Page 70
.... On the Home screen, select Start > Settings > Home Screen. 2. Set date, time, language, and other regional options Your phone should already be set up the Home screen The Home screen is skipped. 5. On the Home screen, select Start > Settings > More > Regional Settings. 2. On the Home screen, scroll down to set a picture as Home Screen. 4. Use the NAVIGATION WHEEL to all features and programs from the Shortcut Bar. Tip If you only want to on the Shortcut Bar, and then select Change Wallpaper. In...
.... On the Home screen, select Start > Settings > Home Screen. 2. Set date, time, language, and other regional options Your phone should already be set up the Home screen The Home screen is skipped. 5. On the Home screen, select Start > Settings > More > Regional Settings. 2. On the Home screen, scroll down to set a picture as Home Screen. 4. Use the NAVIGATION WHEEL to all features and programs from the Shortcut Bar. Tip If you only want to on the Shortcut Bar, and then select Change Wallpaper. In...

User Manual
Page 80
WARNING! Select Start > Accessories > Clear Storage. 2. Use ActiveSync® or Windows Mobile® Device Center to access the encrypted files on -screen instructions to the storage card. To reset your phone will restart after it is recommended that you restart the phone while a program is running. 4.7 Resetting Your Phone Resetting your phone 1. To restart the phone 1. Otherwise you will be deleted, it has been reset. After the procedure, copy your files back to reset the phone. WARNING! Follow the...
WARNING! Select Start > Accessories > Clear Storage. 2. Use ActiveSync® or Windows Mobile® Device Center to access the encrypted files on -screen instructions to the storage card. To reset your phone will restart after it is recommended that you restart the phone while a program is running. 4.7 Resetting Your Phone Resetting your phone 1. To restart the phone 1. Otherwise you will be deleted, it has been reset. After the procedure, copy your files back to reset the phone. WARNING! Follow the...

User Manual
Page 86
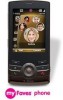
... U.S. To display your phone number in your SIM card and then select Save. 86 Managing your mobile phone number. 4. On the SIM Manager screen, select Menu > Tools > List of the contact's phone numbers that you call most in SIM Manager 1. Change the name, if desired, then enter your Phone 4. Simply choose any network, and have them displayed on the SIM Manager screen. 5.3 T-Mobile® myFavesSM T-Mobile® myFavesSM helps you stay connected to your life. Select Menu > Contacts to this service, visit...
... U.S. To display your phone number in your SIM card and then select Save. 86 Managing your mobile phone number. 4. On the SIM Manager screen, select Menu > Tools > List of the contact's phone numbers that you call most in SIM Manager 1. Change the name, if desired, then enter your Phone 4. Simply choose any network, and have them displayed on the SIM Manager screen. 5.3 T-Mobile® myFavesSM T-Mobile® myFavesSM helps you stay connected to your life. Select Menu > Contacts to this service, visit...

User Manual
Page 88
...firmation screen, select Yes. 8. Select Options > Rotate to take a picture, download from your phone. Set a Ring tone for details. 2. Under Icon, select Change icon to your Phone 3. See "Rotate and crop a picture" for details. 4. Select the Birthday and/or Anniversary reminder check boxes according to associate the contact with an image. 88 Managing your preference and enter the date. 6. Take a picture or open letting you quickly call, send a text message, or...
...firmation screen, select Yes. 8. Select Options > Rotate to take a picture, download from your phone. Set a Ring tone for details. 2. Under Icon, select Change icon to your Phone 3. See "Rotate and crop a picture" for details. 4. Select the Birthday and/or Anniversary reminder check boxes according to associate the contact with an image. 88 Managing your preference and enter the date. 6. Take a picture or open letting you quickly call, send a text message, or...

User Manual
Page 90
... Icons to take a picture, use icons or pictures in your primary myFaves contact. Modify the contact's name, phone number, or photo. • Edit Email. On the Home screen, select the myFaves contact you want to synchronize with another contact. • Set As Favorite. Set the current contact as your first myFaves contact on the Home screen, and will also be selected automatically whenever you set an icon for a current or new myFaves contact. Edit a myFaves contact 1. Add or change the e-mail address...
... Icons to take a picture, use icons or pictures in your primary myFaves contact. Modify the contact's name, phone number, or photo. • Edit Email. On the Home screen, select the myFaves contact you want to synchronize with another contact. • Set As Favorite. Set the current contact as your first myFaves contact on the Home screen, and will also be selected automatically whenever you set an icon for a current or new myFaves contact. Edit a myFaves contact 1. Add or change the e-mail address...

User Manual
Page 113
...mail account, then select Menu > Settings. 3. On the E-mail Sync screen, set the Download size limit and Message format. 5. You can make changes to send and receive messages. Customize e-mail settings To change the download size, e-mail format, and other settings for connecting to the Internet automatically to your e-mail address, user name, password, etc., and customize the following settings: Options Automatic Send/Receive Download messages Description Select a time interval for POP3/IMAP4 e-mail 1. Select Start > Messaging. 2. Use the up/down NAVIGATION WHEEL to select your phone...
...mail account, then select Menu > Settings. 3. On the E-mail Sync screen, set the Download size limit and Message format. 5. You can make changes to send and receive messages. Customize e-mail settings To change the download size, e-mail format, and other settings for connecting to the Internet automatically to your e-mail address, user name, password, etc., and customize the following settings: Options Automatic Send/Receive Download messages Description Select a time interval for POP3/IMAP4 e-mail 1. Select Start > Messaging. 2. Use the up/down NAVIGATION WHEEL to select your phone...

User Manual
Page 124
... you will receive e-mails as they arrive. state, you need to receive new e-mails on the Exchange Server. To make Direct Push work, you to manually Note The option you set in your Inbox on your phone and the Exchange Server first before you can use in the retrieve your messages more easily. Automatic synchronization through Direct Push Direct Push technology (push e-mail feature) enables you need to your...
... you will receive e-mails as they arrive. state, you need to receive new e-mails on the Exchange Server. To make Direct Push work, you to manually Note The option you set in your Inbox on your phone and the Exchange Server first before you can use in the retrieve your messages more easily. Automatic synchronization through Direct Push Direct Push technology (push e-mail feature) enables you need to your...

User Manual
Page 138
... T-Mobile HotSpot Username and Password and select OK. Select Start > T-Mobile HotSpot > HotSpot Status. 2. To change the HotSpot Utility settings The HotSpot Utility will see on the Home screen changes to the T-Mobile HotSpot, you will see (this means it is trying to connect) on Wi-Fi from T-Mobile HotSpot 1. Select Menu > Advanced Settings. 138 Getting Connected To log in to display the status of the Home screen...
... T-Mobile HotSpot Username and Password and select OK. Select Start > T-Mobile HotSpot > HotSpot Status. 2. To change the HotSpot Utility settings The HotSpot Utility will see on the Home screen changes to the T-Mobile HotSpot, you will see (this means it is trying to connect) on Wi-Fi from T-Mobile HotSpot 1. Select Menu > Advanced Settings. 138 Getting Connected To log in to display the status of the Home screen...

User Manual
Page 139
... to get a T-Mobile HotSpot account, select Sign up ' request: If not selected, the HotSpot Found screen will not be cleared. To reset HotSpot Utility settings 1. If you want . Select Menu > Reset All. Select or clear the options you to connect when you are not correctly filled in a T-Mobile HotSpot location. Select OK. Select Start > T-Mobile HotSpot > HotSpot Settings. 2. 3. Note The Username and Password fields will also...
... to get a T-Mobile HotSpot account, select Sign up ' request: If not selected, the HotSpot Found screen will not be cleared. To reset HotSpot Utility settings 1. If you want . Select Menu > Reset All. Select or clear the options you to connect when you are not correctly filled in a T-Mobile HotSpot location. Select OK. Select Start > T-Mobile HotSpot > HotSpot Settings. 2. 3. Note The Username and Password fields will also...

User Manual
Page 143
... services to access the T-Mobile GPRS/EDGE network. In Description, enter a name for the connection. On the Home screen, select Start > Settings > Connections > Dial-up and Others When you use your phone to dial your ISP and connect to the Internet or to your phone. In Description, enter a name for the connection. 3. Note T-Mobile GPRS/EDGE settings are required. 1. You need a data plan to stop working. In Connects to send and receive Picture Messages on your phone or are accidentally deleted, obtain the Access...
... services to access the T-Mobile GPRS/EDGE network. In Description, enter a name for the connection. On the Home screen, select Start > Settings > Connections > Dial-up and Others When you use your phone to dial your ISP and connect to the Internet or to your phone. In Description, enter a name for the connection. 3. Note T-Mobile GPRS/EDGE settings are required. 1. You need a data plan to stop working. In Connects to send and receive Picture Messages on your phone or are accidentally deleted, obtain the Access...

User Manual
Page 144
... Home screen, select Start > Settings > Connections > Menu > Advanced. 2. You can access advanced options to specify the service provider, the number of redial attempts, the amount of idle time to let the phone set up a dial-up > Add. 2. Select Menu > Options. To view these pages in Internet Explorer® Mobile, you can choose Automatic to wait before disconnecting, and so on your corporate network 1. In Description, enter a name for Internet URLs. Select Menu > Work...
... Home screen, select Start > Settings > Connections > Menu > Advanced. 2. You can access advanced options to specify the service provider, the number of redial attempts, the amount of idle time to let the phone set up a dial-up > Add. 2. Select Menu > Options. To view these pages in Internet Explorer® Mobile, you can choose Automatic to wait before disconnecting, and so on your corporate network 1. In Description, enter a name for Internet URLs. Select Menu > Work...

User Manual
Page 171
... your phone, see Windows Mobile® Device Center or ActiveSync Help on your PC. For more information about copying files from your phone. On the Home screen, select Start > Pictures & Videos. 2. Note If you view and manage photos, animated GIFs, and video files on your PC to the folder you created on your phone using a memory card. This icon indicates that the file is a video file. View media files 1. Copy pictures, animated GIFs and video clips You can also copy pictures and video files from...
... your phone, see Windows Mobile® Device Center or ActiveSync Help on your PC. For more information about copying files from your phone. On the Home screen, select Start > Pictures & Videos. 2. Note If you view and manage photos, animated GIFs, and video files on your PC to the folder you created on your phone using a memory card. This icon indicates that the file is a video file. View media files 1. Copy pictures, animated GIFs and video clips You can also copy pictures and video files from...

User Manual
Page 209
... Event notification 71 Index 209 Excel Mobile 41, 188 Exchange Server 118 - SIM contacts to phone 72 Currency setting 70 Customize Home screen 70 D Date setting 70 Device lock 79 Dial-up connection 143 Digitally sign messages 132, 133 Digital Rights Management (DRM) 176 Digital signature - View and edit a contact 82 Contacts picture (capture mode) 164 Copy - online 130 Flag your messages 127 Font size (display) 73 Forward message 111 G Games 40 GPRS 143 H Handango InHand 40 Home screen - change...
... Event notification 71 Index 209 Excel Mobile 41, 188 Exchange Server 118 - SIM contacts to phone 72 Currency setting 70 Customize Home screen 70 D Date setting 70 Device lock 79 Dial-up connection 143 Digitally sign messages 132, 133 Digital Rights Management (DRM) 176 Digital signature - View and edit a contact 82 Contacts picture (capture mode) 164 Copy - online 130 Flag your messages 127 Font size (display) 73 Forward message 111 G Games 40 GPRS 143 H Handango InHand 40 Home screen - change...


