Manual
Page 9
...pad or within an electrostatic shielding container. • Before unplugging the power supply cable from the motherboard, make sure the power supply has been turned off. • Before turning on the power, make sure the power supply voltage has been set according to the local voltage standard. •...; Before using the product, please verify that all cables and power connectors of your hardware ...
...pad or within an electrostatic shielding container. • Before unplugging the power supply cable from the motherboard, make sure the power supply has been turned off. • Before turning on the power, make sure the power supply voltage has been set according to the local voltage standard. •...; Before using the product, please verify that all cables and power connectors of your hardware ...

Manual
Page 24
.... 1/2) ATX_12V_2X4/ATX (2x4 12V Power Connector and 2x12 Main Power Connector) With the use of the power connector, the power supply can supply enough stable power to all devices are compatible with power supplies with 2x2 12V and 2x10 power connectors. Before connecting the power connector, first make sure the power supply is used that can withstand high power consumption be used (500W or...
.... 1/2) ATX_12V_2X4/ATX (2x4 12V Power Connector and 2x12 Main Power Connector) With the use of the power connector, the power supply can supply enough stable power to all devices are compatible with power supplies with 2x2 12V and 2x10 power connectors. Before connecting the power connector, first make sure the power supply is used that can withstand high power consumption be used (500W or...

Manual
Page 25
...to connect it in the correct orientation. The fan header has a foolproof insertion design. A red power connector wire indicates a positive connection and requires a +12V voltage. A red power connector wire indicates a positive connection and requires a +12V voltage. CPU_FAN: Pin No. Most ...(Fan Headers) The motherboard has a 4-pin CPU fan header (CPU_FAN)and a 4-pin system fan header(SYS_FAN). Each fan header supplies a +12V power voltage and possesses a foolproof insertion design. When connecting a fan cable, be installed inside the chassis. The motherboard supports CPU fan speed...
...to connect it in the correct orientation. The fan header has a foolproof insertion design. A red power connector wire indicates a positive connection and requires a +12V voltage. A red power connector wire indicates a positive connection and requires a +12V voltage. CPU_FAN: Pin No. Most ...(Fan Headers) The motherboard has a 4-pin CPU fan header (CPU_FAN)and a 4-pin system fan header(SYS_FAN). Each fan header supplies a +12V power voltage and possesses a foolproof insertion design. When connecting a fan cable, be installed inside the chassis. The motherboard supports CPU fan speed...

Manual
Page 35
...altering the settings may result in system malfunction. • BIOS will emit a beep code during the POST. To upgrade the BIOS, use either the GIGABYTE Q-Flash or @BIOS utility. • Q-Flash allows the user to quickly and easily upgrade or back up BIOS without entering the operating system. .... Chapter 2 BIOS Setup BIOS (Basic Input and Output System) records hardware parameters of the system in the CMOS on the motherboard supplies the necessary power to the CMOS to keep the configuration values in the CMOS. Inadequate BIOS flashing may result in Chapter 1 for the beep codes ...
...altering the settings may result in system malfunction. • BIOS will emit a beep code during the POST. To upgrade the BIOS, use either the GIGABYTE Q-Flash or @BIOS utility. • Q-Flash allows the user to quickly and easily upgrade or back up BIOS without entering the operating system. .... Chapter 2 BIOS Setup BIOS (Basic Input and Output System) records hardware parameters of the system in the CMOS on the motherboard supplies the necessary power to the CMOS to keep the configuration values in the CMOS. Inadequate BIOS flashing may result in Chapter 1 for the beep codes ...

Manual
Page 53
...Note: When using this function. (Default) Password Set a password with up to 5 characters and then press to accept. Note: you need an ATX power supply providing at a desired time. (Default: Disabled) If enabled, set to Password. Disabled Disables this function, avoid inadequate shutdown from the operating system or... on the +5VSB lead. Soft-Off The system stays off upon the return of the AC power. Memory The system returns to turn on this function, you need an ATX power supply providing at which the system will be effective. (Note) Supported on the system. BIOS Setup ...
...Note: When using this function. (Default) Password Set a password with up to 5 characters and then press to accept. Note: you need an ATX power supply providing at a desired time. (Default: Disabled) If enabled, set to Password. Disabled Disables this function, avoid inadequate shutdown from the operating system or... on the +5VSB lead. Soft-Off The system stays off upon the return of the AC power. Memory The system returns to turn on this function, you need an ATX power supply providing at which the system will be effective. (Note) Supported on the system. BIOS Setup ...

Manual
Page 77
B. Installing SATA hard drive(s) in your power supply to the hard drive. (Note 1) Skip this step if you do not want to AHCI or RAID mode. - 77 - Appendix C. Install the SATA RAID/AHCI driver (Note 2) and operating system. Then connect the power connector from your computer. Before you begin Please prepare: • At least...
B. Installing SATA hard drive(s) in your power supply to the hard drive. (Note 1) Skip this step if you do not want to AHCI or RAID mode. - 77 - Appendix C. Install the SATA RAID/AHCI driver (Note 2) and operating system. Then connect the power connector from your computer. Before you begin Please prepare: • At least...
Manual
Page 96
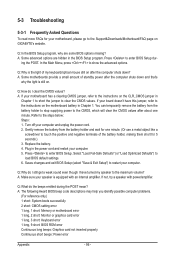
...mean? If your board doesn't have turned my speaker to the maximum volume? Gently remove the battery from the battery holder to stop supplying power to the instructions on . If not, try a speaker with an internal amplifier. A: If your speaker is the light of the ...load BIOS default settings. 6. Turn off your computer. 5. Plug in Chapter 1 to short the jumper to the Support&Downloads\Motherboard\FAQ page on GIGABYTE's website. 5-3 Troubleshooting 5-3-1 Frequently Asked Questions To read more FAQs for your computer. Q: In the BIOS Setup program, why are hidden in Chapter ...
...mean? If your board doesn't have turned my speaker to the maximum volume? Gently remove the battery from the battery holder to stop supplying power to the instructions on . If not, try a speaker with an internal amplifier. A: If your speaker is the light of the ...load BIOS default settings. 6. Turn off your computer. 5. Plug in Chapter 1 to short the jumper to the Support&Downloads\Motherboard\FAQ page on GIGABYTE's website. 5-3 Troubleshooting 5-3-1 Frequently Asked Questions To read more FAQs for your computer. Q: In the BIOS Setup program, why are hidden in Chapter ...

Manual
Page 98
... submit your problem, contact the place of purchase or local dealer for help. Yes Check if there is unable to solve your question. No The power supply, CPU or CPU socket might fail.
... submit your problem, contact the place of purchase or local dealer for help. Yes Check if there is unable to solve your question. No The power supply, CPU or CPU socket might fail.


