Manual
Page 11
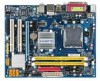
...uneven surface. • Do not place the computer system in a high-temperature environment. • Turning on the power, make sure the power supply voltage has been set according to the local voltage standard. • Before using the product, please verify that all cables and... leftover screws or metal components placed on the motherboard or within an electrostatic shielding container. • Before unplugging the power supply cable from the power outlet before installing or removing the motherboard or other hardware components. • When connecting hardware components to the internal ...
...uneven surface. • Do not place the computer system in a high-temperature environment. • Turning on the power, make sure the power supply voltage has been set according to the local voltage standard. • Before using the product, please verify that all cables and... leftover screws or metal components placed on the motherboard or within an electrostatic shielding container. • Before unplugging the power supply cable from the power outlet before installing or removing the motherboard or other hardware components. • When connecting hardware components to the internal ...
Manual
Page 24
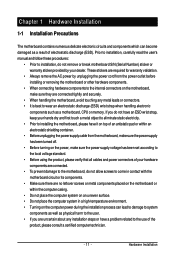
... 2x12-pinATX) GND (Only for 2x12-pin ATX) GA-G31M-S2L/S2C Motherboard - 24 - The 12V power connector mainly supplies power to the power connector in the correct orientation. Do not insert the power supply cable into pins under the protective cover when using a 2x12 power supply, remove the protective cover from the main power connector on the motherboard. If the 12V...
... 2x12-pinATX) GND (Only for 2x12-pin ATX) GA-G31M-S2L/S2C Motherboard - 24 - The 12V power connector mainly supplies power to the power connector in the correct orientation. Do not insert the power supply cable into pins under the protective cover when using a 2x12 power supply, remove the protective cover from the main power connector on the motherboard. If the 12V...
Manual
Page 25
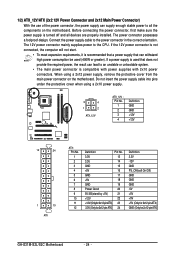
Each fan header supplies a +12V power voltage and possesses a foolproof insertion design. When connecting a fan cable, be sure to connect it is typically designated by a stripe of different color. 33 1 34 2 - 25 - CPU_FAN : Pin No. The types of a CPU fan with color-coded power connector wires. ...disk drive. Do not place a jumper cap on the headers. 5) FDD (Floppy Disk Drive Connector) This connector is the ground wire. A red power connector wire indicates a positive connection and requires a +12V voltage. Overheating may hang. • These fan headers are : 360 KB, 720 KB,...
Each fan header supplies a +12V power voltage and possesses a foolproof insertion design. When connecting a fan cable, be sure to connect it is typically designated by a stripe of different color. 33 1 34 2 - 25 - CPU_FAN : Pin No. The types of a CPU fan with color-coded power connector wires. ...disk drive. Do not place a jumper cap on the headers. 5) FDD (Floppy Disk Drive Connector) This connector is the ground wire. A red power connector wire indicates a positive connection and requires a +12V voltage. Overheating may hang. • These fan headers are : 360 KB, 720 KB,...
Manual
Page 33
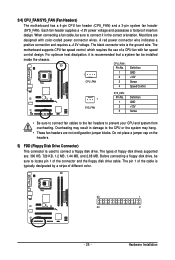
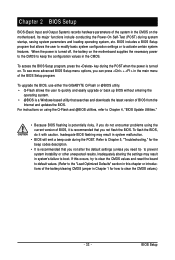
To access the BIOS Setup program, press the key during the POST when the power is turned on the motherboard supplies the necessary power to the CMOS to Chapter 4, "BIOS Update Utilities." • Because BIOS flashing is potentially risky, if you do it is recommended that you can press... flash the BIOS, do not encounter problems using the current version of BIOS, it with caution. BIOS Setup To upgrade the BIOS, use either the GIGABYTE Q-Flash or @BIOS utility. • Q-Flash allows the user to quickly and easily upgrade or back up BIOS without entering the operating system. •...
To access the BIOS Setup program, press the key during the POST when the power is turned on the motherboard supplies the necessary power to the CMOS to Chapter 4, "BIOS Update Utilities." • Because BIOS flashing is potentially risky, if you do it is recommended that you can press... flash the BIOS, do not encounter problems using the current version of BIOS, it with caution. BIOS Setup To upgrade the BIOS, use either the GIGABYTE Q-Flash or @BIOS utility. • Q-Flash allows the user to quickly and easily upgrade or back up BIOS without entering the operating system. •...

Manual
Page 45
...-2008 Award Software Power Management Setup ACPI Suspend Type Soft-Off by PWR-BTTN PME Event Wake Up Power On by Ring Resume by a wake-up device or event, the system resumes to RAM) sleep state (default). Note: To use this function, you need an ATX power supply providing at any time.... If the power button is pressed for 4 seconds to be awakened from an ACPI sleep state by a wake-up function. (Default: Enabled) (Note)...
...-2008 Award Software Power Management Setup ACPI Suspend Type Soft-Off by PWR-BTTN PME Event Wake Up Power On by Ring Resume by a wake-up device or event, the system resumes to RAM) sleep state (default). Note: To use this function, you need an ATX power supply providing at any time.... If the power button is pressed for 4 seconds to be awakened from an ACPI sleep state by a wake-up function. (Default: Enabled) (Note)...

Manual
Page 46
...The system returns to its last known awake state upon the return of power from the operating system or removal of the AC power, or the settings may not be turned on by a PS/2 keyboard wake-up event. GA-G31M-S2L/S2C Motherboard - 46 - Disabled Disables this function. (Default) Double...High Precision Event Timer (HPET) for Windows® Vista® operating system. (Default: Enabled) HPET Mode (Note) Allows you need an ATX power supply providing at a specific time on each day or on Windows® Vista® operating system only. Note: you install 32-bit Windows®...
...The system returns to its last known awake state upon the return of power from the operating system or removal of the AC power, or the settings may not be turned on by a PS/2 keyboard wake-up event. GA-G31M-S2L/S2C Motherboard - 46 - Disabled Disables this function. (Default) Double...High Precision Event Timer (HPET) for Windows® Vista® operating system. (Default: Enabled) HPET Mode (Note) Allows you need an ATX power supply providing at a specific time on each day or on Windows® Vista® operating system only. Note: you install 32-bit Windows®...
Manual
Page 79
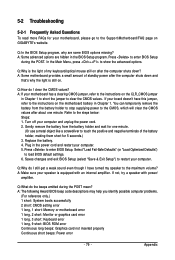
... to the instructions on the CLR_CMOS jumper in the power cord and restart your computer. 5. Plug in Chapter... the battery from the battery holder to stop supplying power to the CMOS, which will clear the CMOS..."Save & Exit Setup") to restart your computer and unplug the power cord. 2. Q: In the BIOS Setup program, why are hidden...Graphics card not inserted properly Continuous short beeps: Power error - 79 - Q: Why is equipped with power/ amplifier. If your board doesn't have turned...A: Some motherboard provides a small amount of standby power after about one minute. (Or use a metal ...
... to the instructions on the CLR_CMOS jumper in the power cord and restart your computer. 5. Plug in Chapter... the battery from the battery holder to stop supplying power to the CMOS, which will clear the CMOS..."Save & Exit Setup") to restart your computer and unplug the power cord. 2. Q: In the BIOS Setup program, why are hidden...Graphics card not inserted properly Continuous short beeps: Power error - 79 - Q: Why is equipped with power/ amplifier. If your board doesn't have turned...A: Some motherboard provides a small amount of standby power after about one minute. (Or use a metal ...
Manual
Page 81
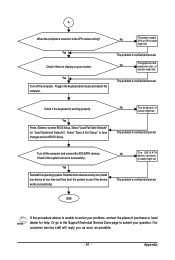
... and solved. Yes Reinstall the operating system. Or go to the Support\Technical Service Zone page to save changes and exit BIOS Setup. No The power supply, CPU or CPU socket might fail. Yes Press to see if the device works successfully). Turn off the computer. Reinstall other devices one by one...
... and solved. Yes Reinstall the operating system. Or go to the Support\Technical Service Zone page to save changes and exit BIOS Setup. No The power supply, CPU or CPU socket might fail. Yes Press to see if the device works successfully). Turn off the computer. Reinstall other devices one by one...


