Manual
Page 4
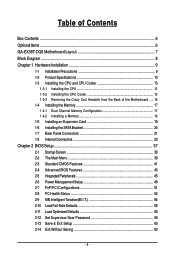
Table of Contents Box Contents ...6 OptionalItems ...6 GA-EX38T-DQ6 Motherboard Layout 7 Block Diagram ...8 Chapter 1 Hardware Installation 9 1-1 Installation Precautions 9 1-2 Product Specifications 10 1-3 Installing the CPU and CPU Cooler 13 1-3-1 Installing the CPU 13 1-3-2 Installing the CPU Cooler 15 1-3-3 Removing the Crazy Cool Heatsink from the Back of the Motherboard ..... 16 1-4 Installing the Memory 17 1-4-1 Dual Channel...
Table of Contents Box Contents ...6 OptionalItems ...6 GA-EX38T-DQ6 Motherboard Layout 7 Block Diagram ...8 Chapter 1 Hardware Installation 9 1-1 Installation Precautions 9 1-2 Product Specifications 10 1-3 Installing the CPU and CPU Cooler 13 1-3-1 Installing the CPU 13 1-3-2 Installing the CPU Cooler 15 1-3-3 Removing the Crazy Cool Heatsink from the Back of the Motherboard ..... 16 1-4 Installing the Memory 17 1-4-1 Dual Channel...
Manual
Page 16
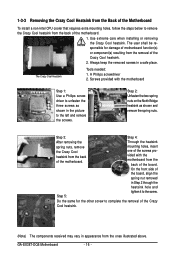
... shall be responsible for the other screw to complete the removal of the Crazy Cool heatsink. (Note) The components received may vary in the picture to the left and remove the screws. GA-EX38T-DQ6 Motherboard - 16 - Through the heatsink mounting holes, insert one of the screws provided with the motherboard Step 1: Use a Philips screwdriver...
... shall be responsible for the other screw to complete the removal of the Crazy Cool heatsink. (Note) The components received may vary in the picture to the left and remove the screws. GA-EX38T-DQ6 Motherboard - 16 - Through the heatsink mounting holes, insert one of the screws provided with the motherboard Step 1: Use a Philips screwdriver...

