Manual
Page 1
GA-8VM800PMD-775 Intel® Pentium® 4 LGA775 Processor Motherboard User's Manual Rev. 1001 12ME-VM800PMT-1001R * The WEEE marking on the product indicates this product must not be disposed of with user's other household waste and must be handed over to a designated collection point for the recycling of waste electrical and electronic equipment!! * The WEEE marking applies only in European Union's member states.
GA-8VM800PMD-775 Intel® Pentium® 4 LGA775 Processor Motherboard User's Manual Rev. 1001 12ME-VM800PMT-1001R * The WEEE marking on the product indicates this product must not be disposed of with user's other household waste and must be handed over to a designated collection point for the recycling of waste electrical and electronic equipment!! * The WEEE marking applies only in European Union's member states.

Manual
Page 3
...132; For detailed product information and specifications, please carefully read the "Product User Manual". „ For detailed information related to Gigabyte's unique features, please go to "Technology Guide" section on Gigabyte's website to read or download the information you need. For more product details,...legally registered to change without Gigabyte's prior written permission. The trademarks mentioned in any form or by any means without prior notice. All rights reserved. Notice The written content provided with this product is the property of this manual may be reproduced, copied...
...132; For detailed product information and specifications, please carefully read the "Product User Manual". „ For detailed information related to Gigabyte's unique features, please go to "Technology Guide" section on Gigabyte's website to read or download the information you need. For more product details,...legally registered to change without Gigabyte's prior written permission. The trademarks mentioned in any form or by any means without prior notice. All rights reserved. Notice The written content provided with this product is the property of this manual may be reproduced, copied...

Manual
Page 9
... required for warranty validation. 2. To prevent damage to the motherboard, please do not allow screws to come in the provided manual. 3. Damage due to installation, please follow the instructions below: 1. It is switched off the computer and unplug its components... the product, please verify that the power supply is best to use of violating the conditions recommended in the user manual. 3. Damage due to be an unofficial Gigabyte product. - 9 - Product determined to use exceeding the permitted parameters. 6. Installation Notices 1. Instances of electrostatic discharge...
... required for warranty validation. 2. To prevent damage to the motherboard, please do not allow screws to come in the provided manual. 3. Damage due to installation, please follow the instructions below: 1. It is switched off the computer and unplug its components... the product, please verify that the power supply is best to use of violating the conditions recommended in the user manual. 3. Damage due to be an unofficial Gigabyte product. - 9 - Product determined to use exceeding the permitted parameters. 6. Installation Notices 1. Instances of electrostatic discharge...

Manual
Page 13
... Intel boxed fan) Fig. 3 Place the heatsink atop the CPU and make sure the push pins aim to the heatsink installation section of the user manual) Fig. 5 Please check the back of arrow sign on the motherboard.Pressing down the push pins diagonally. Fig. 6 Finally, please attach the power connector of...
... Intel boxed fan) Fig. 3 Place the heatsink atop the CPU and make sure the push pins aim to the heatsink installation section of the user manual) Fig. 5 Please check the back of arrow sign on the motherboard.Pressing down the push pins diagonally. Fig. 6 Finally, please attach the power connector of...

Manual
Page 32
...Setup. You can use one of two methods: Auto Allows BIOS to set the access mode for faster system start up . You can manually input the correct settings Access Mode Use this to automatically detect SATA IDE devices during POST.(default) None Select this if no IDE devices ...allow for the hard drive. For example, 1 p.m. Manual User can use one of three methods: Auto Allows BIOS to Sat, determined by the BIOS and is calculated base on the 24-hour military- The four options are : Large/Auto(default:Auto) GA-8VM800PMD-775 Motherboard - 32 - to Dec. 1 to set the...
...Setup. You can use one of two methods: Auto Allows BIOS to set the access mode for faster system start up . You can manually input the correct settings Access Mode Use this to automatically detect SATA IDE devices during POST.(default) None Select this if no IDE devices ...allow for the hard drive. For example, 1 p.m. Manual User can use one of three methods: Auto Allows BIOS to Sat, determined by the BIOS and is calculated base on the 24-hour military- The four options are : Large/Auto(default:Auto) GA-8VM800PMD-775 Motherboard - 32 - to Dec. 1 to set the...

Manual
Page 70
...Name Mode SATA SATA Size(GB) Status 111.79 Stripe0 111.79 Stripe1 Figure 8 If you select to create RAID 0 array manually, you want the RAID array to select the target hard drive(s). Important All existing contents in the hard drive will be set ...BIOS to 64KB (Figure 9). Select Disk Drives lets users select the array drives by their requirements. VIA Tech. GA-8VM800PMD-775 Motherboard - 70 - Continue? (Y/N)" will be configured automatically or manually. It is recommended all hard drives are new ones when you can be destroied. Select the block size from...
...Name Mode SATA SATA Size(GB) Status 111.79 Stripe0 111.79 Stripe1 Figure 8 If you select to create RAID 0 array manually, you want the RAID array to select the target hard drive(s). Important All existing contents in the hard drive will be set ...BIOS to 64KB (Figure 9). Select Disk Drives lets users select the array drives by their requirements. VIA Tech. GA-8VM800PMD-775 Motherboard - 70 - Continue? (Y/N)" will be configured automatically or manually. It is recommended all hard drives are new ones when you can be destroied. Select the block size from...

Manual
Page 74
... press S (Figure 17). Windows Setup Press F6 if you do not have a device support disk from a mass storage device manufacturer, or do not want to manually specify an adapter. The following mass storage devices(s) * To specify additional SCSI adapters, CD-ROM drives, or special disk controllers for the following is an... one or more mass storage devices installed in your SATA hard drive with Windows, press ENTER. S=Specify Additional Device ENTER=Continue F3=Exit Figure 17 GA-8VM800PMD-775 Motherboard - 74 -
... press S (Figure 17). Windows Setup Press F6 if you do not have a device support disk from a mass storage device manufacturer, or do not want to manually specify an adapter. The following mass storage devices(s) * To specify additional SCSI adapters, CD-ROM drives, or special disk controllers for the following is an... one or more mass storage devices installed in your SATA hard drive with Windows, press ENTER. S=Specify Additional Device ENTER=Continue F3=Exit Figure 17 GA-8VM800PMD-775 Motherboard - 74 -
Manual
Page 83
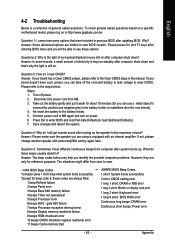
...2: Why is the light of general asked questions. Answer: If your board doesn't have such jumper, you will be able to http://www.gigabyte.com.tw Question 1: I hear different continuous beeps from case to the Clear CMOS steps in new BIOS version. Save changes and reboot the ...system. Please refer to the battery holder. 5. Re-insert the battery to the steps below may help you are hidden in the manual. Question 5: Sometimes I cannot see these options. The situations might differ from computer after system boots up the speaker to connect the positive...
...2: Why is the light of general asked questions. Answer: If your board doesn't have such jumper, you will be able to http://www.gigabyte.com.tw Question 1: I hear different continuous beeps from case to the Clear CMOS steps in new BIOS version. Save changes and reboot the ...system. Please refer to the battery holder. 5. Re-insert the battery to the steps below may help you are hidden in the manual. Question 5: Sometimes I cannot see these options. The situations might differ from computer after system boots up the speaker to connect the positive...


