Manual
Page 9
... the motherboard circuit or its components. • Make sure there are no leftover screws or metal components placed on the motherboard or within the computer casing. • Do not place the computer system on an uneven surface. • Do not place the computer system in a high-temperature environment. • Turning on...
... the motherboard circuit or its components. • Make sure there are no leftover screws or metal components placed on the motherboard or within the computer casing. • Do not place the computer system on an uneven surface. • Do not place the computer system in a high-temperature environment. • Turning on...

Manual
Page 35
... hardware components or conduct hardware testing. The power button and reset button allow users to quickly turn off or reset the computer in an open-case environment when they want to clear the CMOS values (e.g.
... hardware components or conduct hardware testing. The power button and reset button allow users to quickly turn off or reset the computer in an open-case environment when they want to clear the CMOS values (e.g.

Manual
Page 57
...Optimized Defaults Hardware Thermal Control Enables or disables the CPU overheating protection function. Enabled clears the record of previous chassis intrusion status and the Case Opened field will show "No". If the system chassis cover is removed, this field will show "Yes", otherwise it will be reduced... when the CPU is overheated. (Default: Enabled) Reset Case Open Status Keeps or clears the record of the chassis intrusion detection device attached to the CMOS, and then restart your system. - 57 -...
...Optimized Defaults Hardware Thermal Control Enables or disables the CPU overheating protection function. Enabled clears the record of previous chassis intrusion status and the Case Opened field will show "No". If the system chassis cover is removed, this field will show "Yes", otherwise it will be reduced... when the CPU is overheated. (Default: Enabled) Reset Case Open Status Keeps or clears the record of the chassis intrusion detection device attached to the CMOS, and then restart your system. - 57 -...

Manual
Page 59
... CMOS to BIOS F12: Load CMOS from BIOS Press on this item and then press the key to load the safest BIOS default settings. In case system instability occurs, you may try to load Fail-Safe defaults, which are the safest and most stable BIOS settings for the motherboard. 2-10 Load...
... CMOS to BIOS F12: Load CMOS from BIOS Press on this item and then press the key to load the safest BIOS default settings. In case system instability occurs, you may try to load Fail-Safe defaults, which are the safest and most stable BIOS settings for the motherboard. 2-10 Load...

Manual
Page 69
Using the Restore Function in Xpress Recovery2 Select RESTORE to restore the backup to exit Xpress Recovery2. - 69 - Step 2: After the backup file is created before. Unique Features F. Exiting Xpress Recovery2 Select REBOOT to your hard drive in Disk Management and hard drive space will be freed up. D. E. Removing the Backup Step 1: If you wish to remove the backup file, select REMOVE. The RESTORE option will not be present if no backup is removed, no backup image file will be present in case the system breaks down.
Using the Restore Function in Xpress Recovery2 Select RESTORE to restore the backup to exit Xpress Recovery2. - 69 - Step 2: After the backup file is created before. Unique Features F. Exiting Xpress Recovery2 Select REBOOT to your hard drive in Disk Management and hard drive space will be freed up. D. E. Removing the Backup Step 1: If you wish to remove the backup file, select REMOVE. The RESTORE option will not be present if no backup is removed, no backup image file will be present in case the system breaks down.
Manual
Page 86
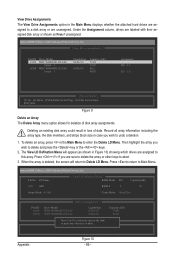
... to delete the array or other keys to abort. 3. Record all array information including the array type, the disk members, and stripe block size in case you wish to delete and press the key or the + keys. 2. The View LD Defination Menu will return to this array. Under the Assignment column...
... to delete the array or other keys to abort. 3. Record all array information including the array type, the disk members, and stripe block size in case you wish to delete and press the key or the + keys. 2. The View LD Defination Menu will return to this array. Under the Assignment column...
Manual
Page 116
... EISA slot 1. On MP platform, adjust the cacheable range to every ISA PnP device Appendix - 116 - Display PnP logo 2. Assign CSN to smaller one in case the cacheable ranges between each 64K page 2.
... EISA slot 1. On MP platform, adjust the cacheable range to every ISA PnP device Appendix - 116 - Display PnP logo 2. Assign CSN to smaller one in case the cacheable ranges between each 64K page 2.

