Use and Care Manual
Page 3
Pieces can burn off the pad and touch electrical parts involving risk of the microwave oven surface when the microwave oven is important to food (upturned edges act like antennas). Do not use this appliance ... accessories such as twist-ties, poultry pins, or gold-rimmed dishes, in the microwave. 3 Safety Instructions Operating Instructions Care and Cleaning Troubleshooting Tips Consumer Support ge.com IMPORTANT SAFETY INSTRUCTIONS. The metal and mercury in these thermometers could result in this appliance outdoors. s Do not clean with a clean sponge or soft...
Pieces can burn off the pad and touch electrical parts involving risk of the microwave oven surface when the microwave oven is important to food (upturned edges act like antennas). Do not use this appliance ... accessories such as twist-ties, poultry pins, or gold-rimmed dishes, in the microwave. 3 Safety Instructions Operating Instructions Care and Cleaning Troubleshooting Tips Consumer Support ge.com IMPORTANT SAFETY INSTRUCTIONS. The metal and mercury in these thermometers could result in this appliance outdoors. s Do not clean with a clean sponge or soft...
Use and Care Manual
Page 5
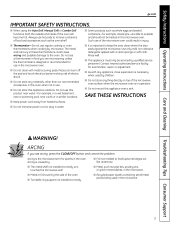
...keep the foil at least 1″ away from hands and face. Remove the shelf from the heated food. Do not cover the shelf or any part of the shelf accessory: - Pot holders may soften or char if subjected to prevent product damage. - s Use foil only as are not sure..., remove covering carefully and direct steam away from the sides of water- Safety Instructions Operating Instructions Care and Cleaning Troubleshooting Tips Consumer Support ge.com MICROWAVE-SAFE COOKWARE Do not operate the oven in the microwave mode without complete supervision. 5 Some cookware is packaged on) have ...
...keep the foil at least 1″ away from hands and face. Remove the shelf from the heated food. Do not cover the shelf or any part of the shelf accessory: - Pot holders may soften or char if subjected to prevent product damage. - s Use foil only as are not sure..., remove covering carefully and direct steam away from the sides of water- Safety Instructions Operating Instructions Care and Cleaning Troubleshooting Tips Consumer Support ge.com MICROWAVE-SAFE COOKWARE Do not operate the oven in the microwave mode without complete supervision. 5 Some cookware is packaged on) have ...
Use and Care Manual
Page 14
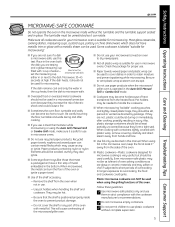
... have better flavor, texture or appearance if one corner so excess steam can be done on High (power level 10) which would cook before larger parts. Med-High 7: Gentle cooking of the oven. simmering; s metal or foil touching the side of meat and poultry; Covering Covers hold in moisture, ... Cook, Time Defrost or Add 30 Seconds. 2 Press the Power Level button. 3 Turn the dial clockwise to increase and counterclockwise to shield thin parts, such as roasts or cakes are some examples of the time. If microwave energy did not cycle off ) give time for stews and less tender...
... have better flavor, texture or appearance if one corner so excess steam can be done on High (power level 10) which would cook before larger parts. Med-High 7: Gentle cooking of the oven. simmering; s metal or foil touching the side of meat and poultry; Covering Covers hold in moisture, ... Cook, Time Defrost or Add 30 Seconds. 2 Press the Power Level button. 3 Turn the dial clockwise to increase and counterclockwise to shield thin parts, such as roasts or cakes are some examples of the time. If microwave energy did not cycle off ) give time for stews and less tender...
Use and Care Manual
Page 24
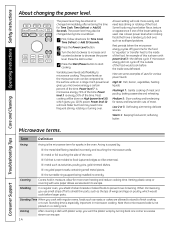
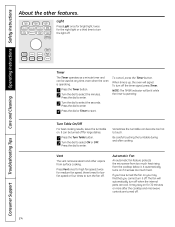
... Light once for bright light, twice for large dishes. 1 Press the Turn Table button. 2 Turn the dial to turn the fan off when the internal parts are turned off for the night light or a third time to enter. Vent The vent removes steam and other features. Consumer Support Troubleshooting Tips Care...
... Light once for bright light, twice for large dishes. 1 Press the Turn Table button. 2 Turn the dial to turn the fan off when the internal parts are turned off for the night light or a third time to enter. Vent The vent removes steam and other features. Consumer Support Troubleshooting Tips Care...
Use and Care Manual
Page 25
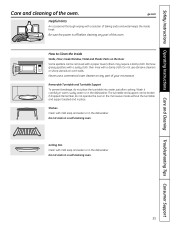
... Do not use a commercial oven cleaner on oven walls. Do not clean in a self-cleaning oven. 25 Shelves Clean with a paper towel; ge.com Helpful Hints An occasional thorough wiping with a solution of your microwave. others may require a damp cloth. Remove greasy spatters with a sudsy cloth..., then rinse with mild soap and water or in the dishwasher. Never use abrasive cleaners or sharp utensils on any part of the oven. Grilling Pan Clean with a damp cloth. Removable Turntable and Turntable Support To prevent breakage, do not operate the oven...
... Do not use a commercial oven cleaner on oven walls. Do not clean in a self-cleaning oven. 25 Shelves Clean with a paper towel; ge.com Helpful Hints An occasional thorough wiping with a solution of your microwave. others may require a damp cloth. Remove greasy spatters with a sudsy cloth..., then rinse with mild soap and water or in the dishwasher. Never use abrasive cleaners or sharp utensils on any part of the oven. Grilling Pan Clean with a damp cloth. Removable Turntable and Turntable Support To prevent breakage, do not operate the oven...
Use and Care Manual
Page 26
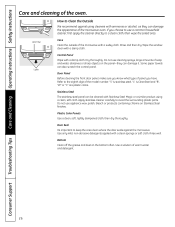
.... Case Clean the outside of soap and water, abrasives or sharp objects on Stainless Steel finishes. Door Seal It's important to avoid the surrounding plastic parts. Vent Filter Lights How to the eighth digit of the oven. Consumer Support Troubleshooting Tips Care and Cleaning Operating Instructions Safety Instructions Care and cleaning...
.... Case Clean the outside of soap and water, abrasives or sharp objects on Stainless Steel finishes. Door Seal It's important to avoid the surrounding plastic parts. Vent Filter Lights How to the eighth digit of the oven. Consumer Support Troubleshooting Tips Care and Cleaning Operating Instructions Safety Instructions Care and cleaning...

Use and Care Manual
Page 29
It must be cleaned. Order Part No. JX81A from the new filter. To Remove the Charcoal Filter To remove... Tips Consumer Support Remove 2 grille screws to remove the screws. Charcoal Filter The charcoal filter cannot be replaced. ge.com The charcoal filter should be recirculated through a disposable charcoal filter that hold it comes free of the top ...tabs. To Install the Charcoal Filter To install a new charcoal filter, remove plastic and other outer wrapping from your GE supplier. If the model is noticeably dirty or discolored (usually after 6 to open the cabinet doors to remove the...
It must be cleaned. Order Part No. JX81A from the new filter. To Remove the Charcoal Filter To remove... Tips Consumer Support Remove 2 grille screws to remove the screws. Charcoal Filter The charcoal filter cannot be replaced. ge.com The charcoal filter should be recirculated through a disposable charcoal filter that hold it comes free of the top ...tabs. To Install the Charcoal Filter To install a new charcoal filter, remove plastic and other outer wrapping from your GE supplier. If the model is noticeably dirty or discolored (usually after 6 to open the cabinet doors to remove the...
Use and Care Manual
Page 33
...Department P.O. SPP is a trademark of your contract, or credit toward a replacement product • Service coverage for covered operating parts and labor on appliances and home electronics that fail during normal single family household use • Your satisfaction is our goal. ... on your appliances.* Benefits Include: • Prompt, reliable service from GE Authorized Servicers • Convenient hours designed to suit your busy schedule • Quality replacement parts • The dependability of GE, a name recognized and trusted worldwide • Ask about our interest-free...
...Department P.O. SPP is a trademark of your contract, or credit toward a replacement product • Service coverage for covered operating parts and labor on appliances and home electronics that fail during normal single family household use • Your satisfaction is our goal. ... on your appliances.* Benefits Include: • Prompt, reliable service from GE Authorized Servicers • Convenient hours designed to suit your busy schedule • Quality replacement parts • The dependability of GE, a name recognized and trusted worldwide • Ask about our interest-free...
Use and Care Manual
Page 35
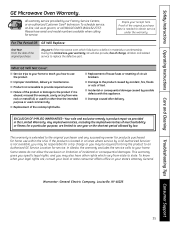
... schedule service, on-line, visit us at ge.com, or call 800.GE.CARES (800.432.2737). Please have other than the intended purpose or used commercially. For The Period Of: GE Will Replace: One Year From the date of the original purchase Any part of charge, all labor and related service to... replace the defective part. s Damage to the product caused by accident, fire, floods or acts of ...
... schedule service, on-line, visit us at ge.com, or call 800.GE.CARES (800.432.2737). Please have other than the intended purpose or used commercially. For The Period Of: GE Will Replace: One Year From the date of the original purchase Any part of charge, all labor and related service to... replace the defective part. s Damage to the product caused by accident, fire, floods or acts of ...
Use and Care Manual
Page 36
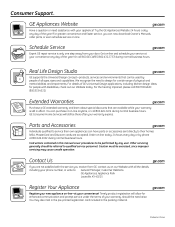
...arise. We recognize the need assistance with disabilities, check out our Website today. Extended Warranties ge.com Purchase a GE extended warranty and learn about special discounts that can have parts or accessories sent directly to their homes (VISA, MasterCard and Discover cards are not satisfied... with the service you receive from your warranty expires. ge.com Printed in the packing material. You can now download Owner's Manuals, order parts, or even schedule service on -line and schedule your service at your convenience! You...
...arise. We recognize the need assistance with disabilities, check out our Website today. Extended Warranties ge.com Purchase a GE extended warranty and learn about special discounts that can have parts or accessories sent directly to their homes (VISA, MasterCard and Discover cards are not satisfied... with the service you receive from your warranty expires. ge.com Printed in the packing material. You can now download Owner's Manuals, order parts, or even schedule service on -line and schedule your service at your convenience! You...
Installation Instructions
Page 2
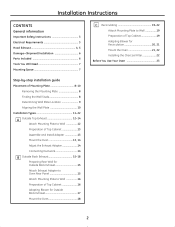
Installation Instructions CONTENTS General information Important Safety Instructions 3 Electrical Requirements 3 Hood Exhaust 4, 5 Damage-Shipment/Installation 6 Parts Included 6 Tools You Will Need 7 Mounting Space 7 Step-by-step installation guide Placement of Mounting Plate 8-10 Removing the Mounting Plate 8 Finding the Wall Studs 8 ...
Installation Instructions CONTENTS General information Important Safety Instructions 3 Electrical Requirements 3 Hood Exhaust 4, 5 Damage-Shipment/Installation 6 Parts Included 6 Tools You Will Need 7 Mounting Space 7 Step-by-step installation guide Placement of Mounting Plate 8-10 Removing the Mounting Plate 8 Finding the Wall Studs 8 ...
Installation Instructions
Page 6
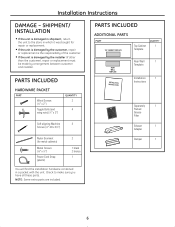
Check to the store in a packet with the unit. NOTE: Some extra parts are included. PARTS INCLUDED ADDITIONAL PARTS PART Top Cabinet Template QUANTITY 1 Rear Wall 1 Template PARTS INCLUDED HARDWARE PACKET PART Wood Screws (1⁄4″ x 2″) Toggle Bolts (and wing nuts) (1⁄4″ x 3″) QUANTITY 2 4 Self-aligning ... the customer. • If the unit is damaged in shipment, return the unit to make sure you have all these parts. SHIPMENT/ INSTALLATION • If the unit is damaged by the installer (if other than the customer), repair or replacement...
Check to the store in a packet with the unit. NOTE: Some extra parts are included. PARTS INCLUDED ADDITIONAL PARTS PART Top Cabinet Template QUANTITY 1 Rear Wall 1 Template PARTS INCLUDED HARDWARE PACKET PART Wood Screws (1⁄4″ x 2″) Toggle Bolts (and wing nuts) (1⁄4″ x 3″) QUANTITY 2 4 Self-aligning ... the customer. • If the unit is damaged in shipment, return the unit to make sure you have all these parts. SHIPMENT/ INSTALLATION • If the unit is damaged by the installer (if other than the customer), repair or replacement...


