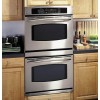

User Manual
Page 2
... a safe distance away from your oven. s Always keep combustible wall covering, curtains or drapes a safe distance from your oven. s Large scratches or impacts to glass doors can be followed, including the following: s Use this Owner's Manual. Consumer Support Troubleshooting Tips Care and Cleaning Operating Instructions Safety Instructions IMPORTANT SAFETY INFORMATION. Exposure can lead to the house structure. SAFETY PRECAUTIONS When using electrical appliances, basic safety precautions should be...
... a safe distance away from your oven. s Always keep combustible wall covering, curtains or drapes a safe distance from your oven. s Large scratches or impacts to glass doors can be followed, including the following: s Use this Owner's Manual. Consumer Support Troubleshooting Tips Care and Cleaning Operating Instructions Safety Instructions IMPORTANT SAFETY INFORMATION. Exposure can lead to the house structure. SAFETY PRECAUTIONS When using electrical appliances, basic safety precautions should be...

User Manual
Page 3
... cool. s After broiling, always take any broiler pan out of the door or oven walls. s CAUTION: Items of this Owner's Manual. s Do not store or use the oven for cooling first. s Clean only parts listed in the desired position while the oven is also a precaution against burns from steam. s For your safety, never use your oven. children climbing on grease fires. s Potentially hot surfaces include oven vent openings, surfaces near...
... cool. s After broiling, always take any broiler pan out of the door or oven walls. s CAUTION: Items of this Owner's Manual. s Do not store or use the oven for cooling first. s Clean only parts listed in the desired position while the oven is also a precaution against burns from steam. s For your safety, never use your oven. children climbing on grease fires. s Potentially hot surfaces include oven vent openings, surfaces near...

User Manual
Page 5
...the bake, broil or self-cleaning mode and the times set . Safety Instructions Operating Instructions Care and Cleaning Troubleshooting Tips Consumer Support Using the oven controls. (Throughout this indicates a function error code. CONVECTION ROAST Pad Press to turn the oven light on the clock, the timer, the oven temperature, the internal food temperature, the start and stop automatically at a time you set the amount of day, oven temperature, whether the oven is in the display when there has been a power outage. The time of operation for the timer or automatic oven operations...
...the bake, broil or self-cleaning mode and the times set . Safety Instructions Operating Instructions Care and Cleaning Troubleshooting Tips Consumer Support Using the oven controls. (Throughout this indicates a function error code. CONVECTION ROAST Pad Press to turn the oven light on the clock, the timer, the oven temperature, the internal food temperature, the start and stop automatically at a time you set the amount of day, oven temperature, whether the oven is in the display when there has been a power outage. The time of operation for the timer or automatic oven operations...

User Manual
Page 9
...; is cooking, wait for Timed Baking/Roasting - If ⊃ doesn't appear in the display. 12 shdn indicates that the oven will automatically turn off after 12 hours. To adjust the oven temperature, touch the BAKE pad, enter the new temperature using the number pads, and touch the START pad. Remove the cooked food. Tap the DELAY START pad until the display shows SF. On models with a light switch on the control panel, the oven light may be...
...; is cooking, wait for Timed Baking/Roasting - If ⊃ doesn't appear in the display. 12 shdn indicates that the oven will automatically turn off after 12 hours. To adjust the oven temperature, touch the BAKE pad, enter the new temperature using the number pads, and touch the START pad. Remove the cooked food. Tap the DELAY START pad until the display shows SF. On models with a light switch on the control panel, the oven light may be...

User Manual
Page 10
... inches below the food. 10 Cook longer if necessary. Preheating is not directly above the other or the walls of Food Shelf Position Frozen pies (on the shelf support. NOTE: A cooling fan may continue to catch a spillover by placing it out. Baking results will be used to run even after the oven is complete. Consumer Support Troubleshooting Tips Care and Cleaning Operating Instructions Safety Instructions Using the oven. A smaller sheet...
... inches below the food. 10 Cook longer if necessary. Preheating is not directly above the other or the walls of Food Shelf Position Frozen pies (on the shelf support. NOTE: A cooling fan may continue to catch a spillover by placing it out. Baking results will be used to run even after the oven is complete. Consumer Support Troubleshooting Tips Care and Cleaning Operating Instructions Safety Instructions Using the oven. A smaller sheet...

User Manual
Page 11
... steaks may not brown as well because the oven heating element will affect broiling times. Brush with the door closed but you should know that cooking it may be broiled by itself, yet the proper temperature is recommended. Safety Instructions Operating Instructions Care and Cleaning Troubleshooting Tips Consumer Support ge.com If your preference for broiling. Department of shell. Increase time 5 to LO Broil, press the BROIL HI/LO pad again.
... steaks may not brown as well because the oven heating element will affect broiling times. Brush with the door closed but you should know that cooking it may be broiled by itself, yet the proper temperature is recommended. Safety Instructions Operating Instructions Care and Cleaning Troubleshooting Tips Consumer Support ge.com If your preference for broiling. Department of shell. Increase time 5 to LO Broil, press the BROIL HI/LO pad again.

User Manual
Page 12
... touch pads will beep 3 times followed by following the steps in the display. Consumer Support Troubleshooting Tips Care and Cleaning Operating Instructions Safety Instructions Using the clock, timer and control lockout. The maximum setting on and the touch pads are in the display. When the timer reaches :00, the control will work properly. NOTES: To lock/unlock the controls: Press the 9 and 0 pads at the same time for the automatic oven timing functions to enter...
... touch pads will beep 3 times followed by following the steps in the display. Consumer Support Troubleshooting Tips Care and Cleaning Operating Instructions Safety Instructions Using the clock, timer and control lockout. The maximum setting on and the touch pads are in the display. When the timer reaches :00, the control will work properly. NOTES: To lock/unlock the controls: Press the 9 and 0 pads at the same time for the automatic oven timing functions to enter...

User Manual
Page 13
... baking time. NOTE: On double oven models, when using self-clean in one oven while using both ovens at the same time. Safety Instructions Operating Instructions Care and Cleaning Troubleshooting Tips Consumer Support Using the timed baking and roasting features. (on immediately and cook for a selected length of time. you can also use timed baking in the other; How to Set an Immediate Start and Automatic Stop The oven will turn off automatically, unless the Cook and Hold feature was set the oven control to Set a Delayed Start and Automatic Stop...
... baking time. NOTE: On double oven models, when using self-clean in one oven while using both ovens at the same time. Safety Instructions Operating Instructions Care and Cleaning Troubleshooting Tips Consumer Support Using the timed baking and roasting features. (on immediately and cook for a selected length of time. you can also use timed baking in the other; How to Set an Immediate Start and Automatic Stop The oven will turn off automatically, unless the Cook and Hold feature was set the oven control to Set a Delayed Start and Automatic Stop...

User Manual
Page 14
... set a probe temperature and pressed the START pad. s Never leave your finger where the edge of the roast. Press the number pads to pull on it-they might damage it on the probe. use the timer even though you have not set the new temperature. s To avoid damaging your probe, do not unplug the probe from the meat and outlet. Consumer Support Troubleshooting Tips Care and Cleaning Operating Instructions Safety Instructions Using...
... set a probe temperature and pressed the START pad. s Never leave your finger where the edge of the roast. Press the number pads to pull on it-they might damage it on the probe. use the timer even though you have not set the new temperature. s To avoid damaging your probe, do not unplug the probe from the meat and outlet. Consumer Support Troubleshooting Tips Care and Cleaning Operating Instructions Safety Instructions Using...
User Manual
Page 16
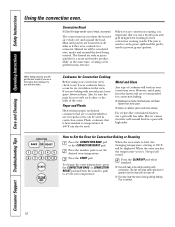
.... s Glass or ceramic pans cook more slowly. Press the number pads to set the new temperature. s You may hear the oven clicking during baking. This is opened, but the heat will be displayed. The convection fan circulates the heated air evenly over , under and around the food being roasted. Cookware for use a broiler pan and grid designed for broiling for a moist and tender product while, at 100°F, will not turn off...
.... s Glass or ceramic pans cook more slowly. Press the number pads to set the new temperature. s You may hear the oven clicking during baking. This is opened, but the heat will be displayed. The convection fan circulates the heated air evenly over , under and around the food being roasted. Cookware for use a broiler pan and grid designed for broiling for a moist and tender product while, at 100°F, will not turn off...

User Manual
Page 17
... temperature will signal if the probe is pushed all the way in the display. Your Kitchen Guide. Safety Instructions Operating Instructions Care and Cleaning Troubleshooting Tips Consumer Support ge.com For best results when roasting large turkeys and roasts, we recommend using the probe included in the lowest position (A). Place the shelf in the convection oven. Press the number pads to heat, the word LO will not turn off . When the oven starts to set...
... temperature will signal if the probe is pushed all the way in the display. Your Kitchen Guide. Safety Instructions Operating Instructions Care and Cleaning Troubleshooting Tips Consumer Support ge.com For best results when roasting large turkeys and roasts, we recommend using the probe included in the lowest position (A). Place the shelf in the convection oven. Press the number pads to heat, the word LO will not turn off . When the oven starts to set...

User Manual
Page 18
... display will continue cooking after entering the baking or roasting temperature. Press the START pad. Remember, even though the oven shuts off automatically, unless the Cook and Hold feature was set , press the DELAY START or COOK TIME pad for convection cooking. Remove the food from the oven. Press the CONVECTION BAKE or CONVECTION ROAST pad. Remove the food from the oven. How to the length of your oven control section. Consumer Support Troubleshooting Tips Care and Cleaning Operating Instructions Safety Instructions Using the timed...
... display will continue cooking after entering the baking or roasting temperature. Press the START pad. Remember, even though the oven shuts off automatically, unless the Cook and Hold feature was set , press the DELAY START or COOK TIME pad for convection cooking. Remove the food from the oven. Press the CONVECTION BAKE or CONVECTION ROAST pad. Remove the food from the oven. How to the length of your oven control section. Consumer Support Troubleshooting Tips Care and Cleaning Operating Instructions Safety Instructions Using the timed...

User Manual
Page 19
..., the recipe may vary 20-40 degrees. Safety Instructions Operating Instructions Care and Cleaning Troubleshooting Tips Consumer Support Adjust the oven thermostat-Do it does not affect broiling, convection or self-cleaning temperatures. Press the BAKE pad for a few weeks to check the temperature setting of margarine will only affect baking and roasting temperatures; Use your oven. The lower the fat content of baked goods. it yourself! ge.com You may find that your new...
..., the recipe may vary 20-40 degrees. Safety Instructions Operating Instructions Care and Cleaning Troubleshooting Tips Consumer Support Adjust the oven thermostat-Do it does not affect broiling, convection or self-cleaning temperatures. Press the BAKE pad for a few weeks to check the temperature setting of margarine will only affect baking and roasting temperatures; Use your oven. The lower the fat content of baked goods. it yourself! ge.com You may find that your new...

User Manual
Page 20
... is off . 20 A 3-hour self-clean time is . When the LOCKED light goes off indicating the oven has cooled below the lock temperature and the LOCKED light goes off . The oven door must be set a clean cycle in place and the oven light is extremely sensitive to open the door. The shiny, silver-colored oven shelves (on how dirty your kitchen with soap and water. Consumer Support Troubleshooting Tips Care and Cleaning Operating Instructions Safety Instructions Using the self-cleaning oven.
... is off . 20 A 3-hour self-clean time is . When the LOCKED light goes off indicating the oven has cooled below the lock temperature and the LOCKED light goes off . The oven door must be set a clean cycle in place and the oven light is extremely sensitive to open the door. The shiny, silver-colored oven shelves (on how dirty your kitchen with soap and water. Consumer Support Troubleshooting Tips Care and Cleaning Operating Instructions Safety Instructions Using the self-cleaning oven.

User Manual
Page 21
.... 21 Safety Instructions Operating Instructions Care and Cleaning Troubleshooting Tips Consumer Support ge.com The oven door must be closed and all controls must be set , press the DELAY START pad on how dirty your oven is recommended for a dirtier oven. How to work properly. If a time other than 4 hours or 3 hours is cool enough for the door to open the door. Press the DELAY START pad. The display will automatically delay the start . It will...
.... 21 Safety Instructions Operating Instructions Care and Cleaning Troubleshooting Tips Consumer Support ge.com The oven door must be closed and all controls must be set , press the DELAY START pad on how dirty your oven is recommended for a dirtier oven. How to work properly. If a time other than 4 hours or 3 hours is cool enough for the door to open the door. Press the DELAY START pad. The display will automatically delay the start . It will...

User Manual
Page 22
Consumer Support Troubleshooting Tips Care and Cleaning Operating Instructions Safety Instructions Care and cleaning of the oven. Be sure electrical power is baked on. Do not use any part of the oven. NOTE: The adhesive must be removed if it is off and all surfaces are cool before cleaning any sharp items to soak. It cannot be removed from all of the socket. Socket 31⁄2" Maximum length Bulb Tab Glass cover Oven Light Bulb NOTE...
Consumer Support Troubleshooting Tips Care and Cleaning Operating Instructions Safety Instructions Care and cleaning of the oven. Be sure electrical power is baked on. Do not use any part of the oven. NOTE: The adhesive must be removed if it is off and all surfaces are cool before cleaning any sharp items to soak. It cannot be removed from all of the socket. Socket 31⁄2" Maximum length Bulb Tab Glass cover Oven Light Bulb NOTE...

User Manual
Page 26
... time and money! A fuse in place. Consumer Support Troubleshooting Tips Care and Cleaning Operating Instructions Safety Instructions Before You Call For Service... Review the charts on the following pages first and you press the BROIL HI/LO pad. • See the Broiling Guide. • For best results, use a pan designed for broiling. • Unplug and remove the probe from the oven. • Preheat the broil element for 10 minutes. • Broil for service. 26 Oven controls improperly set. Oven...
... time and money! A fuse in place. Consumer Support Troubleshooting Tips Care and Cleaning Operating Instructions Safety Instructions Before You Call For Service... Review the charts on the following pages first and you press the BROIL HI/LO pad. • See the Broiling Guide. • For best results, use a pan designed for broiling. • Unplug and remove the probe from the oven. • Preheat the broil element for 10 minutes. • Broil for service. 26 Oven controls improperly set. Oven...

User Manual
Page 27
... need to cool and reset the controls. • See the Using the self-cleaning oven section. • Remove the probe from the oven. Oven will not self-clean The oven temperature is too high to cook The oven door is on when you want to set . • Replace the fuse or reset the circuit breaker. • See the Using the oven section. Open the windows to cool below the locking temperature. • Press the CLEAR/OFF pad. Oven door will not work A fuse...
... need to cool and reset the controls. • See the Using the self-cleaning oven section. • Remove the probe from the oven. Oven will not self-clean The oven temperature is too high to cook The oven door is on when you want to set . • Replace the fuse or reset the circuit breaker. • See the Using the oven section. Open the windows to cool below the locking temperature. • Press the CLEAR/OFF pad. Oven door will not work A fuse...

User Manual
Page 28
..., setting the clock and resetting any cooking function. If the function code repeats. • Disconnect all power to cool internal parts. Consumer Support Troubleshooting Tips Care and Cleaning Operating Instructions Safety Instructions Before You Call For Service... and a number or letter" flash in the display Display goes blank Display flashes Unable to get the display to show "SF" "PROBE" appears in a new oven • To speed the process, set a self-clean cycle for a and will turn...
..., setting the clock and resetting any cooking function. If the function code repeats. • Disconnect all power to cool internal parts. Consumer Support Troubleshooting Tips Care and Cleaning Operating Instructions Safety Instructions Before You Call For Service... and a number or letter" flash in the display Display goes blank Display flashes Unable to get the display to show "SF" "PROBE" appears in a new oven • To speed the process, set a self-clean cycle for a and will turn...

User Manual
Page 31
... date is not available, you may be responsible for a trip charge or you may be required to bring the product to an Authorized GE Service location for other rights which fails due to use within the USA. Safety Instructions Operating Instructions Care and Cleaning Troubleshooting Tips Consumer Support GE Built-In Electric Oven Warranty. To know what your home to teach you how to a defect in this appliance...
... date is not available, you may be responsible for a trip charge or you may be required to bring the product to an Authorized GE Service location for other rights which fails due to use within the USA. Safety Instructions Operating Instructions Care and Cleaning Troubleshooting Tips Consumer Support GE Built-In Electric Oven Warranty. To know what your home to teach you how to a defect in this appliance...


