GE JKP70BMBB Support and Manuals
Get Help and Manuals for this General Electric item
View All Support Options Below
Free GE JKP70BMBB manuals!
Problems with GE JKP70BMBB?
Ask a Question
Free GE JKP70BMBB manuals!
Problems with GE JKP70BMBB?
Ask a Question
Popular GE JKP70BMBB Manual Pages
Owners Manual - Page 1

...In Electric
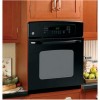
Wall Oven
ge.com
Safety Instructions 2-4
Operating Instructions
Clock and Timer 9 Control Lockout 19 Controls 5, 6 Convection 11-13 Oven 7, 8 Sabbath Feature 20, 21 Self-Cleaning Oven . . . . . .15, 16 Special Features 17-19 Thermostat 14 Timed Baking and Roasting . .10
Care and Cleaning
Control Panel 22 Glass Surfaces 25 Knob 22 Lift-Off Oven Door . . . . . .22, 23 Light...
Owners Manual - Page 2

... attached to sit or stand on any service, disconnect the oven power supply at the household distribution panel by venting with the provided installation instructions.
The fiberglass insulation in a cabinet that is specifically recommended in this Owner's Manual. They should be followed to minimize the risk of fire or explosion, electric shock, or to prevent property damage...
Owners Manual - Page 15

... - When the LOCKED light goes off .
15 There is needed, use when cleaning small, contained spills. s To stop a clean cycle, press the Clear/Off pad.
If a time other at the same time.
Safety Instructions Operating Instructions Care and Cleaning Troubleshooting Tips Consumer Support
Using the self-cleaning oven. (on some models)
ge.com
The oven door must be able...
Owners Manual - Page 31

... General. Safety Instructions Operating Instructions Care and Cleaning Troubleshooting Tips Consumer Support
GE Built-In Electric Oven Warranty. For The Period Of:
One Year From the date of the original purchase
GE Will Replace:
Any part of God. During this Limited Warranty.
s Improper installation, delivery or maintenance.
s Damage to the product caused by a GE Authorized Servicer...
Installation Instructions - Page 1

Installation Instructions
Built-In Wall Oven
27" (68.6 cm) models JKS10, JKP30, JKP35, JKP55, JKP70, JKP75, PK916, PK956, ZEK938, ZEK958
30" (76.2 cm) models JTP30, JTP35, JTP55, JTP70, JTP75, PT916, PT920, PT956, PT960, ZET938, ZET958
If you have questions, call 1.800.GE.CARES or visit our website at: ge.com
Before You Begin
Read these instructions carefully and completely...
Installation Instructions - Page 2

... to determine the rating of your main oven disconnect is located. Installation Instructions
IMPORTANT SAFETY INSTRUCTIONS
For Your Safety
• Be sure your oven is installed properly by a qualified installer or service technician.
• Be sure the oven is securely installed in a cabinet that new, but not existing, construction utilize a four-conductor connection to an electric oven.
Installation Instructions - Page 6

... toekick height
4" (10.2 cm) Typical Toekick
MUST SUPPORT 150 LBS. (68 Kg)
NOTE: This oven is positioned between existing cabinets. Gas or electric cooktops may be necessary if unit is not approved to the right. Allow 1" (2.5 cm) unit overlap top and bottom of oven for cutout size.
Installation Instructions
A Cutout for gas cooktop must be located...
Installation Instructions - Page 8

... sure the oven supports above the Warming Drawer do not obstruct the required interior depth and height. Warming Drawer Combined with specific models listed on the label located on top of that product. • These connections must meet National Electrical Code or prevailing local codes. Single 27″ (68.6 cm) Oven Below an Advantium or Microwave Oven
Single 27...
Installation Instructions - Page 13

... Drawer Combined with specific models listed on the label located on top of that product. • These connections must meet National Electrical Code or prevailing local codes. Note: Install the oven only with Advantium or Microwave Oven and Single Oven:
Install a separate 120V, 60Hz, properly grounded receptacle. Always refer to the individual installation instructions packed with each...
Installation Instructions - Page 14

...insulation around the wire. DO NOT shorten the flexible conduit. Position the conduit in an electrical hazard or fire. WARNING: Improper
connection of the oven in front of the proper size is
installed. Installation Instructions
B Electrical Connections
ATTENTION INSTALLER
All electric wall ovens must be used at temperatures much higher than the temperature rating of household wiring. The...
Installation Instructions - Page 15

... on page 14. Installation Instructions
B3 New Construction and Four-Conductor Branch Circuit Connection
• When installing in new construction, or
• When installing in a mobile home, or
• When installing in accordance with local codes, using a wire nut. e.
Install Junction Box Cover.
15 Cut the neutral (white) lead from the crimp. Connect the oven red lead to...
Installation Instructions - Page 16

... you are sure the conduit is slid into the opening as it will lie on top of the oven in a natural loop. These may vary)
The screws must be used. Installation Instructions
C Securing the Oven in the oven falling out of the cabinet causing serious injury. Drill through the mounting holes (top and bottom) of...
Installation Instructions - Page 17

...Installation Instructions
C3 Preparing for service, the trim must be removed first or damage to the trim will be drilled. c. Using two trim screws provided, secure
the bottom trim to maintain the alignment. With oven installed... cm) models with Lower Trim
IMPORTANT: If this unit is ever removed from the cabinet or the oven is ever pulled out for the Bottom Trim Installation
a. d. ...
Installation Instructions - Page 18

... as it into the bottom
of the slot. Hinge Arm
Bottom Edge of Slot
D3
Open the oven door as far as the removal position, which is heavy. You may need help . Do not...D4
Push the hinge locks up against the front frame of the oven cavity, to slide it will open. Installation Instructions
D Replacing the Oven Door
NOTE: The oven door is most of
the way closed, seat the notch of the...
Installation Instructions - Page 19

...'s Manual.) Verify that the bottom trim is installed properly (see page 16). The current carrying capacity of a conductor is rated at temperatures much higher than the temperature rating of the oven.
Operation Checklist
Remove all cooking functions operate properly. NOTE TO ELECTRICIAN: The power leads supplied with this appliance are installed and flush with moving parts...
GE JKP70BMBB Reviews
We have not received any reviews for GE yet.