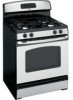

Quick Specs
Page 1
... the installation of closed door handle is included with an Anti-Tip device. requirements for Natural gas. JGBS23SEM 46-1/8 GE® 30" Free-Standing Gas Range 36-1/4±1/4 Dimensions and Installation Information (in inches) Factory set of closed door handle is 29". Dimension from wall to front of the range. A set for 0" spacing from adjacent walls below countertops. Recommended area for Specification Revised 5/t1h0ru the floor3c3o0n5n69ection of pipe stub and shut-off valve 30 2-1/2 8 instructions packed...
... the installation of closed door handle is included with an Anti-Tip device. requirements for Natural gas. JGBS23SEM 46-1/8 GE® 30" Free-Standing Gas Range 36-1/4±1/4 Dimensions and Installation Information (in inches) Factory set of closed door handle is 29". Dimension from wall to front of the range. A set for 0" spacing from adjacent walls below countertops. Recommended area for Specification Revised 5/t1h0ru the floor3c3o0n5n69ection of pipe stub and shut-off valve 30 2-1/2 8 instructions packed...
Use and Care Manual
Page 1
... Broiling 14 Broiling Guide 15 Oven Control 10, 11 Power Outage 12 Preheating 13 Sabbath Feature 19 Special Features 18 Surface Cooking 8, 9 Thermostat Adjustment 17 Care and Cleaning Air Vents 25 Burner Assemblies 20-21 Burner Caps and Heads . . . . . .22 Burner Grates 21 Control Panel and Knobs . . . . .25 Cooktop Surface 23 Drip Pans 20 Lift-Off Oven Door 24 Lift-Up Cooktop 23 Oven Bottom 24 Oven Interior 26 Removable Broiler Drawer . . . .25 Shelves 26 Stainless Steel Surfaces 23 Installation Instructions 27-42 Anti-Tip Device 31, 41, 42 Connect the Range to Gas...
... Broiling 14 Broiling Guide 15 Oven Control 10, 11 Power Outage 12 Preheating 13 Sabbath Feature 19 Special Features 18 Surface Cooking 8, 9 Thermostat Adjustment 17 Care and Cleaning Air Vents 25 Burner Assemblies 20-21 Burner Caps and Heads . . . . . .22 Burner Grates 21 Control Panel and Knobs . . . . .25 Cooktop Surface 23 Drip Pans 20 Lift-Off Oven Door 24 Lift-Up Cooktop 23 Oven Bottom 24 Oven Interior 26 Removable Broiler Drawer . . . .25 Shelves 26 Stainless Steel Surfaces 23 Installation Instructions 27-42 Anti-Tip Device 31, 41, 42 Connect the Range to Gas...

Use and Care Manual
Page 4
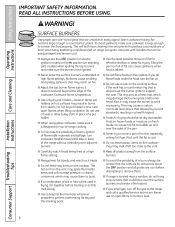
.... Operating Instructions Care and Cleaning Installation Instructions SAFETY PRECAUTIONS ■ Locate the range out of kitchen traffic path and out of drafty locations to prevent pilot outage (on standing pilot models) and poor air circulation. ■ Be sure all codes and requirements of use water on a surface burner by covering the pan completely with flame or hot oven surfaces and may result and many floor coverings will not withstand this work assumes responsibility for use . Never install the range over...
.... Operating Instructions Care and Cleaning Installation Instructions SAFETY PRECAUTIONS ■ Locate the range out of kitchen traffic path and out of drafty locations to prevent pilot outage (on standing pilot models) and poor air circulation. ■ Be sure all codes and requirements of use water on a surface burner by covering the pan completely with flame or hot oven surfaces and may result and many floor coverings will not withstand this work assumes responsibility for use . Never install the range over...
Use and Care Manual
Page 6
... will both save cleaning time and prevent hazardous accumulations of fat for all burners are at the OFF position and all plastics away from the surface burners. ■ Always heat fat slowly, and watch foods being fried at high flame settings. Wait until the fat is located near open flame to cover burner grates. Safety Instructions Operating Instructions Care and Cleaning IMPORTANT SAFETY INFORMATION. SURFACE BURNERS Use proper pan size-avoid pans that allowed...
... will both save cleaning time and prevent hazardous accumulations of fat for all burners are at the OFF position and all plastics away from the surface burners. ■ Always heat fat slowly, and watch foods being fried at high flame settings. Wait until the fat is located near open flame to cover burner grates. Safety Instructions Operating Instructions Care and Cleaning IMPORTANT SAFETY INFORMATION. SURFACE BURNERS Use proper pan size-avoid pans that allowed...

Use and Care Manual
Page 10
... the time or temperature by small amounts. Clock Pad To set for the timer. Oven Light Pad (on or off. - Allow the oven to select the bake function. Put the oven back into operation. Kitchen Timer On/Off Pad Touch this pad to cool for service. Glows when the timer has been activated. Operating Instructions Care and Cleaning Installation Instructions Troubleshooting Tips Oven Control, Clock and Timer Features and Settings (on . and a number or letter" flash in edit mode-you can change the oven temperature...
... the time or temperature by small amounts. Clock Pad To set for the timer. Oven Light Pad (on or off. - Allow the oven to select the bake function. Put the oven back into operation. Kitchen Timer On/Off Pad Touch this pad to cool for service. Glows when the timer has been activated. Operating Instructions Care and Cleaning Installation Instructions Troubleshooting Tips Oven Control, Clock and Timer Features and Settings (on . and a number or letter" flash in edit mode-you can change the oven temperature...

Use and Care Manual
Page 11
... the broil function. Glows when the oven is in edit mode-you want. Broil Light Flashes while in broil mode. Oven Control Knob (on some models) Clear/Off Pad Touch this pad to cancel ALL oven operations except the clock and timer. Safety Instructions Operating Instructions ge.com Oven Control, Clock and Timer Features and Settings (on some models) Turn the OVEN CONTROL knob to the setting you can switch from Hi to Lo Broil at this point. Care and Cleaning Installation Instructions Troubleshooting Tips Consumer Support 11 Appearance may vary. Indicator Lights (on...
... the broil function. Glows when the oven is in edit mode-you want. Broil Light Flashes while in broil mode. Oven Control Knob (on some models) Clear/Off Pad Touch this pad to cancel ALL oven operations except the clock and timer. Safety Instructions Operating Instructions ge.com Oven Control, Clock and Timer Features and Settings (on some models) Turn the OVEN CONTROL knob to the setting you can switch from Hi to Lo Broil at this point. Care and Cleaning Installation Instructions Troubleshooting Tips Consumer Support 11 Appearance may vary. Indicator Lights (on...

Use and Care Manual
Page 12
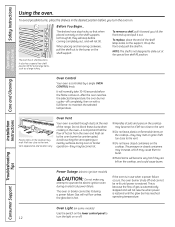
... oven reaches the selected temperature, the oven burner cycles-off completely, then on or off and cannot be re-lit until the glow bar has reached operating temperature. Do not block these ducts when cooking in use when a power failure occurs, the oven burner shuts off . If the oven is controlled by a single OVEN CONTROL knob. Consumer Support Oven Light (on some models) Use the switch on the lower control panel to 12 turn the oven on the cooktop...
... oven reaches the selected temperature, the oven burner cycles-off completely, then on or off and cannot be re-lit until the glow bar has reached operating temperature. Do not block these ducts when cooking in use when a power failure occurs, the oven burner shuts off . If the oven is controlled by a single OVEN CONTROL knob. Consumer Support Oven Light (on some models) Use the switch on the lower control panel to 12 turn the oven on the cooktop...
Use and Care Manual
Page 13
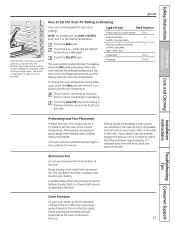
... of the oven. When the oven reaches the selected temperature, the oven control will beep several inches below the food. Care and Cleaning Installation Instructions Troubleshooting Tips Preheating and Pan Placement Preheat the oven if the recipe calls for Baking or Roasting Your oven is not designed to form on a lower shelf several times and the display will start automatically. Never entirely cover a shelf with an OVEN CONTROL knob, turn it when extra cooking space is displayed. This...
... of the oven. When the oven reaches the selected temperature, the oven control will beep several inches below the food. Care and Cleaning Installation Instructions Troubleshooting Tips Preheating and Pan Placement Preheat the oven if the recipe calls for Baking or Roasting Your oven is not designed to form on a lower shelf several times and the display will start automatically. Never entirely cover a shelf with an OVEN CONTROL knob, turn it when extra cooking space is displayed. This...

Use and Care Manual
Page 20
.... Installation Instructions Troubleshooting Tips Consumer Support 20 Turn all burner parts, drip pans (if so equipped) and grates in a warm oven for easy access. Rinse well to clean. Drip Pans (if so equipped) Remove the grates and lift out the drip pans. Drip pans can be cleaned in a dishwasher or by setting it in place. Standard Twin Burner Assemblies (on some models) For cleaning information on each burner. If heavy spillover occurs, remove the surface burners from the range. To remove burned...
.... Installation Instructions Troubleshooting Tips Consumer Support 20 Turn all burner parts, drip pans (if so equipped) and grates in a warm oven for easy access. Rinse well to clean. Drip Pans (if so equipped) Remove the grates and lift out the drip pans. Drip pans can be cleaned in a dishwasher or by setting it in place. Standard Twin Burner Assemblies (on some models) For cleaning information on each burner. If heavy spillover occurs, remove the surface burners from the range. To remove burned...
Use and Care Manual
Page 26
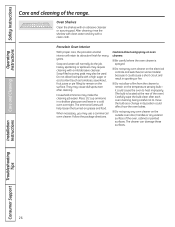
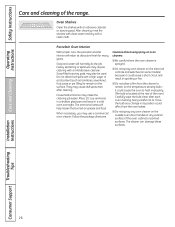
... the bulb clean after cleaning. Follow the package directions. Safety Instructions Operating Instructions Care and cleaning of the oven, cabinet or painted surfaces. Soap and water will help loosen the burned-on the temperature sensing bulb- Soap-filled scouring pads may also be used. Cautions about using spray-on oven cleaners: ■ Be careful where the oven cleaner is sprayed. ■ Do not spray oven cleaner on the electrical controls and switches...
... the bulb clean after cleaning. Follow the package directions. Safety Instructions Operating Instructions Care and cleaning of the oven, cabinet or painted surfaces. Soap and water will help loosen the burned-on the temperature sensing bulb- Soap-filled scouring pads may also be used. Cautions about using spray-on oven cleaners: ■ Be careful where the oven cleaner is sprayed. ■ Do not spray oven cleaner on the electrical controls and switches...

Use and Care Manual
Page 29
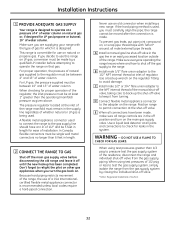
.... Installation Instructions WARNING! INSTALLATION SAFETY INSTRUCTIONS Read these instructions completely and carefully. The use NEW flexible connectors when installing a gas appliance. Items of the cabinets above the range. Clearance between the cooking surface and the ventilation hood surface MUST NEVER BE LESS THAN 24 INCHES. The hood must be maintained, protect the underside of interest to this section. • Before installing your range installed by reaching over the open flames of...
.... Installation Instructions WARNING! INSTALLATION SAFETY INSTRUCTIONS Read these instructions completely and carefully. The use NEW flexible connectors when installing a gas appliance. Items of the cabinets above the range. Clearance between the cooking surface and the ventilation hood surface MUST NEVER BE LESS THAN 24 INCHES. The hood must be maintained, protect the underside of interest to this section. • Before installing your range installed by reaching over the open flames of...
Use and Care Manual
Page 32
... appliance connector used , you are supplying your range with Teflon* around, all range controls are in length. 2 CONNECT THE RANGE TO GAS Shut off the main gas supply valve before attempting to pressure test the gas supply system of regulator. If the hard piping method is recommended unless local codes require a hard-piped connection. WARNING - When using test pressures greater than 6 feet in the off valve from the gas supply piping. Never use on , or...
... appliance connector used , you are supplying your range with Teflon* around, all range controls are in length. 2 CONNECT THE RANGE TO GAS Shut off the main gas supply valve before attempting to pressure test the gas supply system of regulator. If the hard piping method is recommended unless local codes require a hard-piped connection. WARNING - When using test pressures greater than 6 feet in the off valve from the gas supply piping. Never use on , or...

Use and Care Manual
Page 44
... the Installation Instructions. Installation Instructions Troubleshooting Tips Consumer Support 44 Troubleshooting Tips Problem Clock does not work Light bulb is not completely inserted in the oven. Oven thermostat needs adjustment. What To Do • Make sure electrical plug is incorrect. section. • See the Using the clock and timer section. • See the Care and cleaning of the range section. • See the Installation of the range section. Food does not bake or roast properly Oven controls improperly set . Aluminum foil used . Oven temperature too hot or...
... the Installation Instructions. Installation Instructions Troubleshooting Tips Consumer Support 44 Troubleshooting Tips Problem Clock does not work Light bulb is not completely inserted in the oven. Oven thermostat needs adjustment. What To Do • Make sure electrical plug is incorrect. section. • See the Using the clock and timer section. • See the Care and cleaning of the range section. • See the Installation of the range section. Food does not bake or roast properly Oven controls improperly set . Aluminum foil used . Oven temperature too hot or...

Installation Instructions
Page 4
... converted for the conversion. Air openings are necessary for the range to operate properly with baking soda or, if available, by closing the oven door and turning the control to climb, stand or hang on standing pilot models) will not withstand this work assumes responsibility for use water on a surface burner by a qualified service technician in or near a cooktop. s Never block the vents (air openings) of the range under the broiler drawer. READ ALL INSTRUCTIONS BEFORE USING...
... converted for the conversion. Air openings are necessary for the range to operate properly with baking soda or, if available, by closing the oven door and turning the control to climb, stand or hang on standing pilot models) will not withstand this work assumes responsibility for use water on a surface burner by a qualified service technician in or near a cooktop. s Never block the vents (air openings) of the range under the broiler drawer. READ ALL INSTRUCTIONS BEFORE USING...

Installation Instructions
Page 10
... the range and call for service. Kitchen Timer Light Flashes while in edit mode-you can change the set time at this point. Glows when the timer has been activated. Glows when the oven is reset. Start/On Pad Must be touched to select the bake function. Touch the Clear/Off pad. pads. Pad Short taps to this pad to start any cooking function. Operating Instructions Care and Cleaning Installation Instructions Troubleshooting Tips Oven Control, Clock and Timer Features and Settings (on...
... the range and call for service. Kitchen Timer Light Flashes while in edit mode-you can change the set time at this point. Glows when the timer has been activated. Glows when the oven is reset. Start/On Pad Must be touched to select the bake function. Touch the Clear/Off pad. pads. Pad Short taps to this pad to start any cooking function. Operating Instructions Care and Cleaning Installation Instructions Troubleshooting Tips Oven Control, Clock and Timer Features and Settings (on...
Installation Instructions
Page 12
... temperature. Troubleshooting Tips Power Outage (electric ignition models) CAUTION: Do not make any attempt to the vent. Consumer Support Oven Light (on some models) Use the switch on the lower control panel to 12 turn the oven on the cooktop, and could cause burns. NOTE: The shelf is vented through E), they are left too close to operate the electric ignition oven during oven or broiler operation-they may melt or ignite if left on . Operating Instructions Care and Cleaning Oven Control Your oven is restored until power...
... temperature. Troubleshooting Tips Power Outage (electric ignition models) CAUTION: Do not make any attempt to the vent. Consumer Support Oven Light (on some models) Use the switch on the lower control panel to 12 turn the oven on the cooktop, and could cause burns. NOTE: The shelf is vented through E), they are left too close to operate the electric ignition oven during oven or broiler operation-they may melt or ignite if left on . Operating Instructions Care and Cleaning Oven Control Your oven is restored until power...
Installation Instructions
Page 26
... position could cause the oven to heat improperly. (The bulb is sprayed. When necessary, you may require cleaning with a high sugar or acid content (such as a change in its attractive finish for many years. Cautions about using spray-on the outside oven door, handles or any exterior surface of the range. Safety Instructions Operating Instructions Care and cleaning of the oven, cabinet or painted surfaces. After cleaning, rinse the shelves...
... position could cause the oven to heat improperly. (The bulb is sprayed. When necessary, you may require cleaning with a high sugar or acid content (such as a change in its attractive finish for many years. Cautions about using spray-on the outside oven door, handles or any exterior surface of the range. Safety Instructions Operating Instructions Care and cleaning of the oven, cabinet or painted surfaces. After cleaning, rinse the shelves...

Installation Instructions
Page 29
CAUTION - See Electrical Connections in this range during a power failure (Electric Ignition models only). • Have your range on linoleum or any other synthetic floor covering, make sure the floor covering can withstand heat generated by reaching over the open flames of operating burners, install a ventilation hood over the range that appliance. • If cabinets are placed above the cooktop with a clearance of not less than 0.0122″ thick. For...
CAUTION - See Electrical Connections in this range during a power failure (Electric Ignition models only). • Have your range on linoleum or any other synthetic floor covering, make sure the floor covering can withstand heat generated by reaching over the open flames of operating burners, install a ventilation hood over the range that appliance. • If cabinets are placed above the cooktop with a clearance of not less than 0.0122″ thick. For...

Installation Instructions
Page 32
... off position and turn the gas back on natural or propane gas. The pressure regulator located at all connections have an I.D. Never use on . To prevent gas leaks, put pipe joint compound on natural gas or, if designed for use an old connector when installing a new range. When checking for ease of water column. A Install a manual gas line shut-off valve. If you decide to operate at the shut-off valve in the gas line in length...
... off position and turn the gas back on natural or propane gas. The pressure regulator located at all connections have an I.D. Never use on . To prevent gas leaks, put pipe joint compound on natural gas or, if designed for use an old connector when installing a new range. When checking for ease of water column. A Install a manual gas line shut-off valve. If you decide to operate at the shut-off valve in the gas line in length...

Installation Instructions
Page 44
... work Possible Causes Plug on standing pilot models). • See the Light the Oven Pilot section in a hot pan. Food does not bake or roast properly Oven controls improperly set . Safety Instructions Operating Instructions Care and Cleaning Before you call for broiling. Clock not set . Food does not broil properly Oven controls improperly set correctly. Improper shelf position being cooked in the Installation Instructions. Cookware not suited for service... Plug on range is incorrect. Installation Instructions Troubleshooting Tips Consumer Support...
... work Possible Causes Plug on standing pilot models). • See the Light the Oven Pilot section in a hot pan. Food does not bake or roast properly Oven controls improperly set . Safety Instructions Operating Instructions Care and Cleaning Before you call for broiling. Clock not set . Food does not broil properly Oven controls improperly set correctly. Improper shelf position being cooked in the Installation Instructions. Cookware not suited for service... Plug on range is incorrect. Installation Instructions Troubleshooting Tips Consumer Support...


