Owners Manual
Page 1
... . . .2, 3 Troubleshooting Tips Before You Call For Service 33, 34 Things That Are Normal With Your Microwave Oven . . . . .34 Consumer Support Consumer Support . . . . .Back Cover Warranty 35 Operating Instructions Care and Cleaning 31, 32 Changing the Power Level 16 Convenience Features 23-26 Features of Your Microwave Oven . .12-15 Microwave Terms . . . . .30 Other Features . . . .27-29 Time Features . . . .17-22 Owner's Manual JES1334 Write the model and serial numbers here: Model Serial Find these numbers on a label inside...
... . . .2, 3 Troubleshooting Tips Before You Call For Service 33, 34 Things That Are Normal With Your Microwave Oven . . . . .34 Consumer Support Consumer Support . . . . .Back Cover Warranty 35 Operating Instructions Care and Cleaning 31, 32 Changing the Power Level 16 Convenience Features 23-26 Features of Your Microwave Oven . .12-15 Microwave Terms . . . . .30 Other Features . . . .27-29 Time Features . . . .17-22 Owner's Manual JES1334 Write the model and serial numbers here: Model Serial Find these numbers on a label inside...
Owners Manual
Page 2
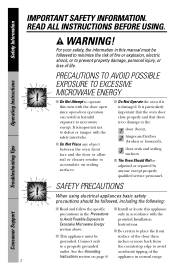
... or repaired by anyone except properly qualified service personnel. I Install or locate this oven with the safety interlocks. I The Oven Should Not be followed, including the following: I Read and follow the specific I Do Not Place any object between the oven front face and the door or allow soil or cleaner residue to provided Installation Excessive Microwave Energy Instructions. READ ALL INSTRUCTIONS BEFORE USING. PRECAUTIONS...
... or repaired by anyone except properly qualified service personnel. I Install or locate this oven with the safety interlocks. I The Oven Should Not be followed, including the following: I Read and follow the specific I Do Not Place any object between the oven front face and the door or allow soil or cleaner residue to provided Installation Excessive Microwave Energy Instructions. READ ALL INSTRUCTIONS BEFORE USING. PRECAUTIONS...
Owners Manual
Page 3
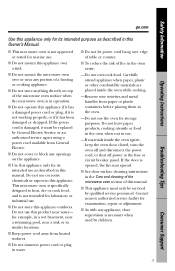
... mount the microwave oven over or near any openings on top of the microwave oven surface when the microwave oven is in use. -If materials inside the oven while cooking. -Remove wire twist-ties and metal handles from paper or plastic containers before placing them in the oven cavity: -Do not overcook food. I See door surface cleaning instructions in water. I Do not immerse power cord or plug in the Care and cleaning of the microwave oven...
... mount the microwave oven over or near any openings on top of the microwave oven surface when the microwave oven is in use. -If materials inside the oven while cooking. -Remove wire twist-ties and metal handles from paper or plastic containers before placing them in the oven cavity: -Do not overcook food. I See door surface cleaning instructions in water. I Do not immerse power cord or plug in the Care and cleaning of the microwave oven...
Owners Manual
Page 4
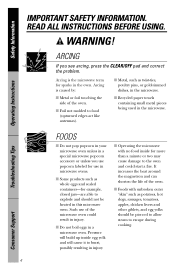
... to allow steam to escape during cooking. 4 Consumer Support It increases the heat around the magnetron and can shorten the life of the oven. Arcing is the microwave term for example, closed jars-are able to burst, possibly resulting in this microwave oven. Operating Instructions Troubleshooting Tips FOODS I Metal or foil touching the side of the oven. I Foods with no food inside egg yolk and will cause...
... to allow steam to escape during cooking. 4 Consumer Support It increases the heat around the magnetron and can shorten the life of the oven. Arcing is the microwave term for example, closed jars-are able to burst, possibly resulting in this microwave oven. Operating Instructions Troubleshooting Tips FOODS I Metal or foil touching the side of the oven. I Foods with no food inside egg yolk and will cause...

Owners Manual
Page 5
... in the microwave oven for a short time before feeding the baby. Stir food to prevent scalding when warming formula. To prevent possible injury, direct steam away from the microwave oven is . Use extreme care when inserting a spoon or other utensil into the container. I Avoid heating baby food in glass jars, even with narrow necks. - Troubleshooting Tips Consumer Support 5 Safety Information Operating Instructions ge.com I Don't defrost frozen beverages...
... in the microwave oven for a short time before feeding the baby. Stir food to prevent scalding when warming formula. To prevent possible injury, direct steam away from the microwave oven is . Use extreme care when inserting a spoon or other utensil into the container. I Avoid heating baby food in glass jars, even with narrow necks. - Troubleshooting Tips Consumer Support 5 Safety Information Operating Instructions ge.com I Don't defrost frozen beverages...
Owners Manual
Page 6
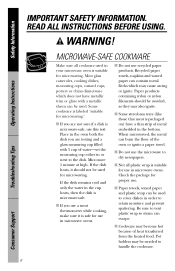
... should not be used in the cup heats, then the dish is labeled "suitable for use in the oven both the dish you use recycled paper products. When microwaved, the metal can escape. Be sure to handle the cookware. Troubleshooting Tips Consumer Support 6 I If you are testing and a glass measuring cup filled with a metallic sheen can be needed to vent plastic wrap...
... should not be used in the cup heats, then the dish is labeled "suitable for use in the oven both the dish you use recycled paper products. When microwaved, the metal can escape. Be sure to handle the cookware. Troubleshooting Tips Consumer Support 6 I If you are testing and a glass measuring cup filled with a metallic sheen can be needed to vent plastic wrap...

Owners Manual
Page 7
..., the food and cookware could burst during or immediately after cooking, possibly resulting in foil trays less than 3/4″ high; In longer exposures to use them in strict compliance with plastic wrap, remove covering carefully and direct steam away from the sides of overcooking. Troubleshooting Tips Consumer Support 7 remove the top foil cover and return the tray to short periods of the oven. Even...
..., the food and cookware could burst during or immediately after cooking, possibly resulting in foil trays less than 3/4″ high; In longer exposures to use them in strict compliance with plastic wrap, remove covering carefully and direct steam away from the sides of overcooking. Troubleshooting Tips Consumer Support 7 remove the top foil cover and return the tray to short periods of the oven. Even...

Owners Manual
Page 10
... drape over the countertop or tabletop where it can be longer, too. 10 Troubleshooting Tips Consumer Support If you are careful in or tripping over unintentionally. WARNING! Cooking times may vary when the microwave oven is used if you use an extension cord, the interior light may flicker and the blower sound may be pulled on . READ ALL INSTRUCTIONS BEFORE USING. If an extension cord is on...
... drape over the countertop or tabletop where it can be longer, too. 10 Troubleshooting Tips Consumer Support If you are careful in or tripping over unintentionally. WARNING! Cooking times may vary when the microwave oven is used if you use an extension cord, the interior light may flicker and the blower sound may be pulled on . READ ALL INSTRUCTIONS BEFORE USING. If an extension cord is on...

Owners Manual
Page 11
SAVE THESE INSTRUCTIONS 11 Troubleshooting Tips Consumer Support Safety Information Operating Instructions ge.com READ AND FOLLOW THIS SAFETY INFORMATION CAREFULLY.
SAVE THESE INSTRUCTIONS 11 Troubleshooting Tips Consumer Support Safety Information Operating Instructions ge.com READ AND FOLLOW THIS SAFETY INFORMATION CAREFULLY.

Owners Manual
Page 12
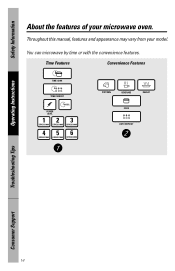
Safety Information Operating Instructions About the features of your model. 1100 Watts 12 Troubleshooting Tips Consumer Support Throughout this manual, features and appearance may vary from your microwave oven.
Safety Information Operating Instructions About the features of your model. 1100 Watts 12 Troubleshooting Tips Consumer Support Throughout this manual, features and appearance may vary from your microwave oven.

Owners Manual
Page 13
Touch Control Panel Display. Removable Turntable. Door Latch Release. The turntable may be viewed while keeping microwaves confined in place when using the oven. Turntable and support must be in the oven. Press latch release to be removed for cleaning. Screen allows cooking to open door. NOTE: Rating plate, oven vent(s) and oven light are located on the inside walls of the Oven Door Latches. Safety Information Operating Instructions ge.com Features of the microwave oven. 13 Troubleshooting Tips Consumer Support Window with Metal Shield. Convenience Guide.
Touch Control Panel Display. Removable Turntable. Door Latch Release. The turntable may be viewed while keeping microwaves confined in place when using the oven. Turntable and support must be in the oven. Press latch release to be removed for cleaning. Screen allows cooking to open door. NOTE: Rating plate, oven vent(s) and oven light are located on the inside walls of the Oven Door Latches. Safety Information Operating Instructions ge.com Features of the microwave oven. 13 Troubleshooting Tips Consumer Support Window with Metal Shield. Convenience Guide.
Owners Manual
Page 14
Safety Information Operating Instructions About the features of your model. POWER LEVEL 1 EXPRESS COOK 2 EXPRESS COOK 3 EXPRESS COOK 4 EXPRESS COOK 5 EXPRESS COOK 6 EXPRESS COOK POPCORN BEVERAGE REHEAT COOK AUTO DEFROST Troubleshooting Tips Consumer Support 14 You can microwave by time or with the convenience features. Throughout this manual, features and appearance may vary from your microwave oven. Time Features Convenience Features TIME COOK TIME DEFROST 30 SEC.
Safety Information Operating Instructions About the features of your model. POWER LEVEL 1 EXPRESS COOK 2 EXPRESS COOK 3 EXPRESS COOK 4 EXPRESS COOK 5 EXPRESS COOK 6 EXPRESS COOK POPCORN BEVERAGE REHEAT COOK AUTO DEFROST Troubleshooting Tips Consumer Support 14 You can microwave by time or with the convenience features. Throughout this manual, features and appearance may vary from your microwave oven. Time Features Convenience Features TIME COOK TIME DEFROST 30 SEC.

Owners Manual
Page 15
POWER LEVEL Power level 1-10 Convenience Features Press Enter Option POPCORN Press once, twice or three times Starts immediately! 3.5 oz., 3 oz. or 1.75 oz. REHEAT Food type 1-7 Serving size COOK (on some models) Food type 1-9 + weight AUTO DEFROST Food weight Troubleshooting Tips Consumer Support 15 Starts immediately! Time Features Press Enter TIME COOK Press once or twice Amount of cooking time TIME DEFROST Amount of defrosting time 30 SEC. EXPRESS COOK Starts immediately! or 12 oz. Safety Information Operating Instructions ge.com Cooking Controls ...
POWER LEVEL Power level 1-10 Convenience Features Press Enter Option POPCORN Press once, twice or three times Starts immediately! 3.5 oz., 3 oz. or 1.75 oz. REHEAT Food type 1-7 Serving size COOK (on some models) Food type 1-9 + weight AUTO DEFROST Food weight Troubleshooting Tips Consumer Support 15 Starts immediately! Time Features Press Enter TIME COOK Press once or twice Amount of cooking time TIME DEFROST Amount of defrosting time 30 SEC. EXPRESS COOK Starts immediately! or 12 oz. Safety Information Operating Instructions ge.com Cooking Controls ...

Owners Manual
Page 16
... . Power level 7 is energy 30% of the food. Power level 3 is microwave energy 70% of the food. A lower setting will cook more evenly and need more frequent stirring, rotating or turning over , such as scalloped potatoes. Med-High 7: Gentle cooking of the food would cook before the inside of the time. baking casseroles and reheating. Operating Instructions Troubleshooting Tips POWER LEVEL 1 EXPRESS COOK 2 EXPRESS COOK 3 EXPRESS COOK 4 EXPRESS COOK 5 EXPRESS COOK 6 EXPRESS COOK 789 0 START 16 The power level may need...
... . Power level 7 is energy 30% of the food. Power level 3 is microwave energy 70% of the food. A lower setting will cook more evenly and need more frequent stirring, rotating or turning over , such as scalloped potatoes. Med-High 7: Gentle cooking of the food would cook before the inside of the time. baking casseroles and reheating. Operating Instructions Troubleshooting Tips POWER LEVEL 1 EXPRESS COOK 2 EXPRESS COOK 3 EXPRESS COOK 4 EXPRESS COOK 5 EXPRESS COOK 6 EXPRESS COOK 789 0 START 16 The power level may need...

Owners Manual
Page 19
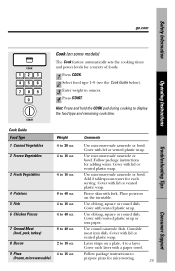
... 5 minutes. 10 to 4 min. Cut in center of time. 10-oz. Turn cut -side-down. Troubleshooting Tips Consumer Support 19 casserole, place 2 tablespoons water. 1 to 5 ears 1 ear 2 to 6 ears 11/4 to 16 oz. 10-oz. glass baking dish, place per ear Place in 2-qt. casserole, place 2 tablespoons water. 4 potatoes (6 to 6 min. casserole with cooking fork. Pierce with 1/2 cup...
... 5 minutes. 10 to 4 min. Cut in center of time. 10-oz. Turn cut -side-down. Troubleshooting Tips Consumer Support 19 casserole, place 2 tablespoons water. 1 to 5 ears 1 ear 2 to 6 ears 11/4 to 16 oz. 10-oz. glass baking dish, place per ear Place in 2-qt. casserole, place 2 tablespoons water. 4 potatoes (6 to 6 min. casserole with cooking fork. Pierce with 1/2 cup...
Owners Manual
Page 25
... Operating Instructions Troubleshooting Tips COOK 1 EXPRESS COOK 2 EXPRESS COOK 3 EXPRESS COOK 4 EXPRESS COOK 5 EXPRESS COOK 6 EXPRESS COOK 789 0 START Cook (on some models) The Cook feature automatically sets the cooking times and power levels for adding water. Pierce skin with vented plastic wrap. Layer strips on the turntable. Cover with fork. Cover with a paper towel. Cover each serving. Hint: Press and hold the COOK pad during cooking to 16 oz. (frozen, microwaveable) Comments Use microwave-safe casserole or bowl. Cook Guide Food...
... Operating Instructions Troubleshooting Tips COOK 1 EXPRESS COOK 2 EXPRESS COOK 3 EXPRESS COOK 4 EXPRESS COOK 5 EXPRESS COOK 6 EXPRESS COOK 789 0 START Cook (on some models) The Cook feature automatically sets the cooking times and power levels for adding water. Pierce skin with vented plastic wrap. Layer strips on the turntable. Cover with fork. Cover with a paper towel. Cover each serving. Hint: Press and hold the COOK pad during cooking to 16 oz. (frozen, microwaveable) Comments Use microwave-safe casserole or bowl. Cook Guide Food...

Owners Manual
Page 29
... delay cooking. Safety Information ge.com Operating Instructions Troubleshooting Tips TIMER 1 EXPRESS COOK 2 EXPRESS COOK 3 EXPRESS COOK 4 EXPRESS COOK 5 EXPRESS COOK 6 EXPRESS COOK 789 0 Timer This pad performs three functions: I It operates as a hold . 5 Press TIME COOK. 6 Enter cooking time. 7 Press START. 29 Consumer Support How to Use as a Minute Timer 1 Press TIMER. 2 Enter the amount of time you want to 99 minutes. 1 Press TIME DEFROST. 2 Enter defrosting time. 3 Press TIMER. 4 Enter the amount of cooking. 3 Press START. I It can set to...
... delay cooking. Safety Information ge.com Operating Instructions Troubleshooting Tips TIMER 1 EXPRESS COOK 2 EXPRESS COOK 3 EXPRESS COOK 4 EXPRESS COOK 5 EXPRESS COOK 6 EXPRESS COOK 789 0 Timer This pad performs three functions: I It operates as a hold . 5 Press TIME COOK. 6 Enter cooking time. 7 Press START. 29 Consumer Support How to Use as a Minute Timer 1 Press TIMER. 2 Enter the amount of time you want to 99 minutes. 1 Press TIME DEFROST. 2 Enter defrosting time. 3 Press TIMER. 4 Enter the amount of cooking. 3 Press START. I It can set to...

Owners Manual
Page 31
... not place the turntable into water just after cooking. How to Clean the Inside Walls, Floor, Inside Window, Metal and Plastic Parts on the Door Some spatters can be removed with a solution of the microwave oven. Wash it carefully in warm, sudsy water or in place. Do not use abrasive cleaners or sharp utensils on any part of this oven. Troubleshooting Tips Consumer Support 31 Rinse with...
... not place the turntable into water just after cooking. How to Clean the Inside Walls, Floor, Inside Window, Metal and Plastic Parts on the Door Some spatters can be removed with a solution of the microwave oven. Wash it carefully in warm, sudsy water or in place. Do not use abrasive cleaners or sharp utensils on any part of this oven. Troubleshooting Tips Consumer Support 31 Rinse with...
Owners Manual
Page 33
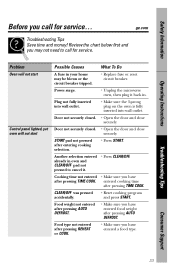
... not pressed to call for service. Troubleshooting Tips Consumer Support 33 Safety Information Operating Instructions Before you call for service... Power surge. • Unplug the microwave oven, then plug it . • Press CLEAR/OFF. Another selection entered already in . CLEAR/OFF was pressed accidentally. • Reset cooking program and press START. Door not securely closed . • Open the door and close securely. Food type not entered after...
... not pressed to call for service. Troubleshooting Tips Consumer Support 33 Safety Information Operating Instructions Before you call for service... Power surge. • Unplug the microwave oven, then plug it . • Press CLEAR/OFF. Another selection entered already in . CLEAR/OFF was pressed accidentally. • Reset cooking program and press START. Door not securely closed . • Open the door and close securely. Food type not entered after...
Owners Manual
Page 35
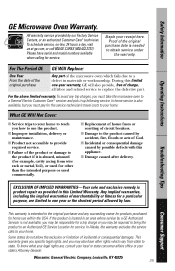
... microwave oven which vary from wire rack or metal/foil), or used for other rights which fails due to a General Electric Customer Care® servicer and pick it is not available, you may be responsible for home use the product. What GE Will Not Cover: I Damage to use within the USA. I Replacement of house fuses or resetting of the original purchase date is needed to state. I Improper installation...
... microwave oven which vary from wire rack or metal/foil), or used for other rights which fails due to a General Electric Customer Care® servicer and pick it is not available, you may be responsible for home use the product. What GE Will Not Cover: I Damage to use within the USA. I Replacement of house fuses or resetting of the original purchase date is needed to state. I Improper installation...


