
Owners Manual
Page 1
Dryers ge.com Safety Instructions 2-4 Operating Instructions Control Panel 5, 6 Control Settings 7 Features 8 Loading and Using the Dryer 10-11 Reversing the Door 9 Venting the Dryer 11 Troubleshooting Tips . . . 12, 13 Consumer Support Consumer Support . . . . . Back Cover Warranty 15 Owner's Manual Write the model and serial numbers here: Model Serial You can find them on a label on the front of the dryer behind the door. 175D1807P596 49-90328 04-07 JR
Dryers ge.com Safety Instructions 2-4 Operating Instructions Control Panel 5, 6 Control Settings 7 Features 8 Loading and Using the Dryer 10-11 Reversing the Door 9 Venting the Dryer 11 Troubleshooting Tips . . . 12, 13 Consumer Support Consumer Support . . . . . Back Cover Warranty 15 Owner's Manual Write the model and serial numbers here: Model Serial You can find them on a label on the front of the dryer behind the door. 175D1807P596 49-90328 04-07 JR

Owners Manual
Page 5
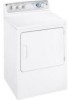
About the dryer control panel. ge.com You can locate your model. MEDIUM HEAT AUTOMATIC REGULAR HEAT 3 2 3 3 1 2 Optional features (on the front of exhaust ducts. 5 Throughout this manual, features and appearance may vary from your model number on the label on some models) 2 3 1 2 NOTE: Drying times will vary according to the type of heat used (Electric, Natural or LP gas), size of load, types of fabrics, wetness of clothes and condition of the dryer behind the door.
About the dryer control panel. ge.com You can locate your model. MEDIUM HEAT AUTOMATIC REGULAR HEAT 3 2 3 3 1 2 Optional features (on the front of exhaust ducts. 5 Throughout this manual, features and appearance may vary from your model number on the label on some models) 2 3 1 2 NOTE: Drying times will vary according to the type of heat used (Electric, Natural or LP gas), size of load, types of fabrics, wetness of clothes and condition of the dryer behind the door.

Owners Manual
Page 6
Throughout this manual, features and appearance may vary from your model number on the label on some models) 1 2 3 NOTE: Drying times will vary according to the type of heat used (Electric, Natural or LP gas), size of load, types of fabrics, wetness of clothes and condition of the dryer behind the door. About the dryer control panel. Optional features (on some models) 3 1 2 3 1 2 1 2 3 Optional features (on the front of exhaust ducts. 6 You can locate your model.
Throughout this manual, features and appearance may vary from your model number on the label on some models) 1 2 3 NOTE: Drying times will vary according to the type of heat used (Electric, Natural or LP gas), size of load, types of fabrics, wetness of clothes and condition of the dryer behind the door. About the dryer control panel. Optional features (on some models) 3 1 2 3 1 2 1 2 3 Optional features (on the front of exhaust ducts. 6 You can locate your model.

Owners Manual
Page 7
...CARE/ For wrinkle-free, permanent press and delicate items, and knits. Use with the same color on some models) REGULAR For regular to feel drier. To restart the dryer, close the door and select START to the area that are clean and dry or that has the same ...the cycle. DAMP DRY For leaving items partially damp. Color Logic (on the Cycle Dial. ge.com 1 Fabric Care/Temperature (on some models. HEAT, EASY CARE or PERMA PRESS MED. HEAT DELICATES On some models) or select the Preferred Regular Setting marked with an *. Troubleshooting Tips Consumer Support 7 or...
...CARE/ For wrinkle-free, permanent press and delicate items, and knits. Use with the same color on some models) REGULAR For regular to feel drier. To restart the dryer, close the door and select START to the area that are clean and dry or that has the same ...the cycle. DAMP DRY For leaving items partially damp. Color Logic (on the Cycle Dial. ge.com 1 Fabric Care/Temperature (on some models. HEAT, EASY CARE or PERMA PRESS MED. HEAT DELICATES On some models) or select the Preferred Regular Setting marked with an *. Troubleshooting Tips Consumer Support 7 or...

Owners Manual
Page 8
... be sure to unplug the dryer power cord or disconnect the dryer at the end of no -heat tumbling after the laundry is time to make the dryer drum provides the highest reliability available in a GE dryer. If WRINKLE CARE is not on some models) Before replacing the light bulb..., be scratched or dented during the WRINKLE CARE cycle. Reach above dryer opening from inside the drum. Consumer Support...
... be sure to unplug the dryer power cord or disconnect the dryer at the end of no -heat tumbling after the laundry is time to make the dryer drum provides the highest reliability available in a GE dryer. If WRINKLE CARE is not on some models) Before replacing the light bulb..., be scratched or dented during the WRINKLE CARE cycle. Reach above dryer opening from inside the drum. Consumer Support...

Owners Manual
Page 15
... is located in materials or workmanship. This warranty gives you specific legal rights, and you may also have serial number and model number available when calling for a particular purpose, are , consult your local or state consumer affairs office or your home. To...Attorney General. Warrantor: General Electric Company. I Damage to a defect in an area where service by law. Safety Instructions Operating Instructions GE Dryer Warranty. Proof of shipping or service calls to replace the defective part. In Alaska, the warranty excludes the cost of the original...
... is located in materials or workmanship. This warranty gives you specific legal rights, and you may also have serial number and model number available when calling for a particular purpose, are , consult your local or state consumer affairs office or your home. To...Attorney General. Warrantor: General Electric Company. I Damage to a defect in an area where service by law. Safety Instructions Operating Instructions GE Dryer Warranty. Proof of shipping or service calls to replace the defective part. In Alaska, the warranty excludes the cost of the original...

