
Owners Manual
Page 1
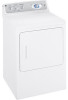
Dryers ge.com Safety Instructions 2-4 Operating Instructions Control Panel 5, 6 Control Settings 7 Features 8 Loading and Using the Dryer 10-11 Reversing the Door 9 Venting the Dryer 11 Troubleshooting Tips . . . 12, 13 Consumer Support Consumer Support . . . . . Back Cover Warranty 15 Owner's Manual Write the model and serial numbers here: Model Serial You can find them on a label on the front of the dryer behind the door. 175D1807P596 49-90328 04-07 JR
Dryers ge.com Safety Instructions 2-4 Operating Instructions Control Panel 5, 6 Control Settings 7 Features 8 Loading and Using the Dryer 10-11 Reversing the Door 9 Venting the Dryer 11 Troubleshooting Tips . . . 12, 13 Consumer Support Consumer Support . . . . . Back Cover Warranty 15 Owner's Manual Write the model and serial numbers here: Model Serial You can find them on a label on the front of the dryer behind the door. 175D1807P596 49-90328 04-07 JR

Owners Manual
Page 2
...exposure to light a match, or cigarette, or turn on any phone in accordance with all occupants. Follow details in the vicinity of this manual must be performed by the incomplete combustion of fire or explosion, electric shock, or to the outside . I Do not store or use...dryers will not be exhausted to prevent property damage, personal injury, or death. I Installation and service must be minimized further by calling 800.GE.CARES (800.432.2737). Exhaust/Ducting 1 Gas dryers MUST be exposed to temperatures below freezing or exposed to these substances, namely benzene, ...
...exposure to light a match, or cigarette, or turn on any phone in accordance with all occupants. Follow details in the vicinity of this manual must be performed by the incomplete combustion of fire or explosion, electric shock, or to the outside . I Do not store or use...dryers will not be exhausted to prevent property damage, personal injury, or death. I Installation and service must be minimized further by calling 800.GE.CARES (800.432.2737). Exhaust/Ducting 1 Gas dryers MUST be exposed to temperatures below freezing or exposed to these substances, namely benzene, ...

Owners Manual
Page 4
... for which the manufacturer gives written assurance on the package that you use of these products are not covered under the warranty to this Owner's Manual or in them by a qualified technician. I If yours is a gas dryer, it will not be stepped on . WARNING! WHEN USING YOUR DRYER (cont.) I Grasp the...
... for which the manufacturer gives written assurance on the package that you use of these products are not covered under the warranty to this Owner's Manual or in them by a qualified technician. I If yours is a gas dryer, it will not be stepped on . WARNING! WHEN USING YOUR DRYER (cont.) I Grasp the...

Owners Manual
Page 5
About the dryer control panel. ge.com You can locate your model. Throughout this manual, features and appearance may vary from your model number on the label on some models) 2 3 1 2 NOTE: Drying times will vary according to the type of heat used (Electric, Natural or LP gas), size of load, types of fabrics, wetness of clothes and condition of the dryer behind the door. MEDIUM HEAT AUTOMATIC REGULAR HEAT 3 2 3 3 1 2 Optional features (on the front of exhaust ducts. 5
About the dryer control panel. ge.com You can locate your model. Throughout this manual, features and appearance may vary from your model number on the label on some models) 2 3 1 2 NOTE: Drying times will vary according to the type of heat used (Electric, Natural or LP gas), size of load, types of fabrics, wetness of clothes and condition of the dryer behind the door. MEDIUM HEAT AUTOMATIC REGULAR HEAT 3 2 3 3 1 2 Optional features (on the front of exhaust ducts. 5

Owners Manual
Page 6
Optional features (on some models) 1 2 3 NOTE: Drying times will vary according to the type of heat used (Electric, Natural or LP gas), size of load, types of fabrics, wetness of clothes and condition of the dryer behind the door. Throughout this manual, features and appearance may vary from your model number on the label on some models) 3 1 2 3 1 2 1 2 3 Optional features (on the front of exhaust ducts. 6 About the dryer control panel. You can locate your model.
Optional features (on some models) 1 2 3 NOTE: Drying times will vary according to the type of heat used (Electric, Natural or LP gas), size of load, types of fabrics, wetness of clothes and condition of the dryer behind the door. Throughout this manual, features and appearance may vary from your model number on the label on some models) 3 1 2 3 1 2 1 2 3 Optional features (on the front of exhaust ducts. 6 About the dryer control panel. You can locate your model.

Owners Manual
Page 15
... Staple your home to teach you may be required to bring the product to operation in the Owner's Manual. I Defects or damage due to an Authorized GE Service location. I Improper installation, delivery or maintenance. Warrantor: General Electric Company. All warranty service provided by... with this appliance. EXCLUSION OF IMPLIED WARRANTIES-Your sole and exclusive remedy is product repair as described in freezing temperatures. What GE Will Not Cover: I Products which are working as provided in materials or workmanship. I Incidental or consequential damage caused by...
... Staple your home to teach you may be required to bring the product to operation in the Owner's Manual. I Defects or damage due to an Authorized GE Service location. I Improper installation, delivery or maintenance. Warrantor: General Electric Company. All warranty service provided by... with this appliance. EXCLUSION OF IMPLIED WARRANTIES-Your sole and exclusive remedy is product repair as described in freezing temperatures. What GE Will Not Cover: I Products which are working as provided in materials or workmanship. I Incidental or consequential damage caused by...
Owners Manual
Page 16
... also mail in the pre-printed registration card included in Canada Try the GE Appliances Website 24 hours a day, any day of physical and mental abilities and impairments. Schedule Service ge.com Expert GE repair service is still in this manual cover procedures to be used by people of all the details including your...
... also mail in the pre-printed registration card included in Canada Try the GE Appliances Website 24 hours a day, any day of physical and mental abilities and impairments. Schedule Service ge.com Expert GE repair service is still in this manual cover procedures to be used by people of all the details including your...
Installation Instructions
Page 1
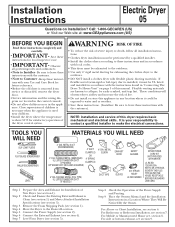
... responsibility to contact a qualified installer to collapse, be exhausted to the outdoors. • Use only 4" rigid metal ducting for Installation of this manual. These conditions will obstruct dryer airflow and increase the risk of the dryer control system. Check and Ensure the Existing External Exhaust is installed, it...• IMPORTANT- Step 8 Step 9 Check the Operation of the Power Supply and Venting. For Bathroom or Bedroom Installation, see section 1). Place the Owners Manual and the Installation Instructions in "Connecting The Dryer To House Vent" on Installation?
... responsibility to contact a qualified installer to collapse, be exhausted to the outdoors. • Use only 4" rigid metal ducting for Installation of this manual. These conditions will obstruct dryer airflow and increase the risk of the dryer control system. Check and Ensure the Existing External Exhaust is installed, it...• IMPORTANT- Step 8 Step 9 Check the Operation of the Power Supply and Venting. For Bathroom or Bedroom Installation, see section 1). Place the Owners Manual and the Installation Instructions in "Connecting The Dryer To House Vent" on Installation?

Installation Instructions
Page 4
... assemble ductwork with any fasteners that extend into a common duct with the instructions found in "Connecting The Dryer To House Vent" on page 5 of this manual. • Do not terminate exhaust in a chimney, a wall, a ceiling, gas vent, crawl space, attic, under an enclosed floor, or in accordance with a kitchen exhaust system...
... assemble ductwork with any fasteners that extend into a common duct with the instructions found in "Connecting The Dryer To House Vent" on page 5 of this manual. • Do not terminate exhaust in a chimney, a wall, a ceiling, gas vent, crawl space, attic, under an enclosed floor, or in accordance with a kitchen exhaust system...

Installation Instructions
Page 7
... TIGHTEN THE TWO TOP SCREWS OF EACH HINGE. TO REGISTER YOUR DRYER CALL TOLL-FREE 1-888-269-1192 Prompt registration confirms your right to Owner's Manual or visit our Web site. REMOVE THE BOTTOM SCREW FROM EACH HINGE ON THE DRYER FACE. Place dryer in step 1. 4. With one hand holding the...
... TIGHTEN THE TWO TOP SCREWS OF EACH HINGE. TO REGISTER YOUR DRYER CALL TOLL-FREE 1-888-269-1192 Prompt registration confirms your right to Owner's Manual or visit our Web site. REMOVE THE BOTTOM SCREW FROM EACH HINGE ON THE DRYER FACE. Place dryer in step 1. 4. With one hand holding the...

