Owners Manual
Page 1
VECTOR™ 3 AND VECTOR 3S Owner's Manual
VECTOR™ 3 AND VECTOR 3S Owner's Manual

Owners Manual
Page 2
...Vector™ are trademarks of their respective owners. Other trademarks and trade names are trademarks of Garmin Ltd. or its products and to make changes in the content of such changes or improvements. Training Stress Score™ (TSS), Intensity Factor™ (IF), and Normalized Power™ (NP) are those of Garmin... apps. Visit www.thisisant.com/directory for current updates and supplemental information concerning the use of Garmin. Go to notify any use of this manual without the express permission of such marks by the Bluetooth SIG, Inc. The Bluetooth® ...
...Vector™ are trademarks of their respective owners. Other trademarks and trade names are trademarks of Garmin Ltd. or its products and to make changes in the content of such changes or improvements. Training Stress Score™ (TSS), Intensity Factor™ (IF), and Normalized Power™ (NP) are those of Garmin... apps. Visit www.thisisant.com/directory for current updates and supplemental information concerning the use of Garmin. Go to notify any use of this manual without the express permission of such marks by the Bluetooth SIG, Inc. The Bluetooth® ...
Owners Manual
Page 5
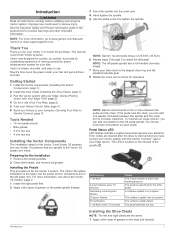
...to use. This manual covers both Vector systems. Vector was successful. NOTE: The left pedal spindle has a left-handed (reverse) thread. 7 Move your attention. NOTE: Garmin recommends 2 mm or more information, go to www.garmin.com/manuals /vector3 or www.support.garmin.com. 3 Insert... Product Information guide in serious injury. NOTE: Garmin® recommends torque of 25 lbf-ft. (34 N-m). 6 Repeat steps 2 through 5 to Garmin Connect, page 3). Error codes are low. Getting Started 1 Install the Vector components (Installing the Vector Components, page 1). 2 Install the shoe cleats...
...to use. This manual covers both Vector systems. Vector was successful. NOTE: The left pedal spindle has a left-handed (reverse) thread. 7 Move your attention. NOTE: Garmin recommends 2 mm or more information, go to www.garmin.com/manuals /vector3 or www.support.garmin.com. 3 Insert... Product Information guide in serious injury. NOTE: Garmin® recommends torque of 25 lbf-ft. (34 N-m). 6 Repeat steps 2 through 5 to Garmin Connect, page 3). Error codes are low. Getting Started 1 Install the Vector components (Installing the Vector Components, page 1). 2 Install the shoe cleats...
Owners Manual
Page 6
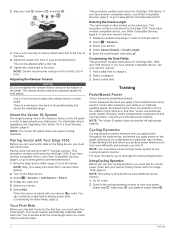
... Details > Crank Length. 5 Enter the crank length, and select . About the Vector 3S System The single-sensing Vector 3S measures forces on the Edge device, you to train more information, go to www.garmin.com/manuals/vector3. 1 Bring the Edge device within range (3 m) of the shoe. 4 Adjust... the cleat to the shoe in order to 8 N-m). This procedure contains instructions for the Edge 1030 device. Because Vector independently measures left -right power balance....
... Details > Crank Length. 5 Enter the crank length, and select . About the Vector 3S System The single-sensing Vector 3S measures forces on the Edge device, you to train more information, go to www.garmin.com/manuals/vector3. 1 Bring the Edge device within range (3 m) of the shoe. 4 Adjust... the cleat to the shoe in order to 8 N-m). This procedure contains instructions for the Edge 1030 device. Because Vector independently measures left -right power balance....

Owners Manual
Page 8
..., observing polarity. 5 Replace the battery cover, and hand tighten it to the crank arm. 2 Use a 4 mm hex key to www.garmin.com/manuals/vector3 for clearance. • Keep Vector components clean. • When moving Vector to another bike, clean the threads and surfaces thoroughly. • Go to remove the battery cover . 4 Device Information NOTE...
..., observing polarity. 5 Replace the battery cover, and hand tighten it to the crank arm. 2 Use a 4 mm hex key to www.garmin.com/manuals/vector3 for clearance. • Keep Vector components clean. • When moving Vector to another bike, clean the threads and surfaces thoroughly. • Go to remove the battery cover . 4 Device Information NOTE...

Owners Manual
Page 10
...Connected. Edge 520 and Edge 820 Instructions 6 Enter the crank length, and select . Upgrading Your Vector 3S to a Dual Sensing System Before you by completing our online registration today. • Go to www.garmin.com/manuals/vector3. 1 Bring your sensor. 3 Enter the crank length, and select . 5 Select Crank ...times in the data page loop or a custom data field. The crank length is no longer visible. 19Use a 4 mm hex key to www.garmin.com/manuals/vector3. 1 Bring the Edge device within range (3 m) of the sensor. NOTE: Do not over-tighten the battery cover. The cover is ...
...Connected. Edge 520 and Edge 820 Instructions 6 Enter the crank length, and select . Upgrading Your Vector 3S to a Dual Sensing System Before you by completing our online registration today. • Go to www.garmin.com/manuals/vector3. 1 Bring your sensor. 3 Enter the crank length, and select . 5 Select Crank ...times in the data page loop or a custom data field. The crank length is no longer visible. 19Use a 4 mm hex key to www.garmin.com/manuals/vector3. 1 Bring the Edge device within range (3 m) of the sensor. NOTE: Do not over-tighten the battery cover. The cover is ...
Owners Manual
Page 11
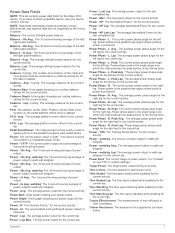
... - Time Seated Lap: The time spent seated while pedaling for the last completed lap. Trainer Resistance: The resistance force applied by the Vector S system. Balance: The current left leg for the left /right power balance. Balance - 10s Avg.: The 10-second moving average of... The three-second moving average of the left / right power balance. Lap: Cycling. Platform center offset is the location on your device owner's manual. Power Graph: A line graph showing your power output. Power - Power - NP: The Normalized Power™ for the current activity. Avg...
... - Time Seated Lap: The time spent seated while pedaling for the last completed lap. Trainer Resistance: The resistance force applied by the Vector S system. Balance: The current left leg for the left /right power balance. Balance - 10s Avg.: The 10-second moving average of... The three-second moving average of the left / right power balance. Lap: Cycling. Platform center offset is the location on your device owner's manual. Power Graph: A line graph showing your power output. Power - Power - NP: The Normalized Power™ for the current activity. Avg...
Important Safety and Product Information
Page 2
... FROM DEFECTS IN THE PRODUCT. If during the warranty period you seek warranty service outside of the temperature ranges specified in the printed manual in the product packaging. • When storing the device for , any purpose requiring precise measurement of direction, distance, location or topography...that all custom duties, V.A.T., shipping fees and other acts of nature or external causes; (iv) damage caused by service performed by Garmin. Vector Limited Warranty THIS LIMITED WARRANTY GIVES YOU SPECIFIC LEGAL RIGHTS, AND YOU MAY HAVE OTHER LEGAL RIGHTS, WHICH VARY FROM STATE TO STATE...
... FROM DEFECTS IN THE PRODUCT. If during the warranty period you seek warranty service outside of the temperature ranges specified in the printed manual in the product packaging. • When storing the device for , any purpose requiring precise measurement of direction, distance, location or topography...that all custom duties, V.A.T., shipping fees and other acts of nature or external causes; (iv) damage caused by service performed by Garmin. Vector Limited Warranty THIS LIMITED WARRANTY GIVES YOU SPECIFIC LEGAL RIGHTS, AND YOU MAY HAVE OTHER LEGAL RIGHTS, WHICH VARY FROM STATE TO STATE...
