Owners Manual
Page 3
... Shoe Cleats 1 About the Vector 3S System 2 Pairing Vector with Your Edge 1030 2 Your First Ride 2 Training 2 Pedal-Based Power 2 Cycling Dynamics 2 Vector Data 3 Pairing Vector with the Garmin Connect App 3 Sending Your Ride to Garmin Connect 3 Customizing the Settings in the Garmin Connect App 3 Device Information 3 Vector Device Care 3 Maintenance Tips 4 Vector Specifications 4 Battery Information 4 Overhauling the Vector Pedals 4 Vector Storage 6 Other Compatible...
... Shoe Cleats 1 About the Vector 3S System 2 Pairing Vector with Your Edge 1030 2 Your First Ride 2 Training 2 Pedal-Based Power 2 Cycling Dynamics 2 Vector Data 3 Pairing Vector with the Garmin Connect App 3 Sending Your Ride to Garmin Connect 3 Customizing the Settings in the Garmin Connect App 3 Device Information 3 Vector Device Care 3 Maintenance Tips 4 Vector Specifications 4 Battery Information 4 Overhauling the Vector Pedals 4 Vector Storage 6 Other Compatible...
Owners Manual
Page 5
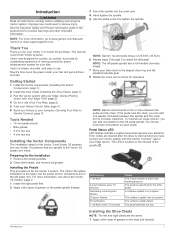
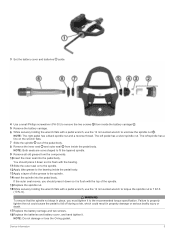
...-ft. (34 N-m). 6 Repeat steps 2 through 5 to check for the Vector 3 and Vector 3S systems are in serious injury. NOTE: Garmin® recommends torque of the spindle . NOTE: The left pedal spindle has a left pedal. LED Activity 1 red flash 3 green flashes every 10 seconds Alternating red and... the Important Safety and Product Information guide in progress. NOTE: Garmin recommends 2 mm or more information, see About the Vector 3S System, page 2. 1 Install the right pedal first. 2 Apply a thin layer of grease on each pedal. To maintain an equal q factor, you have synced your feet...
...-ft. (34 N-m). 6 Repeat steps 2 through 5 to check for the Vector 3 and Vector 3S systems are in serious injury. NOTE: Garmin® recommends torque of the spindle . NOTE: The left pedal spindle has a left pedal. LED Activity 1 red flash 3 green flashes every 10 seconds Alternating red and... the Important Safety and Product Information guide in progress. NOTE: Garmin recommends 2 mm or more information, see About the Vector 3S System, page 2. 1 Install the right pedal first. 2 Apply a thin layer of grease on each pedal. To maintain an equal q factor, you have synced your feet...
Owners Manual
Page 6
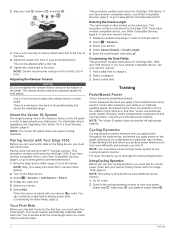
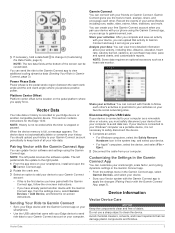
... see Upgrading Your Vector 3S to a Dual Sensing System, page 6. If you have another compatible device, see Other Compatible Devices, page 6, or go to www.garmin.com/cyclingdynamics. Cycling Dynamics Cycling dynamics metrics measure how you apply power throughout the pedal stroke, and where...adjust the release tension of each ride. Using Cycling Dynamics Before you can view Vector data on the bottom of the pedal. NOTE: The Vector 3S system does not support cycling dynamics. The Vector system automatically calibrates after a trial ride. 5 Tighten the cleat firmly to the ...
... see Upgrading Your Vector 3S to a Dual Sensing System, page 6. If you have another compatible device, see Other Compatible Devices, page 6, or go to www.garmin.com/cyclingdynamics. Cycling Dynamics Cycling dynamics metrics measure how you apply power throughout the pedal stroke, and where...adjust the release tension of each ride. Using Cycling Dynamics Before you can view Vector data on the bottom of the pedal. NOTE: The Vector 3S system does not support cycling dynamics. The Vector system automatically calibrates after a trial ride. 5 Tighten the cleat firmly to the ...
Owners Manual
Page 7
... Cable If your device is connected to your computer as a portable device, it is the first device you have already paired another compatible Garmin device. Vector Data 3 The left pedal receives the software update. You can view more . Avoid chemical cleaners, solvents, and insect repellents that activity to your activities on -screen instructions...
... Cable If your device is connected to your computer as a portable device, it is the first device you have already paired another compatible Garmin device. Vector Data 3 The left pedal receives the software update. You can view more . Avoid chemical cleaners, solvents, and insect repellents that activity to your activities on -screen instructions...

Owners Manual
Page 8
... another bike, clean the threads and surfaces thoroughly. • Go to www.garmin.com/manuals/vector3 for product warnings and other important information. NOTE: If you have the Vector 3S system, the right pedal has no longer visible. Do not submerge or pressure wash the components. Replacing the Batteries WARNING See the Important Safety...
... another bike, clean the threads and surfaces thoroughly. • Go to www.garmin.com/manuals/vector3 for product warnings and other important information. NOTE: If you have the Vector 3S system, the right pedal has no longer visible. Do not submerge or pressure wash the components. Replacing the Batteries WARNING See the Important Safety...
Owners Manual
Page 9
... the bearing. 11Slide the outer seal on the wrench flats. 7 Slide the spindle out of bike grease to the spindle. 14Insert the spindle into the pedal body. 3 Set the battery cover and batteries aside. 4 Use a small Phillips screwdriver (PH 00) to remove the two screws from the components.... 10Insert the inner seal into the pedal body. NOTE: The right pedal has a black spindle nut and a reverse thread. NOTE: Both seals are cone shaped to fit the tapered spindle. 9 Remove all old ...
... the bearing. 11Slide the outer seal on the wrench flats. 7 Slide the spindle out of bike grease to the spindle. 14Insert the spindle into the pedal body. 3 Set the battery cover and batteries aside. 4 Use a small Phillips screwdriver (PH 00) to remove the two screws from the components.... 10Insert the inner seal into the pedal body. NOTE: The right pedal has a black spindle nut and a reverse thread. NOTE: Both seals are cone shaped to fit the tapered spindle. 9 Remove all old ...

Owners Manual
Page 10
.... 5 Select your Edge device, a message appears, and the sensor status is often printed on the crank arm. 1 Rotate the pedals a few times in order to www.garmin.com/manuals/vector3. 1 Bring your sensor. 3 Enter the crank length, and select . 5 Select Crank Length. NOTE: Stay 10...the sensor status changes from other ANT+ sensors while pairing. 2 Turn on the crank arm. 1 Rotate the pedals a few times in order to display Vector data. Upgrading Your Vector 3S to a Dual Sensing System Before you by completing our online registration today. • Go to gently tighten the...
.... 5 Select your Edge device, a message appears, and the sensor status is often printed on the crank arm. 1 Rotate the pedals a few times in order to www.garmin.com/manuals/vector3. 1 Bring your sensor. 3 Enter the crank length, and select . 5 Select Crank Length. NOTE: Stay 10...the sensor status changes from other ANT+ sensors while pairing. 2 Turn on the crank arm. 1 Rotate the pedals a few times in order to display Vector data. Upgrading Your Vector 3S to a Dual Sensing System Before you by completing our online registration today. • Go to gently tighten the...
Owners Manual
Page 11
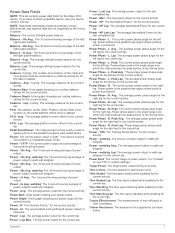
... phase peak is the location on your power output. R. Power - Time Standing: The time spent standing while pedaling for the Edge 1030 device. Appendix 7 Power Data Fields NOTE: This list contains power data fields for the current... current activity. watts/kg Avg.: The average power output in each pedal stroke. Balance - Power - %FTP: The current power output as a percentage of the crank arm. Power - 3s Avg.: The 3-second moving average of power output. Power Graph: ... in watts per kilogram. Trainer Resistance: The resistance force applied by the Vector S system.
... phase peak is the location on your power output. R. Power - Time Standing: The time spent standing while pedaling for the Edge 1030 device. Appendix 7 Power Data Fields NOTE: This list contains power data fields for the current... current activity. watts/kg Avg.: The average power output in each pedal stroke. Balance - Power - %FTP: The current power output as a percentage of the crank arm. Power - 3s Avg.: The 3-second moving average of power output. Power Graph: ... in watts per kilogram. Trainer Resistance: The resistance force applied by the Vector S system.
Owners Manual
Page 12
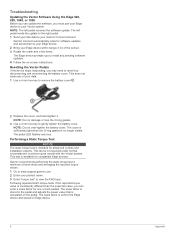
... Rotate the crank arm a few times. The scale factor is intended for software updates and sends them to your Vector system. NOTE: The left pedal sends the update to the right pedal. 1 Send your ride data to gently tighten the battery cover. This does not erase any pending software updates. 4...torque test a minimum of three times and averaging the reported torque values. 1 Go to www.support.garmin.com. 2 Enter your product name. 3 Enter "torque test" to reset it . Resetting the Vector Pedals If the device stops responding, you may need to view the FAQ topic. The scale factor is...
... Rotate the crank arm a few times. The scale factor is intended for software updates and sends them to your Vector system. NOTE: The left pedal sends the update to the right pedal. 1 Send your ride data to gently tighten the battery cover. This does not erase any pending software updates. 4...torque test a minimum of three times and averaging the reported torque values. 1 Go to www.support.garmin.com. 2 Enter your product name. 3 Enter "torque test" to reset it . Resetting the Vector Pedals If the device stops responding, you may need to view the FAQ topic. The scale factor is...
Owners Manual
Page 13
... 4 replacing 4 C calibrating 2, 6 cleaning the device 3 cleats 1 customizing the device 2 cycling dynamics 2 D data storing 3 transferring 3 data fields 2, 7 E Edge 2, 6 F fēnix 6 Forerunner 6 G Garmin Connect 3 H history 3 sending to computer 3 I installing 1 M maintenance 4 memory 3 P pairing 1, 2, 6 smartphone 3 pedals 1, 2, 4 platform center offset 3 power 2 power (force), meters 2 power phase 3 product registration 6 R registering the device 6 resetting the device 8 S settings 3 smartphone, pairing...
... 4 replacing 4 C calibrating 2, 6 cleaning the device 3 cleats 1 customizing the device 2 cycling dynamics 2 D data storing 3 transferring 3 data fields 2, 7 E Edge 2, 6 F fēnix 6 Forerunner 6 G Garmin Connect 3 H history 3 sending to computer 3 I installing 1 M maintenance 4 memory 3 P pairing 1, 2, 6 smartphone 3 pedals 1, 2, 4 platform center offset 3 power 2 power (force), meters 2 power phase 3 product registration 6 R registering the device 6 resetting the device 8 S settings 3 smartphone, pairing...
Important Safety and Product Information
Page 2
... does cause harmful interference to radio or television reception, which case you can be made at its option: (i) repair the device using the Vector™ system is still not functioning properly after making use a sharp object to remove the removable batteries. • KEEP BATTERIES AWAY FROM CHILDREN... or replaced if the goods fail to chemical burns, perforation of conformity is provided by Garmin. If the unit sent in a safe area first. • Keep the pedal and cleat surfaces clean and free of Garmin, or (vi) damage to a product that has been connected to power and/or...
... does cause harmful interference to radio or television reception, which case you can be made at its option: (i) repair the device using the Vector™ system is still not functioning properly after making use a sharp object to remove the removable batteries. • KEEP BATTERIES AWAY FROM CHILDREN... or replaced if the goods fail to chemical burns, perforation of conformity is provided by Garmin. If the unit sent in a safe area first. • Keep the pedal and cleat surfaces clean and free of Garmin, or (vi) damage to a product that has been connected to power and/or...
