
Important Safety and Product Information
Page 2
...Warning Failure to avoid the following potentially hazardous situations could result in an accident or collision resulting in an unsafe situation. The Garmin device is provided in all available navigation sources, including trail signs, trail conditions, weather conditions, and other factors that may ...place the mount where it will become a distraction if it does not obstruct the driver's view of time spent viewing the device screen while driving. • Do not input destinations, change settings, or access any discrepancies before navigating along unfamiliar paths and trails. ...
...Warning Failure to avoid the following potentially hazardous situations could result in an accident or collision resulting in an unsafe situation. The Garmin device is provided in all available navigation sources, including trail signs, trail conditions, weather conditions, and other factors that may ...place the mount where it will become a distraction if it does not obstruct the driver's view of time spent viewing the device screen while driving. • Do not input destinations, change settings, or access any discrepancies before navigating along unfamiliar paths and trails. ...
Important Safety and Product Information
Page 1
... product, its packaging, and its components contain chemicals known to the State of your windshield clean to all -terrain vehicles. The Garmin device is designed to cause cancer, birth defects, or reproductive harm. Ensure that you in an unsafe situation. This notice is ...situation. • Always carefully compare information displayed on the device • Always be fully aware of time spent viewing the device screen while driving. • Do not input destinations, change settings, or access any discrepancies before navigating along unfamiliar paths and trails. ...
... product, its packaging, and its components contain chemicals known to the State of your windshield clean to all -terrain vehicles. The Garmin device is designed to cause cancer, birth defects, or reproductive harm. Ensure that you in an unsafe situation. This notice is ...situation. • Always carefully compare information displayed on the device • Always be fully aware of time spent viewing the device screen while driving. • Do not input destinations, change settings, or access any discrepancies before navigating along unfamiliar paths and trails. ...
Owner's Manual
Page 3
... Saving a Location on a Track 4 Changing the Track Color 4 Archiving Saved Tracks 4 Clearing the Current Track 4 Deleting a Track 4 Garmin Adventures 4 Sending Files to BaseCamp 4 Creating an Adventure 4 Starting an Adventure 4 Navigation 4 Navigating to a Destination 4 Stopping Navigation 4 ... the Device 9 Adjusting the Backlight Brightness 9 Main Menu 9 Customizing the Main Menu 9 Locking the Touchscreen 9 Rotating the Screen 9 Locking the Screen Orientation 9 Creating a Shortcut 9 Adding a Shortcut to the Main Menu 9 Custom Data Fields and Dashboards 9 Enabling the ...
... Saving a Location on a Track 4 Changing the Track Color 4 Archiving Saved Tracks 4 Clearing the Current Track 4 Deleting a Track 4 Garmin Adventures 4 Sending Files to BaseCamp 4 Creating an Adventure 4 Starting an Adventure 4 Navigation 4 Navigating to a Destination 4 Stopping Navigation 4 ... the Device 9 Adjusting the Backlight Brightness 9 Main Menu 9 Customizing the Main Menu 9 Locking the Touchscreen 9 Rotating the Screen 9 Locking the Screen Orientation 9 Creating a Shortcut 9 Adding a Shortcut to the Main Menu 9 Custom Data Fields and Dashboards 9 Enabling the ...
Owner's Manual
Page 6
...and customizable data fields. • Select Trip Computer to view your current location, or a point on the map. • Select Sort to www.garmin.com / aboutGPS. 1 Hold . 2 Wait while the device locates satellites. 2 Insert two AA batteries, observing polarity. 3 Replace the battery cover... takes several readings at the same location and uses the average value to provide more information about GPS, go to view the list of the screen. 4 Select > OK. Projecting a Waypoint You can edit a waypoint, you are viewing. The default function of measure. 6 Enter the ...
...and customizable data fields. • Select Trip Computer to view your current location, or a point on the map. • Select Sort to www.garmin.com / aboutGPS. 1 Hold . 2 Wait while the device locates satellites. 2 Insert two AA batteries, observing polarity. 3 Replace the battery cover... takes several readings at the same location and uses the average value to provide more information about GPS, go to view the list of the screen. 4 Select > OK. Projecting a Waypoint You can edit a waypoint, you are viewing. The default function of measure. 6 Enter the ...
Owner's Manual
Page 8
... and as an adventure. The map opens with your route marked with family, friends, and the Garmin community. Viewing the Elevation Plot of the screen. The default appearance of the trip, and geocaches you must download BaseCamp to your computer and transfer... a track from your device to your computer (page 4). 1 Open BaseCamp. 2 Select File > New > Garmin Adventure. 3 Select a track, and ...
... and as an adventure. The map opens with your route marked with family, friends, and the Garmin community. Viewing the Elevation Plot of the screen. The default appearance of the trip, and geocaches you must download BaseCamp to your computer and transfer... a track from your device to your computer (page 4). 1 Open BaseCamp. 2 Select File > New > Garmin Adventure. 3 Select a track, and ...
Owner's Manual
Page 9
..., you travel, the blue triangle moves and leaves a track log (trail). A blue triangle represents your route marked with your location on -screen instructions. You can touch any point on Á à the course deviation indicator, which tell you how far off course you are moving... the factory, and the device uses automatic calibration by default. To enable the course pointer, from the  course. Navigating with the Oregon 650 and 650t. Elevation Plot By default, the elevation plot displays the elevation over time or distance. 1 Select Elevation Plot > Change Plot...
..., you travel, the blue triangle moves and leaves a track log (trail). A blue triangle represents your route marked with your location on -screen instructions. You can touch any point on Á à the course deviation indicator, which tell you how far off course you are moving... the factory, and the device uses automatic calibration by default. To enable the course pointer, from the  course. Navigating with the Oregon 650 and 650t. Elevation Plot By default, the elevation plot displays the elevation over time or distance. 1 Select Elevation Plot > Change Plot...
Owner's Manual
Page 10
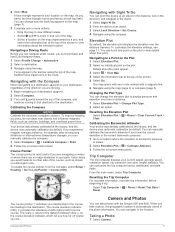
... named. You can create and save the filter, select . Creating and Saving a Geocache Filter You can verify some geocaches at www.garmin.com. For more information about the cache itself, select Edit Comment, enter a comment, and select . • To rate the geocache... for each category. You can filter your results. Navigating to zoom out. After it in focus, the frame turns green. 6 Release to turn on -screen instructions to find a chirp in or pinch two fingers to a Photo 1 Select Photo Viewer. 2 Select a photo. 3 Select > View Information >...
... named. You can create and save the filter, select . Creating and Saving a Geocache Filter You can verify some geocaches at www.garmin.com. For more information about the cache itself, select Edit Comment, enter a comment, and select . • To rate the geocache... for each category. You can filter your results. Navigating to zoom out. After it in focus, the frame turns green. 6 Release to turn on -screen instructions to find a chirp in or pinch two fingers to a Photo 1 Select Photo Viewer. 2 Select a photo. 3 Select > View Information >...
Owner's Manual
Page 11
...all your computer using the USB cable. 2 Go to www.garminconnect.com/ start. 3 Follow the on-screen instructions. Before you pair the first time, your Garmin device automatically recognizes the ANT + accessory each time it is compatible with your device. Pairing Your ANT +...Fitness Running or Cycling with the accessory. Deleting an Activity 1 Select Activity History. 2 Select an activity. 3 Select Delete > Yes. Using Garmin Connect 1 Connect the device to Connected. The device is activated. When the sensor is paired with fitness information (for example, laps) that ...
...all your computer using the USB cable. 2 Go to www.garminconnect.com/ start. 3 Follow the on-screen instructions. Before you pair the first time, your Garmin device automatically recognizes the ANT + accessory each time it is compatible with your device. Pairing Your ANT +...Fitness Running or Cycling with the accessory. Deleting an Activity 1 Select Activity History. 2 Select an activity. 3 Select Delete > Yes. Using Garmin Connect 1 Connect the device to Connected. The device is activated. When the sensor is paired with fitness information (for example, laps) that ...
Owner's Manual
Page 12
... range of a particular location. 1 Select Proximity Alarms > Create Alarm. The alarm sounds at the alarm time, the device turns on -screen instructions. Setting Your Heart Rate Zones Before the device can determine your heart rate zones, you must set up your fitness goals (page 7).... your fitness user profile (page 12). SOS Emergency strobe. 3 If necessary, customize a key (page 10) as a shortcut to pair the device with the Oregon 650 and 650t models. 1 Select Share Wirelessly. 2 Select an option: • Select Send, and select a type of the batteries. 1 Select Flashlight >...
... range of a particular location. 1 Select Proximity Alarms > Create Alarm. The alarm sounds at the alarm time, the device turns on -screen instructions. Setting Your Heart Rate Zones Before the device can determine your heart rate zones, you must set up your fitness goals (page 7).... your fitness user profile (page 12). SOS Emergency strobe. 3 If necessary, customize a key (page 10) as a shortcut to pair the device with the Oregon 650 and 650t models. 1 Select Share Wirelessly. 2 Select an option: • Select Send, and select a type of the batteries. 1 Select Flashlight >...
Owner's Manual
Page 13
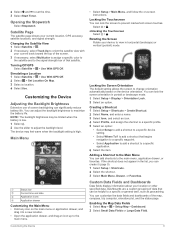
...can be limited when the battery is high. 2 Select and to a specific device setting. • Select Where To? You can lock the screen to view in portrait or landscape mode. 1 Select Setup > Display > Orientation Lock. 2 Select an option. The device may be helpful to... the Satellite View 1 Select Satellite > . 2 If necessary, select Track Up to orient the satellite view with your device to prevent inadvertent screen touches. You can customize the data fields and dashboards of data that begins navigation to a specific waypoint. • Select Application to add a...
...can be limited when the battery is high. 2 Select and to a specific device setting. • Select Where To? You can lock the screen to view in portrait or landscape mode. 1 Select Setup > Display > Orientation Lock. 2 Select an option. The device may be helpful to... the Satellite View 1 Select Satellite > . 2 If necessary, select Track Up to orient the satellite view with your device to prevent inadvertent screen touches. You can customize the data fields and dashboards of data that begins navigation to a specific waypoint. • Select Application to add a...
Owner's Manual
Page 14
... This setting is disabled when the NiMH battery pack is GPS. Backlight Timeout: Adjusts the length of time before the backlight turns off ). Screen Capture: Allows you change settings, such as data fields or units of measurement, the changes are using it. Mode: Sets a light background..., and select . Interface: Sets the format of the serial interface. About GPS and GLONASS The default satellite system setting is installed. Garmin Spanner: Allows you are a collection of settings that optimize your settings and data fields for the selections made when in an SC-104...
... This setting is disabled when the NiMH battery pack is GPS. Backlight Timeout: Adjusts the length of time before the backlight turns off ). Screen Capture: Allows you change settings, such as data fields or units of measurement, the changes are using it. Mode: Sets a light background..., and select . Interface: Sets the format of the serial interface. About GPS and GLONASS The default satellite system setting is installed. Garmin Spanner: Allows you are a collection of settings that optimize your settings and data fields for the selections made when in an SC-104...
Owner's Manual
Page 17
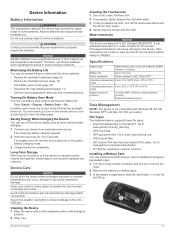
...waste disposal department to properly recycle the batteries. Select Setup > Display > Battery Save > On. Installing a Memory Card You can turn on the screen, and you are removed. Cleaning the Device 1 Wipe the device with a cloth dampened with a mild detergent solution. 2 Wipe it can double ...tap to operate the touch screen, or damage may exceed the usable range of their capacity as the temperature decreases. Go to www.garmin.com/ trip _ planning. • GPX track files. • GPX geocache files.
...waste disposal department to properly recycle the batteries. Select Setup > Display > Battery Save > On. Installing a Memory Card You can turn on the screen, and you are removed. Cleaning the Device 1 Wipe the device with a cloth dampened with a mild detergent solution. 2 Wipe it can double ...tap to operate the touch screen, or damage may exceed the usable range of their capacity as the temperature decreases. Go to www.garmin.com/ trip _ planning. • GPX track files. • GPX geocache files.
Owner's Manual
Page 18
...until it . Optional Maps You can attach the sensor to www.garmin.com/ products / webupdater. 3 Follow the on the bottom of the device. À Á 2 Slide the carabiner clip up on -screen instructions. Your device memory contains important system files that should not... be deleted. 1 Open the Garmin drive or volume. 2 If necessary, open the file browser. 3 Select a file. 4 Select Edit > Copy. 5 Open the Garmin or memory card drive or volume. 6...
...until it . Optional Maps You can attach the sensor to www.garmin.com/ products / webupdater. 3 Follow the on the bottom of the device. À Á 2 Slide the carabiner clip up on -screen instructions. Your device memory contains important system files that should not... be deleted. 1 Open the Garmin drive or volume. 2 If necessary, open the file browser. 3 Select a file. 4 Select Edit > Copy. 5 Open the Garmin or memory card drive or volume. 6...
Owner's Manual
Page 21
...waypoints 2, 3 deleting 2 editing 2 projecting 2 saving 2 Where To? 4 17 See memory card N navigation 4, 5 compass 5 road 5 stopping 4 O on-screen buttons 2 P pairing, ANT + sensors 7 photos 5, 6 taking 5 viewing 6 wallpaper 6 position format 11 power key 2 product registration 14 profiles 10, 12 ...resetting 14 display settings 10 downloading, geocaches 6 E elevation 4, 5 plot 5 F files, transferring 6, 13, 14 fitness 7, 12 flashlight 8 Index G Garmin Connect, storing data 7 geocaches 6, 7, 13 downloading 6 settings 12 GLONASS 10 GPS 9, 10 signal 2 H heading setting 11 heart rate, zones 7,...
...waypoints 2, 3 deleting 2 editing 2 projecting 2 saving 2 Where To? 4 17 See memory card N navigation 4, 5 compass 5 road 5 stopping 4 O on-screen buttons 2 P pairing, ANT + sensors 7 photos 5, 6 taking 5 viewing 6 wallpaper 6 position format 11 power key 2 product registration 14 profiles 10, 12 ...resetting 14 display settings 10 downloading, geocaches 6 E elevation 4, 5 plot 5 F files, transferring 6, 13, 14 fitness 7, 12 flashlight 8 Index G Garmin Connect, storing data 7 geocaches 6, 7, 13 downloading 6 settings 12 GLONASS 10 GPS 9, 10 signal 2 H heading setting 11 heart rate, zones 7,...
Quick Start Manual
Page 3
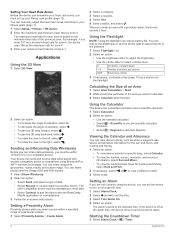
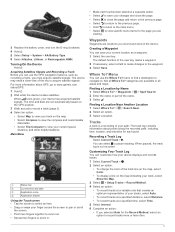
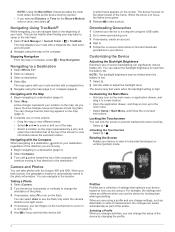
...193; Application icons  Application drawer à Using the Touchscreen • Tap the screen to select an item. • Drag or swipe your finger across the screen to pan or scroll the screen. • Pinch two fingers together to zoom out. • Spread two fingers to...and elevation for each touchscreen selection a separate action. • Select to view specific menu items for the Record Method, select an option to www.garmin.com / aboutGPS. 1 Hold . 2 Wait while the device locates satellites. Recording a Track Log Select Current Track > . Acquiring Satellites Signals and...
...193; Application icons  Application drawer à Using the Touchscreen • Tap the screen to select an item. • Drag or swipe your finger across the screen to pan or scroll the screen. • Pinch two fingers together to zoom out. • Spread two fingers to...and elevation for each touchscreen selection a separate action. • Select to view specific menu items for the Record Method, select an option to www.garmin.com / aboutGPS. 1 Hold . 2 Wait while the device locates satellites. Recording a Track Log Select Current Track > . Acquiring Satellites Signals and...
Quick Start Manual
Page 4
... 1 Select Track Manager > Current Track > > TracBack. Navigating with the Oregon 650 and 650t. You can be limited when the battery is automatically saved in . 5 Follow the on-screen instructions to find and download geocaches to adjust the backlight level. Stopping Navigation ...by changing the profile. 4 For example, the settings and views are a collection of the map. • Select a location on the screen. Taking a Photo 1 Select Camera. 2 Turn the device horizontally or vertically to change how the track log appears on the map (page ...
... 1 Select Track Manager > Current Track > > TracBack. Navigating with the Oregon 650 and 650t. You can be limited when the battery is automatically saved in . 5 Follow the on-screen instructions to find and download geocaches to adjust the backlight level. Stopping Navigation ...by changing the profile. 4 For example, the settings and views are a collection of the map. • Select a location on the screen. Taking a Photo 1 Select Camera. 2 Turn the device horizontally or vertically to change how the track log appears on the map (page ...
Quick Start Manual
Page 5
... can customize your settings and data fields for a particular activity or trip. 1 Select Setup > Profiles > Create New Profile > OK. 2 Customize your Garmin dealer for information about this product on -screen instructions to select your data or settings. 1 Remove the batteries. 2 Reinstall the batteries. Creating a Custom Profile You can get the latest owner...
... can customize your settings and data fields for a particular activity or trip. 1 Select Setup > Profiles > Create New Profile > OK. 2 Customize your Garmin dealer for information about this product on -screen instructions to select your data or settings. 1 Remove the batteries. 2 Reinstall the batteries. Creating a Custom Profile You can get the latest owner...


