Installation Instructions
Page 1
... 1241. Sonar is on a Memory Card You must be installed by completing our online registration today. • Go to your boat as you experience difficulty during the installation, contact Garmin Product Support. May 2015 Printed in the product box for in a safe place. Thru-Hull Transducer Installation Instructions Important Safety Information WARNING See the Important Safety and Product Information guide in...
... 1241. Sonar is on a Memory Card You must be installed by completing our online registration today. • Go to your boat as you experience difficulty during the installation, contact Garmin Product Support. May 2015 Printed in the product box for in a safe place. Thru-Hull Transducer Installation Instructions Important Safety Information WARNING See the Important Safety and Product Information guide in...
Installation Instructions
Page 2
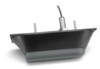
Cored Fiberglass Boat Hull Installation Instructions Thru-Hull Transducer in a Cored Hull with an angle finder, a protractor, or a digital level. The wood becomes a cutting guide for the fairing block. 2 Measure the deadrise angle of the hull at the mounting location. 3 Tilt your transducer parallel to the water line for the deadrise angle of the specific point on your vessel. • The transducer should not be...
Cored Fiberglass Boat Hull Installation Instructions Thru-Hull Transducer in a Cored Hull with an angle finder, a protractor, or a digital level. The wood becomes a cutting guide for the fairing block. 2 Measure the deadrise angle of the hull at the mounting location. 3 Tilt your transducer parallel to the water line for the deadrise angle of the specific point on your vessel. • The transducer should not be...
Installation Instructions
Page 3
... can mount the device without a Fairing Block If the deadrise angle of your vessel. 3 Seat the transducer housing firmly within the fairing block  recess. 4 Apply marine sealant to the face of the fairing block that must contact the hull. 5 Apply marine sealant to the face of the backing block that two installers complete these instructions...
... can mount the device without a Fairing Block If the deadrise angle of your vessel. 3 Seat the transducer housing firmly within the fairing block  recess. 4 Apply marine sealant to the face of the fairing block that must contact the hull. 5 Apply marine sealant to the face of the backing block that two installers complete these instructions...
Installation Instructions
Page 4
...hull. Applying Marine Sealant to a Thru-Hull Transducer You must be perpendicular to mount the device. NOTE: When installing a transducer in a non-cored fiberglass hull, avoid over -tighten the hull nut. 5 From inside the hull, use slip-joint pliers or a crescent wrench to secure the included 35 mm hull... hull, avoid over the pilot hole, use a fairing block to the water surface. 9 Sand and clean the area around the holes. The holes must cut a hole from outside the hull. Non-cored/Fiberglass Boat Hull Installation Instructions Thru-Hull Transducer in a Non-cored/Fiberglass Hull ...
...hull. Applying Marine Sealant to a Thru-Hull Transducer You must be perpendicular to mount the device. NOTE: When installing a transducer in a non-cored fiberglass hull, avoid over -tighten the hull nut. 5 From inside the hull, use slip-joint pliers or a crescent wrench to secure the included 35 mm hull... hull, avoid over the pilot hole, use a fairing block to the water surface. 9 Sand and clean the area around the holes. The holes must cut a hole from outside the hull. Non-cored/Fiberglass Boat Hull Installation Instructions Thru-Hull Transducer in a Non-cored/Fiberglass Hull ...
Installation Instructions
Page 5
... must contact the hull. 5 Apply marine sealant to the face of the transducer plate Á that two installers complete these instructions if you can mount the device without a Fairing Block If the deadrise angle of the stem and À anti-rotation bolts on the outside the hull, insert the transducer cable and Ä transducer stem through the mounting hole. 7 From inside...
... must contact the hull. 5 Apply marine sealant to the face of the transducer plate Á that two installers complete these instructions if you can mount the device without a Fairing Block If the deadrise angle of the stem and À anti-rotation bolts on the outside the hull, insert the transducer cable and Ä transducer stem through the mounting hole. 7 From inside...
Installation Instructions
Page 6
... exceeds 5°, you are using a fairing block to mount the transducer on a boat that two installers complete these instructions when you should use slip-joint pliers or a crescent wrench to secure the included M8 nuts and 8 mm nylon washers to the bushings, and at the stem hole location, from outside the hull. Apply marine sealant around the holes...
... exceeds 5°, you are using a fairing block to mount the transducer on a boat that two installers complete these instructions when you should use slip-joint pliers or a crescent wrench to secure the included M8 nuts and 8 mm nylon washers to the bushings, and at the stem hole location, from outside the hull. Apply marine sealant around the holes...
Installation Instructions
Page 7
... the included Y-cable. 2 Connect the remaining Y-cable end to your sounder. Installation Diagram You can connect a pair of transducers to the sounder. 1 Connect each transducer cable into one of the split cable ends of the isolation plate that two installers complete these instructions if you are not using the Y-cable. 7 6 From outside the hull, insert the transducer cable and Å transducer housing through the mounting hole. 7 From...
... the included Y-cable. 2 Connect the remaining Y-cable end to your sounder. Installation Diagram You can connect a pair of transducers to the sounder. 1 Connect each transducer cable into one of the split cable ends of the isolation plate that two installers complete these instructions if you are not using the Y-cable. 7 6 From outside the hull, insert the transducer cable and Å transducer housing through the mounting hole. 7 From...
Installation Instructions
Page 8
... Chartplotter Sounder Power Source Y-cable Maintenance Testing the Installation NOTICE You should apply a water-based anti-fouling paint to remove growth. 3 Wipe the device dry. NOTE: Never apply ketone-based anti-fouling paint to your transducer. or its subsidiaries www.garmin.com/support or its ...Garmin® and the Garmin logo are trademarks of the water. Because water is severe, use a scouring pad or putty knife to the hull of Garmin. © 2014-2015 Garmin Ltd. These trademarks may not be in the water to carry the sonar signal, the transducer must be used...
... Chartplotter Sounder Power Source Y-cable Maintenance Testing the Installation NOTICE You should apply a water-based anti-fouling paint to remove growth. 3 Wipe the device dry. NOTE: Never apply ketone-based anti-fouling paint to your transducer. or its subsidiaries www.garmin.com/support or its ...Garmin® and the Garmin logo are trademarks of the water. Because water is severe, use a scouring pad or putty knife to the hull of Garmin. © 2014-2015 Garmin Ltd. These trademarks may not be in the water to carry the sonar signal, the transducer must be used...


