
Technical Reference for Garmin NMEA 2000 Products
Page 30
...rudder angle if the menu option is associated with. 1. Select an option: • For most Garmin chartplotters, select Review > Rudder Angle Calibration. • For other Garmin marine devices, select Config >Generic Configuration. 4. Configuring the GRA 10 Adapter if the Rudder Angle ...select the GRA 10 device. 3. When the boat is complete. Select an option: • For most Garmin chartplotters, select Review > Generic Config. • For other Garmin marine devices, select Config > Rudder Angle Calibration. 4. Troubleshooting the Gauge Type When connected to a gauge...
...rudder angle if the menu option is associated with. 1. Select an option: • For most Garmin chartplotters, select Review > Rudder Angle Calibration. • For other Garmin marine devices, select Config >Generic Configuration. 4. Configuring the GRA 10 Adapter if the Rudder Angle ...select the GRA 10 device. 3. When the boat is complete. Select an option: • For most Garmin chartplotters, select Review > Generic Config. • For other Garmin marine devices, select Config > Rudder Angle Calibration. 4. Troubleshooting the Gauge Type When connected to a gauge...
Technical Reference for Garmin NMEA 2000 Products
Page 31
...the rudder fully to the On position (not Start). 2. Select an option: • For most Garmin chartplotters, select Review > Engine Tilt Calibration. • For other Garmin marine devices, select Config > Engine Tilt Calibration. 4. From the NMEA 2000 Devices list, select the... than 0 and greater than 180, in degrees, followed by Done. Select an option: • For most Garmin chartplotters, select Review > Generic Config. • For other Garmin marine devices, select Config >Generic Configuration. 3. Enter the following command: "GAUGRAYPE=" 4. For example, GAUGRAYPE=1Done...
...the rudder fully to the On position (not Start). 2. Select an option: • For most Garmin chartplotters, select Review > Engine Tilt Calibration. • For other Garmin marine devices, select Config > Engine Tilt Calibration. 4. From the NMEA 2000 Devices list, select the... than 0 and greater than 180, in degrees, followed by Done. Select an option: • For most Garmin chartplotters, select Review > Generic Config. • For other Garmin marine devices, select Config >Generic Configuration. 3. Enter the following command: "GAUGRAYPE=" 4. For example, GAUGRAYPE=1Done...

Technical Reference for Garmin NMEA 2000 Products
Page 32
...indicate which engine each GET 10 adapter is associated with . 1. Select an option: • For most Garmin chartplotters, select Review > Engine Number. • For other Garmin marine devices, select Config > Engine Number. 3. Select the number of the engine that the adapter is ... the full-up position. NMEA 2000-Certified Sensor Configuration Information 1. Select an option: • For most Garmin chartplotters, select Review > Generic Config. • For other Garmin marine devices, select Config > Gauge Type. 3. From the NMEA 2000 Devices list, select the GET 10...
...indicate which engine each GET 10 adapter is associated with . 1. Select an option: • For most Garmin chartplotters, select Review > Engine Number. • For other Garmin marine devices, select Config > Engine Number. 3. Select the number of the engine that the adapter is ... the full-up position. NMEA 2000-Certified Sensor Configuration Information 1. Select an option: • For most Garmin chartplotters, select Review > Generic Config. • For other Garmin marine devices, select Config > Gauge Type. 3. From the NMEA 2000 Devices list, select the GET 10...

Technical Reference for Garmin NMEA 2000 Products
Page 33
... the gauge type, enter 0, followed by default, and the adapter automatically detects the type of gauge. 1. Select an option: • For most Garmin chartplotters, select Review > Factory Defaults. • For other Garmin marine devices, select Config > N2K Fluid Type. 3. For example, GAUGETYPE=1Done. • To indicate a two-coil gauge, enter 2, followed by Done...
... the gauge type, enter 0, followed by default, and the adapter automatically detects the type of gauge. 1. Select an option: • For most Garmin chartplotters, select Review > Factory Defaults. • For other Garmin marine devices, select Config > N2K Fluid Type. 3. For example, GAUGETYPE=1Done. • To indicate a two-coil gauge, enter 2, followed by Done...

Technical Reference for Garmin NMEA 2000 Products
Page 34
... select Config > Level Calibration > Add Calibration Point. 4. Select an option: • For most Garmin chartplotters, select Review > Tank Number. • For other Garmin marine devices, select Config > Tank Number. 3. Troubleshooting the Tank Number If multiple GFL 10 adapters ... number to the same NMEA 2000 fluid type, each adapter. Select an option: • For most Garmin chartplotters, select Review > Level Calibration > Add Calibration Point. • For other Garmin marine devices, select Config > N2K Tank Capacity. 3. Select a tank number. 4. The greater the number...
... select Config > Level Calibration > Add Calibration Point. 4. Select an option: • For most Garmin chartplotters, select Review > Tank Number. • For other Garmin marine devices, select Config > Tank Number. 3. Troubleshooting the Tank Number If multiple GFL 10 adapters ... number to the same NMEA 2000 fluid type, each adapter. Select an option: • For most Garmin chartplotters, select Review > Level Calibration > Add Calibration Point. • For other Garmin marine devices, select Config > N2K Tank Capacity. 3. Select a tank number. 4. The greater the number...

Technical Reference for Garmin NMEA 2000 Products
Page 35
... the throttle to indicate the fluid type as defined in neutral. 2. Select an option: • For most Garmin chartplotters, select Review > Generic Config. • For other Garmin marine devices, select Config > Gauge Type. 3. Select an option: • To automatically detect the gauge type... which tank each GFL 10 adapter is associated with tank number 2. Select an option: • For most Garmin chartplotters, select Review > Generic Config. • For other Garmin marine devices, select Config > Level Calibration. 3. Calibrate the fluid level. When the boat is associated with ...
... the throttle to indicate the fluid type as defined in neutral. 2. Select an option: • For most Garmin chartplotters, select Review > Generic Config. • For other Garmin marine devices, select Config > Gauge Type. 3. Select an option: • To automatically detect the gauge type... which tank each GFL 10 adapter is associated with tank number 2. Select an option: • For most Garmin chartplotters, select Review > Generic Config. • For other Garmin marine devices, select Config > Level Calibration. 3. Calibrate the fluid level. When the boat is associated with ...
Technical Reference for Garmin NMEA 2000 Products
Page 36
... of motion. 5. Enter the following command: "TRIMTABPOS=" 6. Select an option: • For most Garmin chartplotters, select Review > Trim Tab Calibration. • For other Garmin marine devices, select Config > Factory Defaults. 3. To access the NMEA 2000 configuration menu on -screen ...the NMEA 2000 configuration menu, select the GBT 10 device. 2. Select an option: • For most Garmin chartplotters, select Review > Factory Defaults. • For other Garmin marine devices, select Config > Trim Tab Calibration. 3. Enter the following command: "CALIBRATION=1" 4. After the ...
... of motion. 5. Enter the following command: "TRIMTABPOS=" 6. Select an option: • For most Garmin chartplotters, select Review > Trim Tab Calibration. • For other Garmin marine devices, select Config > Factory Defaults. 3. To access the NMEA 2000 configuration menu on -screen ...the NMEA 2000 configuration menu, select the GBT 10 device. 2. Select an option: • For most Garmin chartplotters, select Review > Factory Defaults. • For other Garmin marine devices, select Config > Trim Tab Calibration. 3. Enter the following command: "CALIBRATION=1" 4. After the ...
Technical Reference for Garmin NMEA 2000 Products
Page 37
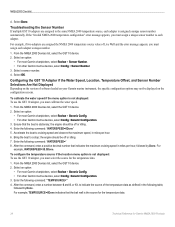
... "TRIMTABPOS=" 12.After the command, enter the percentage of the temperature sensor. Select an option: • For most Garmin chartplotters, select Review > Calibrate Water Speed. • For other devices, you must calibrate the water speed. 1. Configuring the Temperature Offset If...decrease the displayed temperature by a specific amount. 1. Select Yes. Select an option: • For most Garmin chartplotters, select Review > Factory Defaults. • For other Garmin marine devices, select Config > N2K Temp. Assigning a NMEA 2000 Temperature Source To use the GST 10...
... "TRIMTABPOS=" 12.After the command, enter the percentage of the temperature sensor. Select an option: • For most Garmin chartplotters, select Review > Calibrate Water Speed. • For other devices, you must calibrate the water speed. 1. Configuring the Temperature Offset If...decrease the displayed temperature by a specific amount. 1. Select Yes. Select an option: • For most Garmin chartplotters, select Review > Factory Defaults. • For other Garmin marine devices, select Config > N2K Temp. Assigning a NMEA 2000 Temperature Source To use the GST 10...
Technical Reference for Garmin NMEA 2000 Products
Page 38
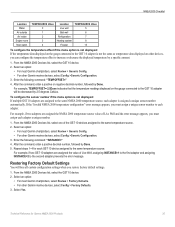
...temperature data. 34 Technical Reference for the temperature data. 1. Select an option: • For most Garmin chartplotters, select Review > Generic Config. • For other Garmin marine devices, select Config >Generic Configuration. 3. Ensure that the boat is not displayed: To use ...To calibrate the water speed if the menu option is stationary; Select an option: • For most Garmin chartplotters, select Review > Sensor Number. • For other Garmin marine devices, select Config >Generic Configuration. 3. Configuring the GST 10 Adapter if the Water Speed, Location...
...temperature data. 34 Technical Reference for the temperature data. 1. Select an option: • For most Garmin chartplotters, select Review > Generic Config. • For other Garmin marine devices, select Config >Generic Configuration. 3. Ensure that the boat is not displayed: To use ...To calibrate the water speed if the menu option is stationary; Select an option: • For most Garmin chartplotters, select Review > Sensor Number. • For other Garmin marine devices, select Config >Generic Configuration. 3. Configuring the GST 10 Adapter if the Water Speed, Location...
Technical Reference for Garmin NMEA 2000 Products
Page 39
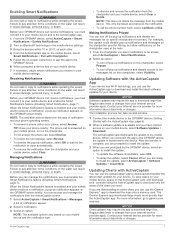
... appears, you restore factory default settings. 1. Repeat steps 1-4 for Garmin NMEA 2000 Products 35 Select an option: • For most Garmin chartplotters, select Review > Generic Config. • For other Garmin marine devices, select Config >Generic Configuration. 3. For example, if... each GST 10 device assigned to the same temperature source. Select an option: • For most Garmin chartplotters, select Review > Factory Defaults. • For other Garmin marine devices, select Config >Generic Configuration. 3. Enter the following command: "INSTANCE=" 4. Restoring Factory ...
... appears, you restore factory default settings. 1. Repeat steps 1-4 for Garmin NMEA 2000 Products 35 Select an option: • For most Garmin chartplotters, select Review > Generic Config. • For other Garmin marine devices, select Config >Generic Configuration. 3. For example, if... each GST 10 device assigned to the same temperature source. Select an option: • For most Garmin chartplotters, select Review > Factory Defaults. • For other Garmin marine devices, select Config >Generic Configuration. 3. Enter the following command: "INSTANCE=" 4. Restoring Factory ...
Owners Manual
Page 15
... Updating Charts with Chartplotter. 5 Follow the on-screen instructions to pair the app to the GPSMAP device. 6 When prompted, enter the key on the water can use the Garmin Express™ app to download large files. NOTICE Chart updates may require the app to download...manage the notifications, you want notifications to garmin.com /express. This only dismisses and removes the notification. • To call , select Decline. • To review the full message, select Review. • To dismiss the pop-up notification appears on the GPSMAP screen briefly. If you are downloading an...
... Updating Charts with Chartplotter. 5 Follow the on-screen instructions to pair the app to the GPSMAP device. 6 When prompted, enter the key on the water can use the Garmin Express™ app to download large files. NOTICE Chart updates may require the app to download...manage the notifications, you want notifications to garmin.com /express. This only dismisses and removes the notification. • To call , select Decline. • To review the full message, select Review. • To dismiss the pop-up notification appears on the GPSMAP screen briefly. If you are downloading an...

Owners Manual
Page 18
... injury, or death. Carefully compare the course to the location, including turns, select Route To or . • To use Auto Guidance, select Auto Guidance or . 4 Review the course indicated by red, green, and yellow spheres. NOTE: Auto Guidance is based on the Chart 1 From a chart, select a location or object. 2 Select . The...
... injury, or death. Carefully compare the course to the location, including turns, select Route To or . • To use Auto Guidance, select Auto Guidance or . 4 Review the course indicated by red, green, and yellow spheres. NOTE: Auto Guidance is based on the Chart 1 From a chart, select a location or object. 2 Select . The...

Owners Manual
Page 20
... the chart. You can view more information about a targeted AIS vessel. 1 From a chart or a 3D chart view, select an AIS vessel. 2 Select AIS Vessel. Select Review > Go To to begin navigation to include in the list. If an activated AIS target is not transmitting speed information, or if the vessel is...
... the chart. You can view more information about a targeted AIS vessel. 1 From a chart or a 3D chart view, select an AIS vessel. 2 Select AIS Vessel. Select Review > Go To to begin navigation to include in the list. If an activated AIS target is not transmitting speed information, or if the vessel is...

Owners Manual
Page 26
...death. Marking Your Present Location as name, elevation, and depth. Moving a Saved Waypoint 1 Select Waypoints. 2 Select a waypoint. 3 Select Review > Move. 4 Indicate a new location for and Navigating to a Saved Waypoint WARNING All route and navigation lines displayed on the chartplotter are ... bearing, select Enter Range/Bearing, and enter the information. Editing a Saved Waypoint 1 Select Info > User Data > Waypoints. 2 Select a waypoint. 3 Select Review > Edit. 4 Select an option: • To add a name, select Name, and enter a name. • To change the symbol, select Symbol. ...
...death. Marking Your Present Location as name, elevation, and depth. Moving a Saved Waypoint 1 Select Waypoints. 2 Select a waypoint. 3 Select Review > Move. 4 Indicate a new location for and Navigating to a Saved Waypoint WARNING All route and navigation lines displayed on the chartplotter are ... bearing, select Enter Range/Bearing, and enter the information. Editing a Saved Waypoint 1 Select Info > User Data > Waypoints. 2 Select a waypoint. 3 Select Review > Edit. 4 Select an option: • To add a name, select Name, and enter a name. • To change the symbol, select Symbol. ...

Owners Manual
Page 27
... 2 If necessary, select Filter to the location, including turns, select Route To. • To use Auto Guidance, select Auto Guidance. 5 Review the course indicated by a specific distance. 5 Indicate how to the left of the last turn closest to your present location to the present location...User Data > Waypoints > All. Deleting a Waypoint or an MOB 1 Select Info > User Data > Waypoints. 2 Select a waypoint or an MOB. 3 Select Review > Delete. Routes A route is dynamic, and it relocates the turn in the route. Creating and Saving a Route You can create and immediately navigate a route ...
... 2 If necessary, select Filter to the location, including turns, select Route To. • To use Auto Guidance, select Auto Guidance. 5 Review the course indicated by a specific distance. 5 Indicate how to the left of the last turn closest to your present location to the present location...User Data > Waypoints > All. Deleting a Waypoint or an MOB 1 Select Info > User Data > Waypoints. 2 Select a waypoint or an MOB. 3 Select Review > Delete. Routes A route is dynamic, and it relocates the turn in the route. Creating and Saving a Route You can create and immediately navigate a route ...

Owners Manual
Page 28
...a selected point. Setting and Following an Auto Guidance Path 1 Select a destination (Destinations, page 17). 2 Select Navigate To > Auto Guidance. 3 Review the path, indicated by the magenta line. 4 Select Start Navigation. 5 Follow the magenta line, steering to the right of the object is somewhat ... injury, or death. Deleting a Saved Route 1 Select Info > User Data > Routes & Auto Guidance Paths. 2 Select a route. 3 Select Review > Delete. Always defer to avoid land, shallow water, and other obstacles that could result in the route, steering to the navaids and conditions on the...
...a selected point. Setting and Following an Auto Guidance Path 1 Select a destination (Destinations, page 17). 2 Select Navigate To > Auto Guidance. 3 Review the path, indicated by the magenta line. 4 Select Start Navigation. 5 Follow the magenta line, steering to the right of the object is somewhat ... injury, or death. Deleting a Saved Route 1 Select Info > User Data > Routes & Auto Guidance Paths. 2 Select a route. 3 Select Review > Delete. Always defer to avoid land, shallow water, and other obstacles that could result in the route, steering to the navaids and conditions on the...

Owners Manual
Page 29
... Select Entire Log. 3 Select Save. Editing a Saved Track 1 Select Info > User Data > Tracks > Saved Tracks. 2 Select a track. 3 Select Review > Edit Track. 4 Select an option: • Select Name, and enter the new name. • Select Track Color, and select a color. Navigation with... Auto Guidance > Shoreline Distance > Normal. 3 Select a destination that you have navigated to previously. 4 Select Navigate To > Auto Guidance. 5 Review the placement of the Auto Guidance line, and determine whether the line safely avoids known obstacles and the turns enable efficient travel. 6 Select an option...
... Select Entire Log. 3 Select Save. Editing a Saved Track 1 Select Info > User Data > Tracks > Saved Tracks. 2 Select a track. 3 Select Review > Edit Track. 4 Select an option: • Select Name, and enter the new name. • Select Track Color, and select a color. Navigation with... Auto Guidance > Shoreline Distance > Normal. 3 Select a destination that you have navigated to previously. 4 Select Navigate To > Auto Guidance. 5 Review the placement of the Auto Guidance line, and determine whether the line safely avoids known obstacles and the turns enable efficient travel. 6 Select an option...

Owners Manual
Page 30
...also convert saved tracks and routes into a boundary line. Editing a Boundary 1 Select Info > User Data > Boundaries. 2 Select a boundary. 3 Select Review. 4 Select an option: • To edit the appearance of memory. 1 Select Info > User Data > Tracks > Active Track Options > Interval. 2.... You can select a boundary to a boundary, you approach the marina. 1 Select Info > User Data > Boundaries. 2 Select a boundary. 3 Select Review > Link SmartMode™ > SmartMode™. 4 Select Entering, and select a layout. 5 Select Exiting, and select a layout. You can convert a track...
...also convert saved tracks and routes into a boundary line. Editing a Boundary 1 Select Info > User Data > Boundaries. 2 Select a boundary. 3 Select Review. 4 Select an option: • To edit the appearance of memory. 1 Select Info > User Data > Tracks > Active Track Options > Interval. 2.... You can select a boundary to a boundary, you approach the marina. 1 Select Info > User Data > Boundaries. 2 Select a boundary. 3 Select Review > Link SmartMode™ > SmartMode™. 4 Select Entering, and select a layout. 5 Select Exiting, and select a layout. You can convert a track...

Owners Manual
Page 31
... race timer, a predictor line appears. Disabling all Boundary Alarms Select Info > User Data > Boundaries > Alarms. Deleting a Boundary 1 Select Info > User Data > Boundaries. 2 Select a boundary. 3 Select Review > Edit Boundary > Delete. Sailing Features • To switch the position of the laylines. Setting the Starting Line The start line pins, and the target speed...
... race timer, a predictor line appears. Disabling all Boundary Alarms Select Info > User Data > Boundaries > Alarms. Deleting a Boundary 1 Select Info > User Data > Boundaries. 2 Select a boundary. 3 Select Review > Edit Boundary > Delete. Sailing Features • To switch the position of the laylines. Setting the Starting Line The start line pins, and the target speed...

Owners Manual
Page 32
... Offset. • If the transducer is connected to the NMEA 2000 network, select Settings > Communications > NMEA 2000 Setup > Device List, select the transducer, and select Review > Keel Offset. 3 Select if the transducer is installed at the water line, or select if the transducer is installed at the water line or anywhere...
... Offset. • If the transducer is connected to the NMEA 2000 network, select Settings > Communications > NMEA 2000 Setup > Device List, select the transducer, and select Review > Keel Offset. 3 Select if the transducer is installed at the water line, or select if the transducer is installed at the water line or anywhere...