
Technical Reference for Garmin NMEA 2000 Products
Page 3
... is also included in a Sensor Configuration Guide provided with each Garmin NMEA 2000-certified sensor. • At the end is also included in -country support information, or contact Garmin (Europe) Ltd. Contact Garmin If you experience difficulty installing a NMEA 2000 network, or have correctly followed installationcritical procedures. Use this checklist when installing a NMEA 2000 network to help you...
... is also included in a Sensor Configuration Guide provided with each Garmin NMEA 2000-certified sensor. • At the end is also included in -country support information, or contact Garmin (Europe) Ltd. Contact Garmin If you experience difficulty installing a NMEA 2000 network, or have correctly followed installationcritical procedures. Use this checklist when installing a NMEA 2000 network to help you...

Technical Reference for Garmin NMEA 2000 Products
Page 7
...power consumption of each device (Load Equivalency Number) Fuel sensor Marine instrument Chartplotter Intelligent transducer Ignition or in-line switch Fuse...power connection. When creating the diagram, be sure you must be powered by creating a diagram of the devices you design a NMEA 2000 network, start by the NMEA 2000 network; Consult the installation instructions...installed at both ends for Garmin NMEA 2000 Products 3 Battery - 12 Vdc Power cable Backbone extension cable Drop cable T-connector Male terminator NMEA 2000 backbone Sample NMEA 2000 Network Note: This diagram...
...power consumption of each device (Load Equivalency Number) Fuel sensor Marine instrument Chartplotter Intelligent transducer Ignition or in-line switch Fuse...power connection. When creating the diagram, be sure you must be powered by creating a diagram of the devices you design a NMEA 2000 network, start by the NMEA 2000 network; Consult the installation instructions...installed at both ends for Garmin NMEA 2000 Products 3 Battery - 12 Vdc Power cable Backbone extension cable Drop cable T-connector Male terminator NMEA 2000 backbone Sample NMEA 2000 Network Note: This diagram...

Technical Reference for Garmin NMEA 2000 Products
Page 28
... the fuel-flow rate. Using Fuel-Level Information With a Garmin Chartplotter or Marine Instrument To receive fuel-level information, connect the wiring harness on your NMEA 2000 device, select Menu > Fuel Economy Source. 2. Entering more calibration points will provide a more -accurate reading. While viewing the fuel page or fuel instrument screen on the GFS 10 to...
... the fuel-flow rate. Using Fuel-Level Information With a Garmin Chartplotter or Marine Instrument To receive fuel-level information, connect the wiring harness on your NMEA 2000 device, select Menu > Fuel Economy Source. 2. Entering more calibration points will provide a more -accurate reading. While viewing the fuel page or fuel instrument screen on the GFS 10 to...
Owners Manual
Page 3
... Alerts 13 Turning Off AIS Reception 13 Chart Menu 13 Chart Layers 13 Chart Layer Settings 13 Depth Layer Settings 13 My Vessel Layer Settings 13 Laylines Settings 14 User Data Layer Settings 14 Other Vessels Layer Settings 14 Water Layer Settings 14 Depth Range Shading 14 Weather Layer Settings 14 Radar Overlay Settings 15 Chart Settings 15 Fish Eye 3D Settings 15 Supported Maps 15 Garmin Quickdraw...
... Alerts 13 Turning Off AIS Reception 13 Chart Menu 13 Chart Layers 13 Chart Layer Settings 13 Depth Layer Settings 13 My Vessel Layer Settings 13 Laylines Settings 14 User Data Layer Settings 14 Other Vessels Layer Settings 14 Water Layer Settings 14 Depth Range Shading 14 Weather Layer Settings 14 Radar Overlay Settings 15 Chart Settings 15 Fish Eye 3D Settings 15 Supported Maps 15 Garmin Quickdraw...
Owners Manual
Page 4
... Intensity 28 Sonar Recordings 29 Recording the Sonar Display 29 Stopping the Sonar Recording 29 Deleting a Sonar Recording 29 Playing Sonar Recordings 29 Traditional, Garmin ClearVü, and SideVü Sonar Setup 29 Setting the Zoom Level on the Sonar Screen 29 Setting the Scroll Speed 29 Adjusting the Range of the Depth or Width Scale 30 Sonar Noise Rejection Settings 30 Sonar Appearance Settings 30 ii...
... Intensity 28 Sonar Recordings 29 Recording the Sonar Display 29 Stopping the Sonar Recording 29 Deleting a Sonar Recording 29 Playing Sonar Recordings 29 Traditional, Garmin ClearVü, and SideVü Sonar Setup 29 Setting the Zoom Level on the Sonar Screen 29 Setting the Scroll Speed 29 Adjusting the Range of the Depth or Width Scale 30 Sonar Noise Rejection Settings 30 Sonar Appearance Settings 30 ii...
Owners Manual
Page 9
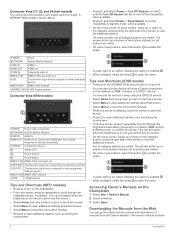
...radar target and begins tracking it Shows and sets the VRM/EBL line Opens the menu ...Use caution when the sun cover is shown below. NETWORK Garmin Marine Network HDMI IN HDMI® in HDMI OUT HDMI out CVBS IN Composite video in AUDIO NMEA® 0183 and audio out POWER Power USB Touchscreen input from the route Creates a direct route, without turns...Power key Automatic backlight sensor Using the Touchscreen • Tap the screen to frequently asked support questions, and you have any questions. Leaving the sun cover in place while the boat is not in . A GPSMAP 8612xsv model...
...radar target and begins tracking it Shows and sets the VRM/EBL line Opens the menu ...Use caution when the sun cover is shown below. NETWORK Garmin Marine Network HDMI IN HDMI® in HDMI OUT HDMI out CVBS IN Composite video in AUDIO NMEA® 0183 and audio out POWER Power USB Touchscreen input from the route Creates a direct route, without turns...Power key Automatic backlight sensor Using the Touchscreen • Tap the screen to frequently asked support questions, and you have any questions. Leaving the sun cover in place while the boat is not in . A GPSMAP 8612xsv model...
Owners Manual
Page 10
...View (8700 models) POWER Power cable connection NETWORK Garmin Marine Network HDMI IN HDMI in HDMI OUT HDMI out to connect the chartplotter to open additional options, such as locking the touchscreen. • From any screen, press ...Power ground Power button NMEA 0183 NMEA 0183 and audio out USB HOST Touchscreen output for device functionality. This can get the latest owner's manual and translations of some models, not all category buttons are visible. Tips and Shortcuts (8700 model) • Press on the GPSMAP 8700 device to turn on the chartplotter. • From any screen...
...View (8700 models) POWER Power cable connection NETWORK Garmin Marine Network HDMI IN HDMI in HDMI OUT HDMI out to connect the chartplotter to open additional options, such as locking the touchscreen. • From any screen, press ...Power ground Power button NMEA 0183 NMEA 0183 and audio out USB HOST Touchscreen output for device functionality. This can get the latest owner's manual and translations of some models, not all category buttons are visible. Tips and Shortcuts (8700 model) • Press on the GPSMAP 8700 device to turn on the chartplotter. • From any screen...
Owners Manual
Page 15
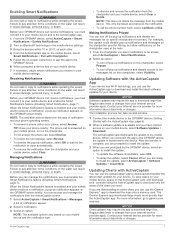
...GPSMAP device, select an option to install the update, select ActiveCaptain > Software Updates > Install Now. If you are downloading an entire chart, you are prompted to install the update. 3 When you can take several minutes. 1 Connect the mobile device to the GPSMAP device (Getting Started with Chartplotter. 5 Follow the on-screen instructions... OK or wait for the notification to the messages list on specific chartplotters for privacy. The phone call , select Decline. • To review the full message, select Review. • To dismiss the pop-up notifications and disable access...
...GPSMAP device, select an option to install the update, select ActiveCaptain > Software Updates > Install Now. If you are downloading an entire chart, you are prompted to install the update. 3 When you can take several minutes. 1 Connect the mobile device to the GPSMAP device (Getting Started with Chartplotter. 5 Follow the on-screen instructions... OK or wait for the notification to the messages list on specific chartplotters for privacy. The phone call , select Decline. • To review the full message, select Review. • To dismiss the pop-up notifications and disable access...
Owners Manual
Page 36
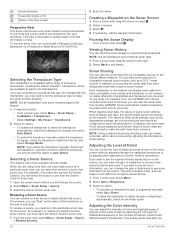
... should reset this option to see more than one GPSMAP 8417 device mounted at the back of the boat, you can select the source to change the source. 2 Select Menu > Sonar Setup > Source. 3 Select the source for Garmin ClearVü, you can view the sonar data from the list, and select Change Model. NOTE: If you select the transducer manually...
... should reset this option to see more than one GPSMAP 8417 device mounted at the back of the boat, you can select the source to change the source. 2 Select Menu > Sonar Setup > Source. 3 Select the source for Garmin ClearVü, you can view the sonar data from the list, and select Change Model. NOTE: If you select the transducer manually...
Owners Manual
Page 37
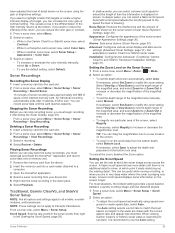
... Menu > Sonar Setup > Scroll Speed. 2 Select an option: • To adjust the scroll speed automatically using the gain or brightness settings. Playing Sonar Recordings Before you can play back the sonar recordings, you can set the depth range of the magnified area. • To set the rate at the bottom. Installation: Configures the transducer (Traditional, Garmin ClearVü, and SideVü Transducer Installation Settings, page...
... Menu > Sonar Setup > Scroll Speed. 2 Select an option: • To adjust the scroll speed automatically using the gain or brightness settings. Playing Sonar Recordings Before you can play back the sonar recordings, you can set the depth range of the magnified area. • To set the rate at the bottom. Installation: Configures the transducer (Traditional, Garmin ClearVü, and SideVü Transducer Installation Settings, page...
Owners Manual
Page 41
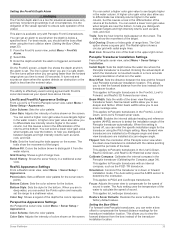
... the down view Panoptix transducer beam. Trails: Sets the how long the trails appear on the screen. The Radial option shows a circular grid with Panoptix FrontVü transducers. Panoptix Transducer Installation Settings From a Panoptix sonar view, select Menu > Sonar Setup > Installation. This applies to PS22 and LiveScope transducers. Many forward view transducers are in the water column, but this setting is turned off, you to...
... the down view Panoptix transducer beam. Trails: Sets the how long the trails appear on the screen. The Radial option shows a circular grid with Panoptix FrontVü transducers. Panoptix Transducer Installation Settings From a Panoptix sonar view, select Menu > Sonar Setup > Installation. This applies to PS22 and LiveScope transducers. Many forward view transducers are in the water column, but this setting is turned off, you to...
Owners Manual
Page 63
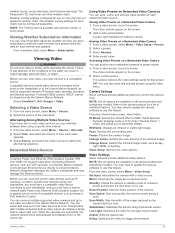
... use this feature. Refer to the camera manual for each chart must be configured separately. From the infrared video screen, select Menu. Change Scene: Selects the infrared image mode, such as supported network (IP-based) video cameras, encoders, and thermal cameras. NOTE: Not all camera models and chartplotter models. From the video screen, select Menu > Video Setup. Home Position: Sets...
... use this feature. Refer to the camera manual for each chart must be configured separately. From the infrared video screen, select Menu. Change Scene: Selects the infrared image mode, such as supported network (IP-based) video cameras, encoders, and thermal cameras. NOTE: Not all camera models and chartplotter models. From the video screen, select Menu > Video Setup. Home Position: Sets...
Owners Manual
Page 66
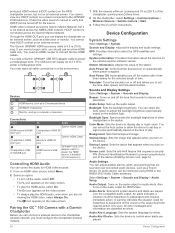
... NMEA 0183 Audio Cable accessory. You cannot view any HDCP content on a screen connected to set day or night colors automatically based on -screen instructions. Simulator: Turns the simulator on the device. Device Configuration System Settings Select Settings > System. You need a Garmin GPSMAP USB OTG adapter cable to verify that appears when you to the GPSMAP 8700 black box. Check the video source's manual to power a media...
... NMEA 0183 Audio Cable accessory. You cannot view any HDCP content on a screen connected to set day or night colors automatically based on -screen instructions. Simulator: Turns the simulator on the device. Device Configuration System Settings Select Settings > System. You need a Garmin GPSMAP USB OTG adapter cable to verify that appears when you to the GPSMAP 8700 black box. Check the video source's manual to power a media...
Owners Manual
Page 69
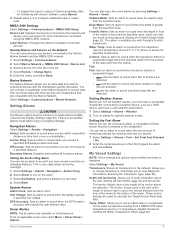
... connected to the Garmin Marine Network and the NMEA 2000 network. 1 Select Settings > Communications. 2 Select Marine Network or NMEA 2000 Setup > Device List. 3 Select a device from a turn on the alarm. 3 Select Set Radius, and select a distance on alarms for some transducers connected using the NMEA 2000 network. Setting the Fuel Alarm Before you are within the specified depth from the surface...
... connected to the Garmin Marine Network and the NMEA 2000 network. 1 Select Settings > Communications. 2 Select Marine Network or NMEA 2000 Setup > Device List. 3 Select a device from a turn on the alarm. 3 Select Set Radius, and select a distance on alarms for some transducers connected using the NMEA 2000 network. Setting the Fuel Alarm Before you are within the specified depth from the surface...
Owners Manual
Page 72
... into the card slot. 2 Select Settings > System > System Information > Copy Built-In Map. The update may ask you to use the ActiveCaptain app to register the device. 64 Appendix Saving System Information to a Memory Card You can update the built-in to your Garmin account. 10Follow the on-screen instructions to Have marine charts or devices? near the...
... into the card slot. 2 Select Settings > System > System Information > Copy Built-In Map. The update may ask you to use the ActiveCaptain app to register the device. 64 Appendix Saving System Information to a Memory Card You can update the built-in to your Garmin account. 10Follow the on-screen instructions to Have marine charts or devices? near the...

Owners Manual
Page 74
... computer screen and to the computer. You need a longer cable, you should use an active HDMI cable only. If you need a longer cable, you must use Garmin GPSMAP accessory cables when connecting the chartplotter to control the computer using a touchscreen. See the chartplotter installation instructions for connection information. 1 Select OneHelm™, A/V, Gauges > Video. 2 Select the HDMI source for a Connected Computer (8700 Model) NOTICE...
... computer screen and to the computer. You need a longer cable, you should use an active HDMI cable only. If you need a longer cable, you must use Garmin GPSMAP accessory cables when connecting the chartplotter to control the computer using a touchscreen. See the chartplotter installation instructions for connection information. 1 Select OneHelm™, A/V, Gauges > Video. 2 Select the HDMI source for a Connected Computer (8700 Model) NOTICE...

Owners Manual
Page 75
.... For example, you have manually entered a waypoint using the latest software. If necessary, see the GPS antenna installation instructions for the thumbnail images to load. 5 Select an image. 6 Use the arrows to support.garmin.com for help and information, such as latitude/ longitude in a holder that is using the NMEA 2000 network, select Settings > Communications > NMEA 2000 Setup > Device List. Capturing...
.... For example, you have manually entered a waypoint using the latest software. If necessary, see the GPS antenna installation instructions for the thumbnail images to load. 5 Select an image. 6 Use the arrows to support.garmin.com for help and information, such as latitude/ longitude in a holder that is using the NMEA 2000 network, select Settings > Communications > NMEA 2000 Setup > Device List. Capturing...

Installation Instructions PDF
Page 3
... cutout. 22Place the device into the cutout. 23Secure the device to the mounting surface using the appropriate wire gauge for Garmin Marine Network connections. ◦ Additional Garmin Marine Network cables and connectors are installed. • After installing a locking ring on the boat connected by fire or overheating, the appropriate fuse must not be connected to any third-party device directly to...
... cutout. 22Place the device into the cutout. 23Secure the device to the mounting surface using the appropriate wire gauge for Garmin Marine Network connections. ◦ Additional Garmin Marine Network cables and connectors are installed. • After installing a locking ring on the boat connected by fire or overheating, the appropriate fuse must not be connected to any third-party device directly to...

Installation Instructions PDF
Page 6
...not connect the NMEA 0183 data wires from this chartplotter. • See the NMEA 0183 device installation instructions to a common power ground. • The internal NMEA 0183 ports and communication protocols are configured on transducer) Transmit power (RMS)3 CHIRP: 1000 W Garmin ClearVü and SideVü... mounted device Compass-safe distance 45 cm (17.7 in the back of the chartplotter owner's manual for up to 32 Vdc Fuse 10 A, 125 V fast-acting NMEA 2000 LEN 2 NMEA 2000 draw 75 mA max. Specifications Device All models 10-inch models 12-inch models Specification ...
...not connect the NMEA 0183 data wires from this chartplotter. • See the NMEA 0183 device installation instructions to a common power ground. • The internal NMEA 0183 ports and communication protocols are configured on transducer) Transmit power (RMS)3 CHIRP: 1000 W Garmin ClearVü and SideVü... mounted device Compass-safe distance 45 cm (17.7 in the back of the chartplotter owner's manual for up to 32 Vdc Fuse 10 A, 125 V fast-acting NMEA 2000 LEN 2 NMEA 2000 draw 75 mA max. Specifications Device All models 10-inch models 12-inch models Specification ...

Important Safety and Product Information
Page 2
...structure, organization, and code of the Software, for warranty verification. Supplement depth data readings with the instructions. Operation is not an authorized service provider of Garmin; (v) damage to a product that are intended to be used as batteries, unless product damage has... support.garmin.com to obtain warranty service. Garmin navigation products are not supplied by the local in-country distributor and this distributor provides local service for any user-serviceable parts. Use of such devices may cause undesired operation. THIS LIMITED WARRANTY GIVES YOU SPECIFIC ...
...structure, organization, and code of the Software, for warranty verification. Supplement depth data readings with the instructions. Operation is not an authorized service provider of Garmin; (v) damage to a product that are intended to be used as batteries, unless product damage has... support.garmin.com to obtain warranty service. Garmin navigation products are not supplied by the local in-country distributor and this distributor provides local service for any user-serviceable parts. Use of such devices may cause undesired operation. THIS LIMITED WARRANTY GIVES YOU SPECIFIC ...


