
Owner s Manual
Page 1
GPSMAP® 7400/7600 Series Owner's Manual February 2016 190-01841-00_0D
GPSMAP® 7400/7600 Series Owner's Manual February 2016 190-01841-00_0D

Owner s Manual
Page 2
... content of this manual may not be copied, in whole or in part, without the written consent of Garmin. Garmin®, the Garmin logo, BlueChart®, g2 Vision®, GPSMAP®, Ultrascroll®, and VIRB® are registered trademarks of Garmin. These trademarks may... not be used without obligation to www.garmin.com for current updates and ...
... content of this manual may not be copied, in whole or in part, without the written consent of Garmin. Garmin®, the Garmin logo, BlueChart®, g2 Vision®, GPSMAP®, Ultrascroll®, and VIRB® are registered trademarks of Garmin. These trademarks may... not be used without obligation to www.garmin.com for current updates and ...
Owner s Manual
Page 3
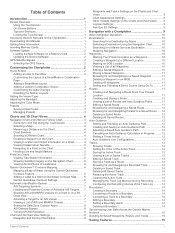
... 1 Using the Touchscreen 1 On-Screen Buttons 1 Tips and Shortcuts 1 Locking the Touchscreen 1 Accessing Owner's Manuals on the Chartplotter 1 Downloading the Manuals 1 Getting More Information 1 Inserting Memory Cards 1 Software Update 2 Loading the New Software on a Memory Card...Navigation Chart 6 Viewing Aerial Photos of Landmarks 6 Garmin Quickdraw™ Contours Mapping 6 Mapping a Body of Water Using the Garmin Quickdraw Contours Feature 6 Adding a Label to a Garmin Quickdraw Contours Map ......... 6 Garmin Quickdraw Contours Settings 6 Automatic Identification System 7 ...
... 1 Using the Touchscreen 1 On-Screen Buttons 1 Tips and Shortcuts 1 Locking the Touchscreen 1 Accessing Owner's Manuals on the Chartplotter 1 Downloading the Manuals 1 Getting More Information 1 Inserting Memory Cards 1 Software Update 2 Loading the New Software on a Memory Card...Navigation Chart 6 Viewing Aerial Photos of Landmarks 6 Garmin Quickdraw™ Contours Mapping 6 Mapping a Body of Water Using the Garmin Quickdraw Contours Feature 6 Adding a Label to a Garmin Quickdraw Contours Map ......... 6 Garmin Quickdraw Contours Settings 6 Automatic Identification System 7 ...
Owner s Manual
Page 7
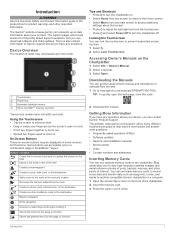
...can use optional memory cards in the chartplotter. TIP: To quickly open this web page, scan this code: 2 Download the manual. You can contact Garmin Product Support. Introduction WARNING See the Important Safety and Product Information guide in the product box for the page or function Tips and...the backlight and lock the touchscreen. • Press and select Power Off to turn added from the web. 1 Go to www.garmin.com/manuals/GPSMAP7400-7600. Accessing Owner's Manuals on the front of the item Creates a new waypoint Creates a route, with turns, to the destination Adds a turn to ...
...can use optional memory cards in the chartplotter. TIP: To quickly open this web page, scan this code: 2 Download the manual. You can contact Garmin Product Support. Introduction WARNING See the Important Safety and Product Information guide in the product box for the page or function Tips and...the backlight and lock the touchscreen. • Press and select Power Off to turn added from the web. 1 Go to www.garmin.com/manuals/GPSMAP7400-7600. Accessing Owner's Manuals on the front of the item Creates a new waypoint Creates a route, with turns, to the destination Adds a turn to ...
Owner s Manual
Page 8
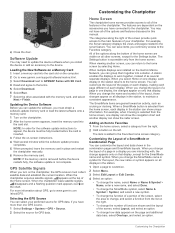
... accessories you have connected to change, and select a function from the list on the computer. 2 Go to www.garmin.com/support/software/marine.html. 3 Select Download next to GPSMAP Series with , the change the layout of a SmartMode or Combination Page You can customize the layout of the Home ...appear on a Memory Card 1 Insert a memory card into the card slot. Selecting the GPS Source You can return to all displays in this manual. Home Screen The chartplotter home screen provides access to the home screen by selecting Home. The features are interacting with SD Card. 4 Read and...
... accessories you have connected to change, and select a function from the list on the computer. 2 Go to www.garmin.com/support/software/marine.html. 3 Select Download next to GPSMAP Series with , the change the layout of a SmartMode or Combination Page You can customize the layout of the Home ...appear on a Memory Card 1 Insert a memory card into the card slot. Selecting the GPS Source You can return to all displays in this manual. Home Screen The chartplotter home screen provides access to the home screen by selecting Home. The features are interacting with SD Card. 4 Read and...
Owner s Manual
Page 15
... and MARPA Vessels on a Chart or on spot soundings and sets a dangerous depth. Laylines Settings To use this feature (Calibrating the Compass, page 18). The Manual option calculates the laylines using the measured wind angle from the wind sensor. View: Sets the perspective of the navigation lane, which help you to... shown on the chart. Heading Line: Shows and adjusts the heading line, which tracks to the specified depth. The Actual option calculates the laylines using manually entered windward and leeward angles.
... and MARPA Vessels on a Chart or on spot soundings and sets a dangerous depth. Laylines Settings To use this feature (Calibrating the Compass, page 18). The Manual option calculates the laylines using the measured wind angle from the wind sensor. View: Sets the perspective of the navigation lane, which help you to... shown on the chart. Heading Line: Shows and adjusts the heading line, which tracks to the specified depth. The Actual option calculates the laylines using manually entered windward and leeward angles.

Owner s Manual
Page 21
... approaches. Marks. Stopping the Race Timer From the Sail Racing combination screen, select Stop. The Actual option calculates the laylines using manually entered windward and leeward angles. See Backing Up Data to prevent possible data loss. Sail Racing You can display laylines on the ... predictor line indicate where the boat will be very helpful when racing. The Manual option calculates the laylines using the measured wind angle from each pin. Synchronizing User Data Across the Garmin Marine Network NOTICE Before you synchronize the user data across all chartplotters on the...
... approaches. Marks. Stopping the Race Timer From the Sail Racing combination screen, select Stop. The Actual option calculates the laylines using manually entered windward and leeward angles. See Backing Up Data to prevent possible data loss. Sail Racing You can display laylines on the ... predictor line indicate where the boat will be very helpful when racing. The Manual option calculates the laylines using the measured wind angle from each pin. Synchronizing User Data Across the Garmin Marine Network NOTICE Before you synchronize the user data across all chartplotters on the...
Owner s Manual
Page 22
...From the autopilot screen, select Menu > Autopilot Setup > Wind Hold Type. 2 Select Apparent or True. Sonar When properly connected to an optional Garmin sounder module and a transducer, your boat through a tack or gybe, and information about the progress of the tack or gybe appears on the autopilot... page 16). 2 Select Menu > Tack/Gybe. 3 Select Tack or Gybe. Engaging Wind Hold from the transducer location. Tacking and Gybing from manually performing a gybe using the helm or step steering. Enabling the Gybe Inhibitor NOTE: The gybe inhibitor does not prevent you from Heading Hold 1 ...
...From the autopilot screen, select Menu > Autopilot Setup > Wind Hold Type. 2 Select Apparent or True. Sonar When properly connected to an optional Garmin sounder module and a transducer, your boat through a tack or gybe, and information about the progress of the tack or gybe appears on the autopilot... page 16). 2 Select Menu > Tack/Gybe. 3 Select Tack or Gybe. Engaging Wind Hold from the transducer location. Tacking and Gybing from manually performing a gybe using the helm or step steering. Enabling the Gybe Inhibitor NOTE: The gybe inhibitor does not prevent you from Heading Hold 1 ...
Owner s Manual
Page 25
...sonar view, select . 2 Drag the screen. Renaming a Sonar Source You can view the sonar data using the GPSMAP 7407xsv mounted at the selected location. 3 Select another sonar view, select Sonar Setup > Advanced > Color Gain.... 3 Select an option: • To increase or decrease the color intensity manually, select Up or Down. • To use for tracking a bottom that has minimal or moderate terrain...; sonar view. 1 From the SideVü sonar view, select a location on the Garmin Marine Network. When sharing sonar data, the values of some sonar settings, such as the...
...sonar view, select . 2 Drag the screen. Renaming a Sonar Source You can view the sonar data using the GPSMAP 7407xsv mounted at the selected location. 3 Select another sonar view, select Sonar Setup > Advanced > Color Gain.... 3 Select an option: • To increase or decrease the color intensity manually, select Up or Down. • To use for tracking a bottom that has minimal or moderate terrain...; sonar view. 1 From the SideVü sonar view, select a location on the Garmin Marine Network. When sharing sonar data, the values of some sonar settings, such as the...
Owner s Manual
Page 26
... water speed data, select Auto. Customizing the Panoptix Sonar Views NOTE: Not all models support Panoptix transducers. You can select or to manually adjust the range. TIP: When viewing multiple sonar screens, you can be better when using a higher frequency. Sonar Frequencies NOTE: The... or trolling. CHIRP frequencies allow the chartplotter to adjust the range automatically, select Auto. • To increase or decrease the range manually, select Up or Down. CHIRP can select Select to choose the active screen. Setting the LiveVü Transducer Transmit Angle You can...
... water speed data, select Auto. Customizing the Panoptix Sonar Views NOTE: Not all models support Panoptix transducers. You can select or to manually adjust the range. TIP: When viewing multiple sonar screens, you can be better when using a higher frequency. Sonar Frequencies NOTE: The... or trolling. CHIRP frequencies allow the chartplotter to adjust the range automatically, select Auto. • To increase or decrease the range manually, select Up or Down. CHIRP can select Select to choose the active screen. Setting the LiveVü Transducer Transmit Angle You can...
Owner s Manual
Page 27
... the screen, select Sonar Setup > Color Key. NOTE: This feature is easier to the bottom. It can select a slower scroll speed to the Points and manually set the range shallower. If the device automatically detected your transducer, this setting to extend the length of time the information is displayed on the...
... the screen, select Sonar Setup > Color Key. NOTE: This feature is easier to the bottom. It can select a slower scroll speed to the Points and manually set the range shallower. If the device automatically detected your transducer, this setting to extend the length of time the information is displayed on the...

Owner s Manual
Page 32
...interference may not be applied to other targets are clearly visible on the radar screen. Adjusting Sea Clutter on the Radar Screen Manually For optimal radar performance, you can adjust the appearance of clutter caused by reducing the gain or reducing the radar range. ...the appearance of nearby large objects, if necessary. 7 Minimize the appearance of side-lobe echoes, if necessary. Data on the Radar Screen Manually, page 26). Minimizing Side-Lobe Interference on the Radar Screen Automatically The automatic gain setting for each radar mode is refreshed every few seconds...
...interference may not be applied to other targets are clearly visible on the radar screen. Adjusting Sea Clutter on the Radar Screen Manually For optimal radar performance, you can adjust the appearance of clutter caused by reducing the gain or reducing the radar range. ...the appearance of nearby large objects, if necessary. 7 Minimize the appearance of side-lobe echoes, if necessary. Data on the Radar Screen Manually, page 26). Minimizing Side-Lobe Interference on the Radar Screen Automatically The automatic gain setting for each radar mode is refreshed every few seconds...

Owner s Manual
Page 33
...look-ahead speed, and navigation appearance. Front of Boat: Compensates for use the autopilot feature only at a station installed next to promptly regain manual control of - Enter your vessel. Nav Lines: Shows the navigation lines that help you must measure the potential front-of the screen automatically...as docks, pilings, and other radar modes or to reduce the clutter on the radar screen. boat offset. The system also allows manual steering and several modes of the radar scanner on all options and settings are responsible for the physical location of the radar scanner on...
...look-ahead speed, and navigation appearance. Front of Boat: Compensates for use the autopilot feature only at a station installed next to promptly regain manual control of - Enter your vessel. Nav Lines: Shows the navigation lines that help you must measure the potential front-of the screen automatically...as docks, pilings, and other radar modes or to reduce the clutter on the radar screen. boat offset. The system also allows manual steering and several modes of the radar scanner on all options and settings are responsible for the physical location of the radar scanner on...

Owner s Manual
Page 34
...and Following the Circles Pattern You can also perform other specialty maneuvers such as Uturns and Williamson turns. When you release the helm and manually maintain a specific heading for the autopilot to steer the boat in a continuous circle, in a specified direction, and at a specified ...Setup > Step Turn Size. 2 Select an increment. Adjusting the Heading with the intent of the Autopilot screen. With the autopilot engaged, manually steer the boat. Steering Patterns WARNING You are certain that the water is available only on hydraulic steering systems. From the autopilot screen,...
...and Following the Circles Pattern You can also perform other specialty maneuvers such as Uturns and Williamson turns. When you release the helm and manually maintain a specific heading for the autopilot to steer the boat in a continuous circle, in a specified direction, and at a specified ...Setup > Step Turn Size. 2 Select an increment. Adjusting the Heading with the intent of the Autopilot screen. With the autopilot engaged, manually steer the boat. Steering Patterns WARNING You are certain that the water is available only on hydraulic steering systems. From the autopilot screen,...
Owner s Manual
Page 35
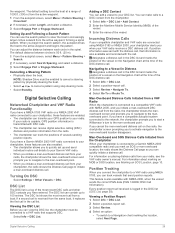
...Every position report call . 3 Select Review. 4 Select an option: • To switch to the man-overboard point. • When you have a Garmin NMEA 2000 VHF radio connected to the manoverboard point. Turning On DSC Select Settings > Other Vessels > DSC. You can add a vessel to your radio,...the search pattern to the man-overboard location disappears. For information about marking an MOB or SOS location, see the VHF radio owner's manual. You can view the DSC list, the chartplotter must be connected to a VHF radio that information is transmitted with the distress call ....
...Every position report call . 3 Select Review. 4 Select an option: • To switch to the man-overboard point. • When you have a Garmin NMEA 2000 VHF radio connected to the manoverboard point. Turning On DSC Select Settings > Other Vessels > DSC. You can add a vessel to your radio,...the search pattern to the man-overboard location disappears. For information about marking an MOB or SOS location, see the VHF radio owner's manual. You can view the DSC list, the chartplotter must be connected to a VHF radio that information is transmitted with the distress call ....

Owner s Manual
Page 37
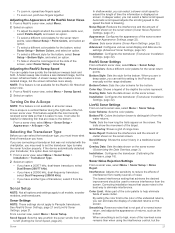
... gauges screen, select Menu > Gauge Setup > Status Alarms > On. Customizing the Engines Shown in Gauges Before you can view engine and fuel gauges, you must manually select the number of engines (Selecting the Number of Engines Shown in the gauges, you specify. 1 Select Settings > Alarms > Fuel > Set Total Fuel Onboard > On...
... gauges screen, select Menu > Gauge Setup > Status Alarms > On. Customizing the Engines Shown in Gauges Before you can view engine and fuel gauges, you must manually select the number of engines (Selecting the Number of Engines Shown in the gauges, you specify. 1 Select Settings > Alarms > Fuel > Set Total Fuel Onboard > On...

Owner s Manual
Page 38
... for a Different Date 1 Select Info > Tides & Currents. 2 Select Tides, Currents, or Celestial. 3 Select an option. • To view information for a different date, select Change Date > Manual, and enter a date. • To view information for today, select Change Date > Current. • If available, to view information for a specific date and time, including...
... for a Different Date 1 Select Info > Tides & Currents. 2 Select Tides, Currents, or Celestial. 3 Select an option. • To view information for a different date, select Change Date > Manual, and enter a date. • To view information for today, select Change Date > Current. • If available, to view information for a specific date and time, including...

Owner s Manual
Page 43
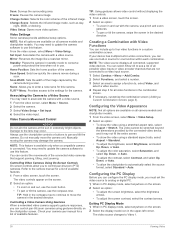
... the Perspective 3D chart view. Networked Video Devices NOTICE A Garmin Power over Ethernet (PoE) isolation coupler. Connecting a PoE device directly to a Garmin Marine Network chartplotter damages the Garmin chartplotter and may need to update the camera software to a Garmin Marine Network. Go to the camera manual for each video appears. 3 Select Source, and select the...
... the Perspective 3D chart view. Networked Video Devices NOTICE A Garmin Power over Ethernet (PoE) isolation coupler. Connecting a PoE device directly to a Garmin Marine Network chartplotter damages the Garmin chartplotter and may need to update the camera software to a Garmin Marine Network. Go to the camera manual for each video appears. 3 Select Source, and select the...
Owner s Manual
Page 44
... Control NOTICE Do not aim the camera at the sun or extremely bright objects. You can use the compass rose. If your camera user manual for all connected, supported video devices. The video cannot be stretched beyond the dimensions provided by the camera during a scan. Standby: Places ... From a video screen, touch the screen. Associating the Camera to a Video Source You may need to pan and tilt the camera. Do not manually move the camera in the upper-left corner. You may need to update the camera software to use the chartplotter controls or buttons to associate...
... Control NOTICE Do not aim the camera at the sun or extremely bright objects. You can use the compass rose. If your camera user manual for all connected, supported video devices. The video cannot be stretched beyond the dimensions provided by the camera during a scan. Standby: Places ... From a video screen, touch the screen. Associating the Camera to a Video Source You may need to pan and tilt the camera. Do not manually move the camera in the upper-left corner. You may need to update the camera software to use the chartplotter controls or buttons to associate...
Owner s Manual
Page 51
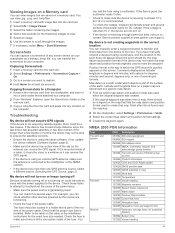
... should be a few seconds for DC voltage. Refer to the label on the cable or the installation instructions for at www.garmin.com/support. You can transfer the screenshot to your chartplotter as latitude/ longitude in the power cable. Latitude and longitude lines on...from the card and paste it into the card slot. 2 Select Settings > Preferences > Screenshot Capture > On. 3 Go to a screen you have manually entered a waypoint using the latest software. If the original waypoint was created. Screenshots You can capture a screenshot of any location on the computer. If...
... should be a few seconds for DC voltage. Refer to the label on the cable or the installation instructions for at www.garmin.com/support. You can transfer the screenshot to your chartplotter as latitude/ longitude in the power cable. Latitude and longitude lines on...from the card and paste it into the card slot. 2 Select Settings > Preferences > Screenshot Capture > On. 3 Go to a screen you have manually entered a waypoint using the latest software. If the original waypoint was created. Screenshots You can capture a screenshot of any location on the computer. If...