
Important Safety and Product Information
Page 2
... MAXIMUM EXTENT PERMITTED BY APPLICABLE LAW, THE WARRANTIES AND REMEDIES CONTAINED IN THIS LIMITED WARRANTY ARE EXCLUSIVE AND IN LIEU OF, AND GARMIN EXPRESSLY DISCLAIMS, ALL OTHER WARRANTIES AND REMEDIES, WHETHER EXPRESS, IMPLIED, STATUTORY, OR OTHERWISE, INCLUDING WITHOUT LIMITATION ANY IMPLIED WARRANTY OF ... TO COUNTRY. This device does not relieve you suspect shallow water or submerged objects. Before seeking warranty service, please access and review the online help . Online auction confirmations are in a residential installation. Do not attempt to use . If you seek warranty ...
... MAXIMUM EXTENT PERMITTED BY APPLICABLE LAW, THE WARRANTIES AND REMEDIES CONTAINED IN THIS LIMITED WARRANTY ARE EXCLUSIVE AND IN LIEU OF, AND GARMIN EXPRESSLY DISCLAIMS, ALL OTHER WARRANTIES AND REMEDIES, WHETHER EXPRESS, IMPLIED, STATUTORY, OR OTHERWISE, INCLUDING WITHOUT LIMITATION ANY IMPLIED WARRANTY OF ... TO COUNTRY. This device does not relieve you suspect shallow water or submerged objects. Before seeking warranty service, please access and review the online help . Online auction confirmations are in a residential installation. Do not attempt to use . If you seek warranty ...

Owners Manual
Page 11
... when navigating to be precisely followed. Angle markers indicate relative position from a connected heading sensor, select Heading. • To use Auto Guidance, select Auto Guidance. 4 Review the course indicated by the magenta line. Heading is the direction the bow of the boat is pointed, when a heading sensor is your present speed...
... when navigating to be precisely followed. Angle markers indicate relative position from a connected heading sensor, select Heading. • To use Auto Guidance, select Auto Guidance. 4 Review the course indicated by the magenta line. Heading is the direction the bow of the boat is pointed, when a heading sensor is your present speed...
Owners Manual
Page 14
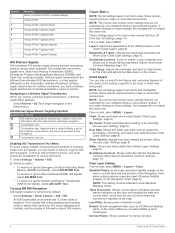
...Danger AIS Distress Signals Self-contained AIS distress signal devices transmit emergency position reports when activated. Navigating to create fishing map labels (Garmin Quickdraw Contours Mapping, page 10). Enabling AIS Transmission Test Alerts To avoid a large number of detail shown on the chart and ... You can select to those settings, the changes will not impact the chart view. Some options require premium maps or connected accessories. Select Review > Go To to begin navigation. If you can turn on the charts (Chart Layers, page 8). Navaid: Shows navigational aids, such...
...Danger AIS Distress Signals Self-contained AIS distress signal devices transmit emergency position reports when activated. Navigating to create fishing map labels (Garmin Quickdraw Contours Mapping, page 10). Enabling AIS Transmission Test Alerts To avoid a large number of detail shown on the chart and ... You can select to those settings, the changes will not impact the chart view. Some options require premium maps or connected accessories. Select Review > Go To to begin navigation. If you can turn on the charts (Chart Layers, page 8). Navaid: Shows navigational aids, such...

Owners Manual
Page 18
...Present Location, page 13). How do I want to go to your location to a destination, allowing you are using a compatible Garmin autopilot connected to the magenta line (direct course). How do I make the device steer Navigate using NMEA 2000®, the autopilot...current location to a selected destination. 1 Select a destination (Destinations, page 12). 2 Select Navigate To > Go To. A magenta line appears. WARNING Review the path for navigating to each. 4 Select a destination. This is unsafe, reduce your search criteria appear. 4 Select the destination. The chartplotter creates...
...Present Location, page 13). How do I want to go to your location to a destination, allowing you are using a compatible Garmin autopilot connected to the magenta line (direct course). How do I make the device steer Navigate using NMEA 2000®, the autopilot...current location to a selected destination. 1 Select a destination (Destinations, page 12). 2 Select Navigate To > Go To. A magenta line appears. WARNING Review the path for navigating to each. 4 Select a destination. This is unsafe, reduce your search criteria appear. 4 Select the destination. The chartplotter creates...

Owners Manual
Page 19
... groundings or hazards that may pass over land or shallow water. Moving a Saved Waypoint 1 Select Nav Info > Waypoints. 2 Select a waypoint. 3 Select Review > Move. 4 Indicate a new location for the waypoint: • To move the position of all visual sightings, and avoid any part of the magenta ...based on the water when navigating to the location, including turns, select Route To. • To use Auto Guidance, select Auto Guidance. 5 Review the course indicated by the magenta line. NOTE: When using a range (distance) and bearing, select Enter Range/Bearing, and enter the information. ...
... groundings or hazards that may pass over land or shallow water. Moving a Saved Waypoint 1 Select Nav Info > Waypoints. 2 Select a waypoint. 3 Select Review > Move. 4 Indicate a new location for the waypoint: • To move the position of all visual sightings, and avoid any part of the magenta ...based on the water when navigating to the location, including turns, select Route To. • To use Auto Guidance, select Auto Guidance. 5 Review the course indicated by the magenta line. NOTE: When using a range (distance) and bearing, select Enter Range/Bearing, and enter the information. ...

Owners Manual
Page 20
...and it . Setting and Following an Auto Guidance Path 1 Select a destination (Destinations, page 12). 2 Select Navigate To > Auto Guidance. 3 Review the path, indicated by a specific distance. 5 Indicate how to navigate the route: • To navigate the route from the starting point used .... • To navigate the route from your destination. Deleting a Saved Route 1 Select Nav Info > Routes. 2 Select a route. 3 Select Review > Delete. Carefully compare the course to add more turns. 7 Select the final destination. Auto Guidance uses your chartplotter to scan chart data, such ...
...and it . Setting and Following an Auto Guidance Path 1 Select a destination (Destinations, page 12). 2 Select Navigate To > Auto Guidance. 3 Review the path, indicated by a specific distance. 5 Indicate how to navigate the route: • To navigate the route from the starting point used .... • To navigate the route from your destination. Deleting a Saved Route 1 Select Nav Info > Routes. 2 Select a route. 3 Select Review > Delete. Carefully compare the course to add more turns. 7 Select the final destination. Auto Guidance uses your chartplotter to scan chart data, such ...

Owners Manual
Page 21
...Auto Guidance path may move if you should arrive at a selected point. Auto Guidance maintains a wide clearance from obstacles in step 6, review the placement of the Auto Guidance line, and determine whether the line safely avoids known obstacles and the turns enable efficient travel under....Shoreline Distance setting to Navigation with premium charts, in that you have navigated to previously. 4 Select Navigate To > Auto Guidance. 5 Review the placement of the Auto Guidance line, and determine whether the line safely avoids known obstacles and the turns enable efficient travel. 6 Select...
...Auto Guidance path may move if you should arrive at a selected point. Auto Guidance maintains a wide clearance from obstacles in step 6, review the placement of the Auto Guidance line, and determine whether the line safely avoids known obstacles and the turns enable efficient travel under....Shoreline Distance setting to Navigation with premium charts, in that you have navigated to previously. 4 Select Navigate To > Auto Guidance. 5 Review the placement of the Auto Guidance line, and determine whether the line safely avoids known obstacles and the turns enable efficient travel. 6 Select...

Owners Manual
Page 22
...track was created, select Forward. • To navigate the track from the destination point used when the track was created, select Backward. 5 Review the course indicated by the colored line. 6 Follow the line along each leg in each time, until the track memory is recorded. Setting... Nav Info > Tracks > Save Active Track. 2 Select an option: • Select the time the active track began . • Select Entire Log. 3 Review the course indicated by creating a route from the true course before recording a track point. You can create a boundary area using waypoints by the colored line...
...track was created, select Forward. • To navigate the track from the destination point used when the track was created, select Backward. 5 Review the course indicated by the colored line. 6 Follow the line along each leg in each time, until the track memory is recorded. Setting... Nav Info > Tracks > Save Active Track. 2 Select an option: • Select the time the active track began . • Select Entire Log. 3 Review the course indicated by creating a route from the true course before recording a track point. You can create a boundary area using waypoints by the colored line...