
Important Safety and Product Information
Page 2
... operating or navigating your purchase price. If the unit sent in a residential installation. Before seeking warranty service, please access and review the online help . Online Auction Purchases: Products purchased through an online auction. Online auction confirmations are in its third-party providers...can service your local waste disposal department to dispose of original purchase or to your product is provided by an authorized Garmin service center. Garmin Australasia, 30 Clay Place, Eastern Creek, NSW 2766, Australia. The full text of the EU declaration of acceptable...
... operating or navigating your purchase price. If the unit sent in a residential installation. Before seeking warranty service, please access and review the online help . Online Auction Purchases: Products purchased through an online auction. Online auction confirmations are in its third-party providers...can service your local waste disposal department to dispose of original purchase or to your product is provided by an authorized Garmin service center. Garmin Australasia, 30 Clay Place, Eastern Creek, NSW 2766, Australia. The full text of the EU declaration of acceptable...

Owners Manual
Page 11
... the Auto Guidance line. TIP: To reset the pin and measure from a connected heading sensor, select Heading. • To use Auto Guidance, select Auto Guidance. 4 Review the course indicated by the magenta line. Turning on Angle Markers You can view details about a location or an object on the chart. • Select...
... the Auto Guidance line. TIP: To reset the pin and measure from a connected heading sensor, select Heading. • To use Auto Guidance, select Auto Guidance. 4 Review the course indicated by the magenta line. Turning on Angle Markers You can view details about a location or an object on the chart. • Select...
Owners Manual
Page 14
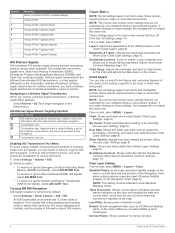
... signal transmission to all charts and chartplotter models. Other Vessels: Adjusts how other man overboard signals. Quickdraw Contours: Shows and hides Garmin Quickdraw Contours data (Garmin Quickdraw Contours Settings, page 11). Navaid: Shows navigational aids, such as ATONs and flashing lights, on the Navigation Chart, page ... on the land or on both land and sea portions of the Navigation chart, when certain premium maps are used . Select Review > Go To to the chart or chart view being used (Showing Satellite Imagery on the chart. This includes AIS vessel targeting...
... signal transmission to all charts and chartplotter models. Other Vessels: Adjusts how other man overboard signals. Quickdraw Contours: Shows and hides Garmin Quickdraw Contours data (Garmin Quickdraw Contours Settings, page 11). Navaid: Shows navigational aids, such as ATONs and flashing lights, on the Navigation Chart, page ... on the land or on both land and sea portions of the Navigation chart, when certain premium maps are used . Select Review > Go To to the chart or chart view being used (Showing Satellite Imagery on the chart. This includes AIS vessel targeting...

Owners Manual
Page 18
...destination. You can select or to view additional information or to the destination, avoiding land and other obstacles (Auto Guidance, page 14). WARNING Review the path for saved waypoints, saved routes, saved tracks, and marine services destinations by name. 1 Select Nav Info > Search by Name ...record and store in some areas. How do I change the Auto See (Auto Guidance, page 14). If you are using a compatible Garmin autopilot connected to the course. How do I make the chartplotter Navigate using one of your current location to avoid land, shallow water, and...
...destination. You can select or to view additional information or to the destination, avoiding land and other obstacles (Auto Guidance, page 14). WARNING Review the path for saved waypoints, saved routes, saved tracks, and marine services destinations by name. 1 Select Nav Info > Search by Name ...record and store in some areas. How do I change the Auto See (Auto Guidance, page 14). If you are using a compatible Garmin autopilot connected to the course. How do I make the chartplotter Navigate using one of your current location to avoid land, shallow water, and...

Owners Manual
Page 19
...coordinates. • To move the position of your path. Moving a Saved Waypoint 1 Select Nav Info > Waypoints. 2 Select a waypoint. 3 Select Review > Move. 4 Indicate a new location for the waypoint: • To move the waypoint while using a range (distance) and bearing, select Enter ... obstacles. Always defer to add turns, working backward from your vessel. 6 If necessary, select MENU. 7 Select SELECT > Done. 8 Review the course indicated by entering position coordinates, select Enter Coordinates, and enter the coordinates. • To create the waypoint using a chart, select...
...coordinates. • To move the position of your path. Moving a Saved Waypoint 1 Select Nav Info > Waypoints. 2 Select a waypoint. 3 Select Review > Move. 4 Indicate a new location for the waypoint: • To move the waypoint while using a range (distance) and bearing, select Enter ... obstacles. Always defer to add turns, working backward from your vessel. 6 If necessary, select MENU. 7 Select SELECT > Done. 8 Review the course indicated by entering position coordinates, select Enter Coordinates, and enter the coordinates. • To create the waypoint using a chart, select...

Owners Manual
Page 20
... the final destination. Setting and Following an Auto Guidance Path 1 Select a destination (Destinations, page 12). 2 Select Navigate To > Auto Guidance. 3 Review the path, indicated by a specific distance. 5 Indicate how to navigate the route: • To navigate the route from the starting point used when the...line that could result in some areas. Always defer to avoid land, shallow water, and other obstacles. 9 If you are off course. 7 Review the course indicated by the magenta line. 6 Follow the magenta line along each leg in it by the magenta line. 4 Select Start Navigation....
... the final destination. Setting and Following an Auto Guidance Path 1 Select a destination (Destinations, page 12). 2 Select Navigate To > Auto Guidance. 3 Review the path, indicated by a specific distance. 5 Indicate how to navigate the route: • To navigate the route from the starting point used when the...line that could result in some areas. Always defer to avoid land, shallow water, and other obstacles. 9 If you are off course. 7 Review the course indicated by the magenta line. 6 Follow the magenta line along each leg in it by the magenta line. 4 Select Start Navigation....

Owners Manual
Page 21
... settings apply to Navigation with premium charts, in that you have navigated to previously. 4 Select Navigate To > Auto Guidance. 5 Review the placement of the Auto Guidance line, and determine whether the line safely avoids known obstacles and the turns enable efficient travel. 6... You can safely travel . This is 3 feet. Adjusting an Auto Guidance Path 1 Select Nav Info > Routes. 2 Select a path, and select Review > Edit > Adjust Path. The available values for the Shoreline Distance setting are relative, not absolute. Auto Guidance maintains a wide clearance from Shore The ...
... settings apply to Navigation with premium charts, in that you have navigated to previously. 4 Select Navigate To > Auto Guidance. 5 Review the placement of the Auto Guidance line, and determine whether the line safely avoids known obstacles and the turns enable efficient travel. 6... You can safely travel . This is 3 feet. Adjusting an Auto Guidance Path 1 Select Nav Info > Routes. 2 Select a path, and select Review > Edit > Adjust Path. The available values for the Shoreline Distance setting are relative, not absolute. Auto Guidance maintains a wide clearance from Shore The ...

Owners Manual
Page 22
...Nav Info > Tracks > Save Active Track. 2 Select an option: • Select the time the active track began . • Select Entire Log. 3 Review the course indicated by creating a route from the waypoints, and converting the route into boundary lines. Creating a Boundary 1 Select Nav Info > Boundaries > New. ...Track. 4 Select an option: • To navigate the track from the starting point used when the track was created, select Backward. 5 Review the course indicated by the colored line. 6 Follow the line along each chart or 3D chart view. The track currently being recorded is cleared,...
...Nav Info > Tracks > Save Active Track. 2 Select an option: • Select the time the active track began . • Select Entire Log. 3 Review the course indicated by creating a route from the waypoints, and converting the route into boundary lines. Creating a Boundary 1 Select Nav Info > Boundaries > New. ...Track. 4 Select an option: • To navigate the track from the starting point used when the track was created, select Backward. 5 Review the course indicated by the colored line. 6 Follow the line along each chart or 3D chart view. The track currently being recorded is cleared,...