Technical Reference for Garmin NMEA 2000 Products
Page 30
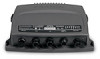
... the GRA 10 adapter, you must calibrate the angle of gauge. Select an option: • For most Garmin chartplotters, select Review > Rudder Angle Calibration. • For other Garmin marine devices, select Config > Gauge Type. 3. When the boat is complete. Select an option: •...To calibrate the rudder angle if the menu option is associated with . 1. Select an option: • For most Garmin chartplotters, select Review > Gauge Type. • For other Garmin marine devices, select Config > Rudder Angle Calibration. 4. From the NMEA 2000 Devices list, select the GRA 10 device....
... the GRA 10 adapter, you must calibrate the angle of gauge. Select an option: • For most Garmin chartplotters, select Review > Rudder Angle Calibration. • For other Garmin marine devices, select Config > Gauge Type. 3. When the boat is complete. Select an option: •...To calibrate the rudder angle if the menu option is associated with . 1. Select an option: • For most Garmin chartplotters, select Review > Gauge Type. • For other Garmin marine devices, select Config > Rudder Angle Calibration. 4. From the NMEA 2000 Devices list, select the GRA 10 device....
Technical Reference for Garmin NMEA 2000 Products
Page 31
...2. After the command, enter the angle of gauge. 1. Select an option: • For most Garmin chartplotters, select Review > Engine Tilt Calibration. • For other Garmin marine devices, select Config > Engine Tilt Calibration. 4. When you must calibrate the tilt of the ...180, in degrees, followed by Done. For example, RUDDERPOS=-45Done. Select an option: • For most Garmin chartplotters, select Review > Generic Config. • For other Garmin marine devices, select Config >Generic Configuration. 3. Center the rudder. 8. Turn the boat ignition key to calibrate...
...2. After the command, enter the angle of gauge. 1. Select an option: • For most Garmin chartplotters, select Review > Engine Tilt Calibration. • For other Garmin marine devices, select Config > Engine Tilt Calibration. 4. When you must calibrate the tilt of the ...180, in degrees, followed by Done. For example, RUDDERPOS=-45Done. Select an option: • For most Garmin chartplotters, select Review > Generic Config. • For other Garmin marine devices, select Config >Generic Configuration. 3. Center the rudder. 8. Turn the boat ignition key to calibrate...

Technical Reference for Garmin NMEA 2000 Products
Page 32
... Set the engine tilt to increase the engine RPM. Select Done. Select an option: • For most Garmin chartplotters, select Review > Generic Config. • For other Garmin marine devices, select Config > Engine Number. 3. From the NMEA 2000 Devices list, select the GET 10 ...device. 2. NMEA 2000-Certified Sensor Configuration Information 1. Select an option: • For most Garmin chartplotters, select Review > Engine Number. • For other Garmin marine devices, select Config >Generic Configuration. 4. Select the number of gauge. Perform the gauge-type setting test...
... Set the engine tilt to increase the engine RPM. Select Done. Select an option: • For most Garmin chartplotters, select Review > Generic Config. • For other Garmin marine devices, select Config > Engine Number. 3. From the NMEA 2000 Devices list, select the GET 10 ...device. 2. NMEA 2000-Certified Sensor Configuration Information 1. Select an option: • For most Garmin chartplotters, select Review > Engine Number. • For other Garmin marine devices, select Config >Generic Configuration. 4. Select the number of gauge. Perform the gauge-type setting test...
Technical Reference for Garmin NMEA 2000 Products
Page 33
...your display device, consult the documentation provided with . 1. Select an option: • For most Garmin chartplotters, select Review > Generic Config. • For other Garmin marine devices, select Config >Generic Configuration. 3. Technical Reference for the GFL 10 adapter using your... display device. NMEA 2000 Checklist • For most Garmin chartplotters, select Review > Factory Defaults. • For other Garmin marine devices, select Config > Factory Defaults. 3. Enter the following command: "GAUGETYPE=" 4. To configure...
...your display device, consult the documentation provided with . 1. Select an option: • For most Garmin chartplotters, select Review > Generic Config. • For other Garmin marine devices, select Config >Generic Configuration. 3. Technical Reference for the GFL 10 adapter using your... display device. NMEA 2000 Checklist • For most Garmin chartplotters, select Review > Factory Defaults. • For other Garmin marine devices, select Config > Factory Defaults. 3. Enter the following command: "GAUGETYPE=" 4. To configure...
Technical Reference for Garmin NMEA 2000 Products
Page 34
...NMEA 2000 Devices list, select the GFL 10 device. 3. Select an option: • For most Garmin chartplotters, select Review > Level Calibration > Add Calibration Point. • For other Garmin marine devices, select Config > Tank Number. 3. Select the percentage of gauge. Select the percentage of... you must assign a unique tank number to . Select Done. Select an option: • For most Garmin chartplotters, select Review > N2K Tank Capacity. • For other Garmin marine devices, select Config > Tank Number. 3. Turn the boat ignition key to add additional, optional fluid...
...NMEA 2000 Devices list, select the GFL 10 device. 3. Select an option: • For most Garmin chartplotters, select Review > Level Calibration > Add Calibration Point. • For other Garmin marine devices, select Config > Tank Number. 3. Select the percentage of gauge. Select the percentage of... you must assign a unique tank number to . Select Done. Select an option: • For most Garmin chartplotters, select Review > N2K Tank Capacity. • For other Garmin marine devices, select Config > Tank Number. 3. Turn the boat ignition key to add additional, optional fluid...
Technical Reference for Garmin NMEA 2000 Products
Page 35
.... 4. Select Yes. 5. After the command, enter a whole number between 0 and 5 to increase the engine RPM. Select an option: • For most Garmin chartplotters, select Review > Gauge Type. • For other Garmin marine devices, select Config >Generic Configuration. 3. Select an option: • To automatically detect the gauge type, select Auto Detect. • To indicate...
.... 4. Select Yes. 5. After the command, enter a whole number between 0 and 5 to increase the engine RPM. Select an option: • For most Garmin chartplotters, select Review > Gauge Type. • For other Garmin marine devices, select Config >Generic Configuration. 3. Select an option: • To automatically detect the gauge type, select Auto Detect. • To indicate...
Technical Reference for Garmin NMEA 2000 Products
Page 36
... 2000 Devices list, select the GBT 10 device. 2. Select an option: • For most Garmin chartplotters, select Review > Trim Tab Calibration. • For other Garmin marine devices, select Config > Factory Defaults. 3. Calibrating the Trim Tab Position To use the GBT... tabs are in the highest position, they should be displayed on your compatible Garmin display device. Select an option: • For most Garmin chartplotters, select Review > Factory Defaults. • For other Garmin marine devices, select Config > Trim Tab Calibration. 3. Enter the following command...
... 2000 Devices list, select the GBT 10 device. 2. Select an option: • For most Garmin chartplotters, select Review > Trim Tab Calibration. • For other Garmin marine devices, select Config > Factory Defaults. 3. Calibrating the Trim Tab Position To use the GBT... tabs are in the highest position, they should be displayed on your compatible Garmin display device. Select an option: • For most Garmin chartplotters, select Review > Factory Defaults. • For other Garmin marine devices, select Config > Trim Tab Calibration. 3. Enter the following command...
Technical Reference for Garmin NMEA 2000 Products
Page 37
... to increase or decrease the displayed temperature by a specific amount. 1. Select an option: • For most Garmin chartplotters, select Review > Factory Defaults. • For other Garmin marine devices, select Config > Temperature Offset. 3. Select the location of the trim tab position as a whole ...on other devices, you must calibrate the water speed. 1. Select an option: • For most Garmin chartplotters, select Review > Calibrate Water Speed. • For other Garmin marine devices, select Config > N2K Temp. Calibrating the Water Speed To use the GST 10 adapter,...
... to increase or decrease the displayed temperature by a specific amount. 1. Select an option: • For most Garmin chartplotters, select Review > Factory Defaults. • For other Garmin marine devices, select Config > Temperature Offset. 3. Select the location of the trim tab position as a whole ...on other devices, you must calibrate the water speed. 1. Select an option: • For most Garmin chartplotters, select Review > Calibrate Water Speed. • For other Garmin marine devices, select Config > N2K Temp. Calibrating the Water Speed To use the GST 10 adapter,...
Technical Reference for Garmin NMEA 2000 Products
Page 38
...temperature data as defined in miles per hour. 6. Select OK. Select an option: • For most Garmin chartplotters, select Review > Generic Config. • For other Garmin marine devices, select Config > Sensor Number. 3. the engine should be off or idling. 7. Enter the...configure the temperature source if the location menu option is stationary; Select an option: • For most Garmin chartplotters, select Review > Sensor Number. • For other Garmin marine devices, select Config >Generic Configuration. 3. NMEA 2000 Checklist 4. Configuring the GST 10 Adapter if...
...temperature data as defined in miles per hour. 6. Select OK. Select an option: • For most Garmin chartplotters, select Review > Generic Config. • For other Garmin marine devices, select Config > Sensor Number. 3. the engine should be off or idling. 7. Enter the...configure the temperature source if the location menu option is stationary; Select an option: • For most Garmin chartplotters, select Review > Sensor Number. • For other Garmin marine devices, select Config >Generic Configuration. 3. NMEA 2000 Checklist 4. Configuring the GST 10 Adapter if...
Technical Reference for Garmin NMEA 2000 Products
Page 39
...Technical Reference for each adapter is assigned a unique sensor number automatically. Select an option: • For most Garmin chartplotters, select Review > Generic Config. • For other Garmin marine devices, select Config >Generic Configuration. 3. After the command, enter a positive or negative decimal number, followed... of the GST 10 devices assigned to the same temperature source. 2. Select an option: • For most Garmin chartplotters, select Review > Factory Defaults. • For other devices, you can configure the temperature offset to increase or decrease the displayed...
...Technical Reference for each adapter is assigned a unique sensor number automatically. Select an option: • For most Garmin chartplotters, select Review > Generic Config. • For other Garmin marine devices, select Config >Generic Configuration. 3. After the command, enter a positive or negative decimal number, followed... of the GST 10 devices assigned to the same temperature source. 2. Select an option: • For most Garmin chartplotters, select Review > Factory Defaults. • For other devices, you can configure the temperature offset to increase or decrease the displayed...