LED Series Maunal
Page 1
CCTV Monitor User Manual
CCTV Monitor User Manual

LED Series Maunal
Page 2
... controls ...3 Control panel...3 (17") ...3 (19"W,22",24") ...3 (27") ...3 (19") ...4 Remote control (27" only) ...5 Inserting batteries into the remote control unit ...5 Changing a monitor parameter ...5 Adjustment procedure...6 OSD function ...6 VGA menu ...6 Picture ...6 Sound(optional) ...7 System ...7 Lock 8 Cam menu (HDMI) ...8 Picture ...8 Sound(optional) ...9 Lock ...10 Self-diagnosis ...10 Troubleshooting...11 Specifications...12 Factory preset timings (VGA mode)...15 Factory preset timings (HDMI mode) ...15 User Manual
... controls ...3 Control panel...3 (17") ...3 (19"W,22",24") ...3 (27") ...3 (19") ...4 Remote control (27" only) ...5 Inserting batteries into the remote control unit ...5 Changing a monitor parameter ...5 Adjustment procedure...6 OSD function ...6 VGA menu ...6 Picture ...6 Sound(optional) ...7 System ...7 Lock 8 Cam menu (HDMI) ...8 Picture ...8 Sound(optional) ...9 Lock ...10 Self-diagnosis ...10 Troubleshooting...11 Specifications...12 Factory preset timings (VGA mode)...15 Factory preset timings (HDMI mode) ...15 User Manual

LED Series Maunal
Page 3
...; Power cord and power cord protection: Power cords should be in accordance with the instruction manual, may damage the screen permanently. Lightning: For added protection during a lighting storm or when this unit is located in a well-ventilated area to prevent the unit from overheating. • Only use shielded cables and connectors for all servicing to qualified service personnel. 7. Installation cautions: • Do not block any ventilation openings...
...; Power cord and power cord protection: Power cords should be in accordance with the instruction manual, may damage the screen permanently. Lightning: For added protection during a lighting storm or when this unit is located in a well-ventilated area to prevent the unit from overheating. • Only use shielded cables and connectors for all servicing to qualified service personnel. 7. Installation cautions: • Do not block any ventilation openings...

LED Series Maunal
Page 4
...; The monitor features Advanced Color Controls for fine-tuning to correctly install, operate and get the best performance from this product. Use the on-screen controls to dismantle or remove the covers from your monitor for quick reference. Insert the arm of the monitor stand of the box correspond with the following checklist: • Monitor • Power cord • VGA cable • AC adaptor(only 27") • User manual • Remote Control (only...
...; The monitor features Advanced Color Controls for fine-tuning to correctly install, operate and get the best performance from this product. Use the on-screen controls to dismantle or remove the covers from your monitor for quick reference. Insert the arm of the monitor stand of the box correspond with the following checklist: • Monitor • Power cord • VGA cable • AC adaptor(only 27") • User manual • Remote Control (only...

LED Series Maunal
Page 5
... IN Composite signal input. 4. Remove the two screws connecting the stand and monitor body. VGA RGB signal input. Remove the connecting stand front body. Caution : Incomplete tightening of the monitor's main body. 3. Remove the four screws connecting the stand rear body. 3. Place the monitor on it facing downwards. 2. Front panel controls Control panel (17") (19"W,22",24") (27") 3 Detach the rear cover of the stand. HDMI HDMI signal input. 5. Put a smooth pad or cloth on it clockwise three to four turns. 4. After...
... IN Composite signal input. 4. Remove the two screws connecting the stand and monitor body. VGA RGB signal input. Remove the connecting stand front body. Caution : Incomplete tightening of the monitor's main body. 3. Remove the four screws connecting the stand rear body. 3. Place the monitor on it facing downwards. 2. Front panel controls Control panel (17") (19"W,22",24") (27") 3 Detach the rear cover of the stand. HDMI HDMI signal input. 5. Put a smooth pad or cloth on it clockwise three to four turns. 4. After...

LED Series Maunal
Page 6
... different input sources, to confirm selection, press the source button. MENU Turns the OSD window on . Turns the OSD window off and moves from sub menu to top menu in the OSD window. *Push the menu button for 5seconds when you want to the most optimal setting possible. 4 AUTO(*) Primary Function: Automatically adjusts the display to unlock the keypad lock. 2. ▲ (Up Arrow) Primary Function: Select the input source. POWER Switches the monitor on and off . *HOT KEY →(*) (VGA mode...
... different input sources, to confirm selection, press the source button. MENU Turns the OSD window on . Turns the OSD window off and moves from sub menu to top menu in the OSD window. *Push the menu button for 5seconds when you want to the most optimal setting possible. 4 AUTO(*) Primary Function: Automatically adjusts the display to unlock the keypad lock. 2. ▲ (Up Arrow) Primary Function: Select the input source. POWER Switches the monitor on and off . *HOT KEY →(*) (VGA mode...

LED Series Maunal
Page 7
... Select input signal source. R9 MENU Display a main menu. Make sure that the polarity matches with the (+) and (-) marks inside of time. R20 AIR/CABLE Not used . Press AUTO/SELECT button, then using left- R6 INFO Information display. R13 OK Select menu items. R15 VOL +/- (optional) Adjust the sound level. Remote control (27" only) R1 POWER Turn the monitor on the front panel to obtain the OSD menu screen. 2. R19 PC Select PC mode. Use UP-DOWN buttons...
... Select input signal source. R9 MENU Display a main menu. Make sure that the polarity matches with the (+) and (-) marks inside of time. R20 AIR/CABLE Not used . Press AUTO/SELECT button, then using left- R6 INFO Information display. R13 OK Select menu items. R15 VOL +/- (optional) Adjust the sound level. Remote control (27" only) R1 POWER Turn the monitor on the front panel to obtain the OSD menu screen. 2. R19 PC Select PC mode. Use UP-DOWN buttons...

LED Series Maunal
Page 8
... End screen yet? Contrast Adjust the contrast of the image. 2. VGA Setting 5-1 Auto adjust 6 No Yes Adjust the Phase until the screen is cleared. VGA menu Picture 1. Brightness Adjust the brightness of image, the difference between light and dark areas on the screen. 3. Color Tone Choose a different preset color temperatures or set your own customized color parameters. (Normal/Warm/Cool/User) 4. Is the noise displayed on the screen? Yes (Advanced Setting) (VGA setting) OSD function Configure the monitor using the onscreen display (OSD) menus...
... End screen yet? Contrast Adjust the contrast of the image. 2. VGA Setting 5-1 Auto adjust 6 No Yes Adjust the Phase until the screen is cleared. VGA menu Picture 1. Brightness Adjust the brightness of image, the difference between light and dark areas on the screen. 3. Color Tone Choose a different preset color temperatures or set your own customized color parameters. (Normal/Warm/Cool/User) 4. Is the noise displayed on the screen? Yes (Advanced Setting) (VGA setting) OSD function Configure the monitor using the onscreen display (OSD) menus...

LED Series Maunal
Page 9
... an enhanced listening experience. 6. OSD Time out Adjust the display of the volume if you change the program. 1. Auto Volume Automatically remains on the same level of the OSD menu 4. Sound Mode Choose a different preset sound mode or your own customized sound. (Standard/ Speech/ Music/ User) 2. OSD Transparency Adjust the OSD. Blue Screen Select the background color. 7. Choose automatically the proper horizontal position and vertical position and size of the screen image. 5-2 H-Position Adjust the position of the display horizontally (left and right...
... an enhanced listening experience. 6. OSD Time out Adjust the display of the volume if you change the program. 1. Auto Volume Automatically remains on the same level of the OSD menu 4. Sound Mode Choose a different preset sound mode or your own customized sound. (Standard/ Speech/ Music/ User) 2. OSD Transparency Adjust the OSD. Blue Screen Select the background color. 7. Choose automatically the proper horizontal position and vertical position and size of the screen image. 5-2 H-Position Adjust the position of the display horizontally (left and right...

LED Series Maunal
Page 10
... color parameters. (Normal/Warm/Cool/User) 8. Keypad Lock Turn keypad lock on or off 2. Picture Mode Select the picture mode (Standard/Eco/Movie/Dynamic/User). 2. Sharpness Adjust the display image quality (if the screen proceed to be brighter or darker. 8-3 DCR(Dynamic Contrast Ratio) Turn DCR on or off 8-4 DCC(Dynamic Contrast Control) Turn DCC on or off 8 Monitor is turned off when it did not receive any signal from remote control or any button...
... color parameters. (Normal/Warm/Cool/User) 8. Keypad Lock Turn keypad lock on or off 2. Picture Mode Select the picture mode (Standard/Eco/Movie/Dynamic/User). 2. Sharpness Adjust the display image quality (if the screen proceed to be brighter or darker. 8-3 DCR(Dynamic Contrast Ratio) Turn DCR on or off 8-4 DCC(Dynamic Contrast Control) Turn DCC on or off 8 Monitor is turned off when it did not receive any signal from remote control or any button...

LED Series Maunal
Page 11
Equalizer Provide an enhanced listening experience. 6. Blue Screen Select the background color. 7. Sound Mode Choose a different preset sound mode or your own customized sound. (Standard/ Movie/ Music/ User) 2. OSD Time out Adjust the display of the left and right speakers. 3. OSD Transparency Adjust the OSD. Menu Language Select language for OSD. 2. Power status Not used . 8-2 Sleep Timer Set sleep timer 8-3 Auto Sleep Monitor is turned off when it did not receive any signal from remote control or any button within the time that you...
Equalizer Provide an enhanced listening experience. 6. Blue Screen Select the background color. 7. Sound Mode Choose a different preset sound mode or your own customized sound. (Standard/ Movie/ Music/ User) 2. OSD Time out Adjust the display of the left and right speakers. 3. OSD Transparency Adjust the OSD. Menu Language Select language for OSD. 2. Power status Not used . 8-2 Sleep Timer Set sleep timer 8-3 Auto Sleep Monitor is turned off when it did not receive any signal from remote control or any button within the time that you...

LED Series Maunal
Page 12
... to cancel. (Monitor is displayed when the D- No Signal screen is turned off 2. Out of Range screen is displayed when the applied frequency is No Signal, Out of the monitor screen is under or over normal range. The self-diagnosis function checks if the status of Range or None Supported. Keypad Lock Turn keypad lock on or off when it did not receive any signal from remote control or any button within the...
... to cancel. (Monitor is displayed when the D- No Signal screen is turned off 2. Out of Range screen is displayed when the applied frequency is No Signal, Out of the monitor screen is under or over normal range. The self-diagnosis function checks if the status of Range or None Supported. Keypad Lock Turn keypad lock on or off when it did not receive any signal from remote control or any button within the...

LED Series Maunal
Page 13
... set . Check if the signal cable is properly connected. saving mode. Check if the video cable is correctly connected to the video card. Check if the pins of the manual. Keep the devices that may cause electrical interference away from the monitor. Check if the power cord is correctly connected. See the FCC information at the front cover of D sub-connector are in the power- Adjust the Color or Tint values on the OSD Picture menu. 11 Check if the power switch...
... set . Check if the signal cable is properly connected. saving mode. Check if the video cable is correctly connected to the video card. Check if the pins of the manual. Keep the devices that may cause electrical interference away from the monitor. Check if the power cord is correctly connected. See the FCC information at the front cover of D sub-connector are in the power- Adjust the Color or Tint values on the OSD Picture menu. 11 Check if the power switch...

LED Series Maunal
Page 14
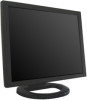
Specifications Items Panel Interface Power Dimensions Weight VESA mount Specifications Hole patterns Operating temperature Screen size Pixel pitch View angle (H/V) Contrast ratio Response time Brightness Recommended resolution 17" 17in (43.2cm) 0.264 x 0.264 mm 170°/160° 1000:1 (typ) 5 ms 250 cd/m² (typ) 1280 x 1024 @ 60Hz VGA in (15 Pin D- 1 Sub) HDMI in 1 BNC (in/out) 1/1 Consumption
Specifications Items Panel Interface Power Dimensions Weight VESA mount Specifications Hole patterns Operating temperature Screen size Pixel pitch View angle (H/V) Contrast ratio Response time Brightness Recommended resolution 17" 17in (43.2cm) 0.264 x 0.264 mm 170°/160° 1000:1 (typ) 5 ms 250 cd/m² (typ) 1280 x 1024 @ 60Hz VGA in (15 Pin D- 1 Sub) HDMI in 1 BNC (in/out) 1/1 Consumption

LED Series Maunal
Page 15
Items Panel Interface Power Dimensions Weight VESA mount Specifications Hole patterns Operating temperature 19" Screen size 19 in. (48.3 cm) Pixel pitch 0.294 x 0.294 mm View angle (H/V) 170°/160° Contrast ratio 1000:1 (typ) Response time 5 ms Brightness 250 cd/m² (typ) Recommended resolution 1280 x 1024 @ 60 Hz VGA in 1 (15 Pin D-Sub) HDMI in 1 BNC (in/out) 1/1 Consumption
Items Panel Interface Power Dimensions Weight VESA mount Specifications Hole patterns Operating temperature 19" Screen size 19 in. (48.3 cm) Pixel pitch 0.294 x 0.294 mm View angle (H/V) 170°/160° Contrast ratio 1000:1 (typ) Response time 5 ms Brightness 250 cd/m² (typ) Recommended resolution 1280 x 1024 @ 60 Hz VGA in 1 (15 Pin D-Sub) HDMI in 1 BNC (in/out) 1/1 Consumption

LED Series Maunal
Page 16
... The specifications can change without any notice. Items Panel Interface Power Dimensions Weight VESA mount Specifications Hole patterns Operating temperature 24" Screen size 23.6 in(59.95cm) Pixel pitch 0.2715(H) x 0.2715(V) View angle (H/V) 170°/160° Contrast ratio 1000:1 (typ) Response time 5 ms Brightness 250 cd/m² (typ) Recommended resolution 1920 x 1080@60Hz VGA in 1 (15 Pin D-Sub) HDMI in 1 BNC (in/out) 1/1 Consumption < 30 W Source...
... The specifications can change without any notice. Items Panel Interface Power Dimensions Weight VESA mount Specifications Hole patterns Operating temperature 24" Screen size 23.6 in(59.95cm) Pixel pitch 0.2715(H) x 0.2715(V) View angle (H/V) 170°/160° Contrast ratio 1000:1 (typ) Response time 5 ms Brightness 250 cd/m² (typ) Recommended resolution 1920 x 1080@60Hz VGA in 1 (15 Pin D-Sub) HDMI in 1 BNC (in/out) 1/1 Consumption < 30 W Source...