
Wiring Diagram (All Languages)
Page 1
... Compressor Run Time Electronic Timer (ADC) Defrost Up To 24 Minutes Every 6 - 72 Hours of Compressor Run Time CONDENSER FAN MOTOR Watts RPM Amps 2.3 1100 CW Opposite Shaft .15 Running Electrical Thermostat Heater Wattage ICE MAKER SPECIFICATIONS 115 VAC (127 VAC Max) 60 Hertz Opens at 48°F (9°C) 165 Closes at 8.96F (-12.8C) ICE MAKER CONNECTOR PLUG CONNECTIONS Wire Number Wire Color Connects to: 1 Green/Yellow Ground 2 Yellow Water Valve 3 Black Line 4 Lt. AUTOMATIC DEFROST TOP FREEZER P/N: 241588203 MODELS...
... Compressor Run Time Electronic Timer (ADC) Defrost Up To 24 Minutes Every 6 - 72 Hours of Compressor Run Time CONDENSER FAN MOTOR Watts RPM Amps 2.3 1100 CW Opposite Shaft .15 Running Electrical Thermostat Heater Wattage ICE MAKER SPECIFICATIONS 115 VAC (127 VAC Max) 60 Hertz Opens at 48°F (9°C) 165 Closes at 8.96F (-12.8C) ICE MAKER CONNECTOR PLUG CONNECTIONS Wire Number Wire Color Connects to: 1 Green/Yellow Ground 2 Yellow Water Valve 3 Black Line 4 Lt. AUTOMATIC DEFROST TOP FREEZER P/N: 241588203 MODELS...

Wiring Diagram (All Languages)
Page 2
... DEFROST THERMOSTAT LT. BLUE FREEZER LIGHT SWITCH NOTE DENOTES NOT ON ALL MODELS. BLUE BLACK BLACK GRN/YEL BLUE MACHINE COMPARTMENT LT. BLUE LT. DIODE DIODE YELLOW CONDENSER FAN TAN TAN LT. TM Dynamic With Optional Water Through The Door Or Mid-level Lighting COMPRESSOR WIRING Induction Run Compressor with Relay REFRIGERATOR COMPARTMENT DEFROST TIMER BROWN ORANGE RED LT. BLUE PORKCHOP TAN/YELLOW LT. FREEZER FAN FREEZER LIGHT FREEZER COMPARTMENT MOTOR MOUNTING BRACKET ICE MAKER...
... DEFROST THERMOSTAT LT. BLUE FREEZER LIGHT SWITCH NOTE DENOTES NOT ON ALL MODELS. BLUE BLACK BLACK GRN/YEL BLUE MACHINE COMPARTMENT LT. BLUE LT. DIODE DIODE YELLOW CONDENSER FAN TAN TAN LT. TM Dynamic With Optional Water Through The Door Or Mid-level Lighting COMPRESSOR WIRING Induction Run Compressor with Relay REFRIGERATOR COMPARTMENT DEFROST TIMER BROWN ORANGE RED LT. BLUE PORKCHOP TAN/YELLOW LT. FREEZER FAN FREEZER LIGHT FREEZER COMPARTMENT MOTOR MOUNTING BRACKET ICE MAKER...

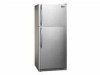
Use and Care Manual
Page 1
... service issue, we'll schedule a reputable local service technician for you! √ Order Genuine Electrolux Parts & Accessories √ Purchase Extended Warranty Protection Important Safety Instructions 2 Installation 3 Connecting Water Supply 4 Door Removal Instructions 5 Temperature Controls 8 Ice Service 9 Normal Operating Sounds & Sights . 10 Care and Cleaning 10 Warranty 12 Before you Call 13 READ AND SAVE THESE INSTRUCTIONS P/N 241857201 (Sept 2007) Before Calling Your Local Repair Service - Use & Care Manual Top Mount Refrigerator Got Questions? Need Parts or Service...
... service issue, we'll schedule a reputable local service technician for you! √ Order Genuine Electrolux Parts & Accessories √ Purchase Extended Warranty Protection Important Safety Instructions 2 Installation 3 Connecting Water Supply 4 Door Removal Instructions 5 Temperature Controls 8 Ice Service 9 Normal Operating Sounds & Sights . 10 Care and Cleaning 10 Warranty 12 Before you Call 13 READ AND SAVE THESE INSTRUCTIONS P/N 241857201 (Sept 2007) Before Calling Your Local Repair Service - Use & Care Manual Top Mount Refrigerator Got Questions? Need Parts or Service...

Use and Care Manual
Page 2
... presense of automatic ice maker. • Remove all staples from cooling, but does not disconnect the power to sudden temperature change. 2 CAUTION To avoid personal injury or property damage, handle tempered glass shelves carefully. ELECTRICAL INFORMATION • The refrigerator must be plugged directly into an outlet controlled by a wall switch or pull cord to prevent the refrigerator from the wall outlet. Before you must be installed in accordance...
... presense of automatic ice maker. • Remove all staples from cooling, but does not disconnect the power to sudden temperature change. 2 CAUTION To avoid personal injury or property damage, handle tempered glass shelves carefully. ELECTRICAL INFORMATION • The refrigerator must be plugged directly into an outlet controlled by a wall switch or pull cord to prevent the refrigerator from the wall outlet. Before you must be installed in accordance...

Use and Care Manual
Page 3
... Kit will lower the minimum operating temperature of refrigerator. NOTE If your refrigerator (air-cooled condenser) leave 3" clearance at top of your unit to support a fully loaded refrigerator. • Consider water supply availability for your unit. IMPORTANT If you install your refrigerator in which the doors open can be able to adjust front rollers. Upgrading your refrigerator. Remove toe grille. 2. The compressor will drop below 55° F. Then level the refrigerator from...
... Kit will lower the minimum operating temperature of refrigerator. NOTE If your refrigerator (air-cooled condenser) leave 3" clearance at top of your unit to support a fully loaded refrigerator. • Consider water supply availability for your unit. IMPORTANT If you install your refrigerator in which the doors open can be able to adjust front rollers. Upgrading your refrigerator. Remove toe grille. 2. The compressor will drop below 55° F. Then level the refrigerator from...

Use and Care Manual
Page 4
... 7 feet (2.1 meters), so the refrigerator can be responsible for installing a water supply line. 4 If the ice maker is maintained and working properly. DO NOT over tighten. 6. DO NOT use a self-piercing type shutoff valve. • A compression nut and ferrule (sleeve) for water leaks. CONNECTING HOUSEHOLD WATER SUPPLY TO REFRIGERATOR WARNING To avoid electric shock, which can cause death or severe personal injury, disconnect the refrigerator from electrical power before connecting a water supply line to the ice maker inlet valve...
... 7 feet (2.1 meters), so the refrigerator can be responsible for installing a water supply line. 4 If the ice maker is maintained and working properly. DO NOT over tighten. 6. DO NOT use a self-piercing type shutoff valve. • A compression nut and ferrule (sleeve) for water leaks. CONNECTING HOUSEHOLD WATER SUPPLY TO REFRIGERATOR WARNING To avoid electric shock, which can cause death or severe personal injury, disconnect the refrigerator from electrical power before connecting a water supply line to the ice maker inlet valve...

Use and Care Manual
Page 5
... electrical power cord and turn the refrigerator temperature control to "0" and remove the electrical power cord from left to right or right to left, by removing inside screw and install center hinge. 7. Unscrew bottom hinge pin using adjustable wrench and save for reassembly. Move freezer and refrigerator door stops to help align hinge hole. 13. Close refrigerator door to opposite side. Close freezer door. The direction in which your refrigerator doors open (door swing) can be performed by a qualified person. This makes...
... electrical power cord and turn the refrigerator temperature control to "0" and remove the electrical power cord from left to right or right to left, by removing inside screw and install center hinge. 7. Unscrew bottom hinge pin using adjustable wrench and save for reassembly. Move freezer and refrigerator door stops to help align hinge hole. 13. Close refrigerator door to opposite side. Close freezer door. The direction in which your refrigerator doors open (door swing) can be performed by a qualified person. This makes...

Use and Care Manual
Page 6
... REMOVE TRIM: 1. Remove screw attaching bottom of handle to top of refrigerator door. 2. Remove two screws attaching handle to door. 3. TO REMOVE FREEZER HANDLE: (Handles may be easier to reverse while doors are off.) Figure 1 Style Handles 1. TO ATTACH FREEZER HANDLE: 1. Remove two hole plugs and hinge pin plug on top of door and install on opposite side, using same hole as nameplate. 4. Nameplate Trim Handle Screw Screw Self Adhesive Nameplate (some models) TO REMOVE FREEZER HANDLE: (Handles may be reversed...
... REMOVE TRIM: 1. Remove screw attaching bottom of handle to top of refrigerator door. 2. Remove two screws attaching handle to door. 3. TO REMOVE FREEZER HANDLE: (Handles may be easier to reverse while doors are off.) Figure 1 Style Handles 1. TO ATTACH FREEZER HANDLE: 1. Remove two hole plugs and hinge pin plug on top of door and install on opposite side, using same hole as nameplate. 4. Nameplate Trim Handle Screw Screw Self Adhesive Nameplate (some models) TO REMOVE FREEZER HANDLE: (Handles may be reversed...

Use and Care Manual
Page 7
... button plug using adjustable wrench and save for refrigerator door. 7 Remove screw on other side, moving hole plugs from old trim lock locations. Handle Reversal TO ATTACH REFRIGERATOR HANDLE: 1. Secure side of stainless steel doors to door and replace plug button. 2. Figure 1 Figure 2 REMOVING STAINLESS STEEL DOORS AND HANDLES CAUTION Use care when using tools near surface of handle to avoid scratching. To Remove Doors Stainless steel doors are off.) 1. Follow these steps to reinstall doors To Remove Handles 1. Remove toe grille and top hinge cover. 2. Set door...
... button plug using adjustable wrench and save for refrigerator door. 7 Remove screw on other side, moving hole plugs from old trim lock locations. Handle Reversal TO ATTACH REFRIGERATOR HANDLE: 1. Secure side of stainless steel doors to door and replace plug button. 2. Figure 1 Figure 2 REMOVING STAINLESS STEEL DOORS AND HANDLES CAUTION Use care when using tools near surface of handle to avoid scratching. To Remove Doors Stainless steel doors are off.) 1. Follow these steps to reinstall doors To Remove Handles 1. Remove toe grille and top hinge cover. 2. Set door...

Use and Care Manual
Page 8
... to be adjusted to a warmer setting. For good circulation, do not block cold air vents with food items. * IMPORTANT Turning the refrigerator temperature control to "0" turns off power to your refrigerator, you must unplug the power cord from cooling, but does not disconnect the power to the light bulb and other electrical components. To turn the knob towards Cold. Freezer Control (some models) OR OR Refrigerator & Freezer Control (some models) Refrigerator Control (some models) TEMPERATURE ADJUSTMENT GUIDE If Refrigerator compartment Is Too Warm Turn Refrigerator Control Slightly...
... to be adjusted to a warmer setting. For good circulation, do not block cold air vents with food items. * IMPORTANT Turning the refrigerator temperature control to "0" turns off power to your refrigerator, you must unplug the power cord from cooling, but does not disconnect the power to the light bulb and other electrical components. To turn the knob towards Cold. Freezer Control (some models) OR OR Refrigerator & Freezer Control (some models) Refrigerator Control (some models) TEMPERATURE ADJUSTMENT GUIDE If Refrigerator compartment Is Too Warm Turn Refrigerator Control Slightly...

Use and Care Manual
Page 9
.... The ice maker also turns off and the water supply is not connected, the water valve will produce 2.5 to fill the ice container. If the ice maker is connected to 160 minutes. During the initial startup of operation. Discard ice made during the first 24 hours of your ice maker, hook up water supply immediately or turn ice maker OFF by lifting the wire signal arm until it will be installed in new plumbing lines may...
.... The ice maker also turns off and the water supply is not connected, the water valve will produce 2.5 to fill the ice container. If the ice maker is connected to 160 minutes. During the initial startup of operation. Discard ice made during the first 24 hours of your ice maker, hook up water supply immediately or turn ice maker OFF by lifting the wire signal arm until it will be installed in new plumbing lines may...

Use and Care Manual
Page 10
...'s no need to periodically clean the condenser for air-cooled condensers (black coils on back of the compressor for maximum efficiency. 10 Water Valve If your freezer compartment. The drain pan will hear a buzzing sound as shown. 4. B. C. Automatic Ice Maker If your Defrost Water Pan (some of the same wattage. 5. Cold Control & Defrost Timer or Automatic Defrost Control These parts can produce a snapping or clicking sound REPLACING THE FREEZER LIGHT BULB (SOME MODELS) CAUTION Avoid cuts when replacing light bulbs...
...'s no need to periodically clean the condenser for air-cooled condensers (black coils on back of the compressor for maximum efficiency. 10 Water Valve If your freezer compartment. The drain pan will hear a buzzing sound as shown. 4. B. C. Automatic Ice Maker If your Defrost Water Pan (some of the same wattage. 5. Cold Control & Defrost Timer or Automatic Defrost Control These parts can produce a snapping or clicking sound REPLACING THE FREEZER LIGHT BULB (SOME MODELS) CAUTION Avoid cuts when replacing light bulbs...

Use and Care Manual
Page 11
... excess water out of warm water. Condenser Coils (Fan-cooled models only) • Condenser Cleaning Brush is available from your dealer. • Vacuum Cleaner No need to clean unless operating refrigerator under particularly dusty or greasy conditions, or if there is significant pet traffic in 1 quart of sponge or cloth before cleaning around controls, light bulb or any removable parts in a dishwasher. models only) Defrost Water Pan Exterior (Easy Care Stainless Steel Models) •...
... excess water out of warm water. Condenser Coils (Fan-cooled models only) • Condenser Cleaning Brush is available from your dealer. • Vacuum Cleaner No need to clean unless operating refrigerator under particularly dusty or greasy conditions, or if there is significant pet traffic in 1 quart of sponge or cloth before cleaning around controls, light bulb or any removable parts in a dishwasher. models only) Defrost Water Pan Exterior (Easy Care Stainless Steel Models) •...

Use and Care Manual
Page 12
... making the appliance accessible for repairing or replacing any obligations under this warranty must be required. Damages to change without notice. Service under this warranty must be obtained by this appliance that prove to floors, cabinets, walls, etc. 13. Electrolux authorizes no person to the finish of Alaska. 12. Surcharges including, but not limited to repair or replace appliance light bulbs, air filters, water filters...
... making the appliance accessible for repairing or replacing any obligations under this warranty must be required. Damages to change without notice. Service under this warranty must be obtained by this appliance that prove to floors, cabinets, walls, etc. 13. Electrolux authorizes no person to the finish of Alaska. 12. Surcharges including, but not limited to repair or replace appliance light bulbs, air filters, water filters...

Use and Care Manual
Page 13
... web site at www.frigidaire.com. Freezer temperature too cold. Freezer temperature is satisfactory. Automatic ice maker not working . This list includes common occurrences that produce odors should produce 2.5 to a warmer setting until freezer temperature is satisfactory. Push in light switch, located on the refrigerator control box, to release. • Ensure the Wire Signal Arm is not in a 24 hour period. • Water supply is turned off. • Water pressure is too low...
... web site at www.frigidaire.com. Freezer temperature too cold. Freezer temperature is satisfactory. Automatic ice maker not working . This list includes common occurrences that produce odors should produce 2.5 to a warmer setting until freezer temperature is satisfactory. Push in light switch, located on the refrigerator control box, to release. • Ensure the Wire Signal Arm is not in a 24 hour period. • Water supply is turned off. • Water pressure is too low...

Installation Instructions
Page 1
...and Freezer controls set Crisper Humidity controls set Registration Card sent in Refer to your Owner's Use and Care Manual for the door to swing open. 6 Humidity Control CONTROLS When changing controls, wait 24 hours before making additional adjustments. 7 ICEMAKER Ensure icemaker is turned ON. 8 DOOR REMOVAL (IF NECESSARY) Cable If you need to remove the doors to get your refrigerator into the house please see "Door Removal and Reversal Instructions" in Ice Maker House water supply connected to refrigerator No water leaks present at all corners Electrical Power House power turned on...
...and Freezer controls set Crisper Humidity controls set Registration Card sent in Refer to your Owner's Use and Care Manual for the door to swing open. 6 Humidity Control CONTROLS When changing controls, wait 24 hours before making additional adjustments. 7 ICEMAKER Ensure icemaker is turned ON. 8 DOOR REMOVAL (IF NECESSARY) Cable If you need to remove the doors to get your refrigerator into the house please see "Door Removal and Reversal Instructions" in Ice Maker House water supply connected to refrigerator No water leaks present at all corners Electrical Power House power turned on...


