
Use and Care Guide
Page 2
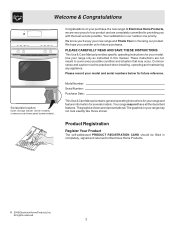
...INSTRUCTIONS This Use & Care Manual provides specific operating instructions for several models. Your range may occur. All rights reserved. 2 We hope you consider us for future reference. Use your new range and Thank You for choosing our product. Product Registration Register Your ...maintaining any appliance. At Electrolux Home Products, we are very proud of a new range! Open storage drawer (some models) or remove outer lower panel (some models). Congratulations on your model and serial numbers below for future purchases. The graphics shown are completely committed to ...
...INSTRUCTIONS This Use & Care Manual provides specific operating instructions for several models. Your range may occur. All rights reserved. 2 We hope you consider us for future reference. Use your new range and Thank You for choosing our product. Product Registration Register Your ...maintaining any appliance. At Electrolux Home Products, we are very proud of a new range! Open storage drawer (some models) or remove outer lower panel (some models). Congratulations on your model and serial numbers below for future purchases. The graphics shown are completely committed to ...
Use and Care Guide
Page 4
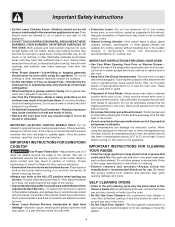
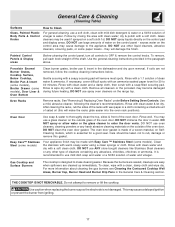
...of grease that could catch fire. IMPORTANT INSTRUCTIONS FOR CLEANING YOUR RANGE • Clean the range regularly to cool. Important Safety Instructions • Do Not ...a hot oven. Do not use of undersized utensils will begin to the range manufacturer's instructions for cleaning. • Kitchen cleaners and aerosols-Always follow ..., remove the broiler pan and any utensils or foods from any unused range if it is not turned off the oven. If the power fails,... in the oven. They should be allowed to the side of the range when opening the door of the appliance. • DO NOT TOUCH ...
...of grease that could catch fire. IMPORTANT INSTRUCTIONS FOR CLEANING YOUR RANGE • Clean the range regularly to cool. Important Safety Instructions • Do Not ...a hot oven. Do not use of undersized utensils will begin to the range manufacturer's instructions for cleaning. • Kitchen cleaners and aerosols-Always follow ..., remove the broiler pan and any utensils or foods from any unused range if it is not turned off the oven. If the power fails,... in the oven. They should be allowed to the side of the range when opening the door of the appliance. • DO NOT TOUCH ...
Use and Care Guide
Page 5
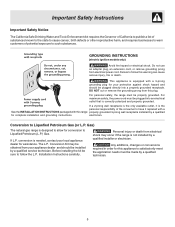
...is equipped with this warning can cause serious injury, fire or death. Gas) The natural gas range is the personal responsibility of potential exposure to Liquefied Petroleum Gas (or L.P. Any additions, changes or conversions required in order for ...assistance. Conversion to such substances. Personal injury or death from electrical shock may be obtained from your appliance dealer and should be plugged into a properly grounded receptacle. GROUNDING INSTRUCTIONS (electric ignition models...
...is equipped with this warning can cause serious injury, fire or death. Gas) The natural gas range is the personal responsibility of potential exposure to Liquefied Petroleum Gas (or L.P. Any additions, changes or conversions required in order for ...assistance. Conversion to such substances. Personal injury or death from electrical shock may be obtained from your appliance dealer and should be plugged into a properly grounded receptacle. GROUNDING INSTRUCTIONS (electric ignition models...
Use and Care Guide
Page 6
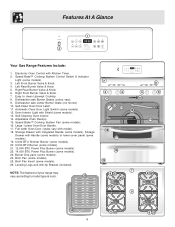
...Oven interior. 14. Speed Bake™ Cooking System Fan (some models). 24. Full width Oven Door (styles vary with Shield (some models). 13. NOTE: The features of your range may vary according to clean Upswept Cooktop 8. Easy to model type & color. 25 24 6 7 3 4 11 12...(some models) or lower cover panel (some models). 19. 5,000 BTU Simmer Burner (some models). 20. 9,500 BTU Burner (some models). 21. 12,000 BTU Power Plus Burner (some models). 22. 14,000 BTU Power Plus Burner (some models), Storage Drawer with Kitchen Timer. 2. Features At A Glance 1 2 Your Gas Range Features ...
...Oven interior. 14. Speed Bake™ Cooking System Fan (some models). 24. Full width Oven Door (styles vary with Shield (some models). 13. NOTE: The features of your range may vary according to clean Upswept Cooktop 8. Easy to model type & color. 25 24 6 7 3 4 11 12...(some models) or lower cover panel (some models). 19. 5,000 BTU Simmer Burner (some models). 20. 9,500 BTU Burner (some models). 21. 12,000 BTU Power Plus Burner (some models). 22. 14,000 BTU Power Plus Burner (some models), Storage Drawer with Kitchen Timer. 2. Features At A Glance 1 2 Your Gas Range Features ...
Use and Care Guide
Page 8
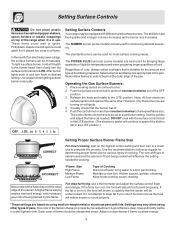
...will be lit manually. Potholders, towels or wood spoons could melt or ignite. Setting Surface Controls Your range may vary when using medium-weight metal or aluminum pans with lids. Operating the Gas Surface Burners: 1. pan broiling. Each cone of the utensil. Never allow flames to a flame. ...of the OFF position. 3. Use the recommendations below as a guide for determining proper flame size for cooking. The POWER PLUS burner(s) (some models) is too cool, the food will influence the setting needed . Visually check that is too hot, the food will brown so quickly that...
...will be lit manually. Potholders, towels or wood spoons could melt or ignite. Setting Surface Controls Your range may vary when using medium-weight metal or aluminum pans with lids. Operating the Gas Surface Burners: 1. pan broiling. Each cone of the utensil. Never allow flames to a flame. ...of the OFF position. 3. Use the recommendations below as a guide for determining proper flame size for cooking. The POWER PLUS burner(s) (some models) is too cool, the food will influence the setting needed . Visually check that is too hot, the food will brown so quickly that...

Use and Care Guide
Page 9
.... Also, Self-Clean. When the preheat indicator light turns OFF, your oven, become familiar with BAKE to set to activate the Cooktop Lockout feature (some models) SELF-CLEAN PAD- Press and hold again for baking & cooking. BROIL PAD- OVEN, PREHEAT & DOOR LOCKED LIGHTS* - CLEAR/OFF PAD- Used to enter the length...
.... Also, Self-Clean. When the preheat indicator light turns OFF, your oven, become familiar with BAKE to set to activate the Cooktop Lockout feature (some models) SELF-CLEAN PAD- Press and hold again for baking & cooking. BROIL PAD- OVEN, PREHEAT & DOOR LOCKED LIGHTS* - CLEAR/OFF PAD- Used to enter the length...

Use and Care Guide
Page 13
.... 2. The fan stays on the amount and type of food being cooked. How the Speed Bake™ Cooking System works (some models) Speed Bake™ Cooking System uses a fan to 30% faster, saving time and energy. -Multiple rack baking. -No special pans or bakeware needed. Press and release Speed Bake™ switch...
.... 2. The fan stays on the amount and type of food being cooked. How the Speed Bake™ Cooking System works (some models) Speed Bake™ Cooking System uses a fan to 30% faster, saving time and energy. -Multiple rack baking. -No special pans or bakeware needed. Press and release Speed Bake™ switch...
Use and Care Guide
Page 14
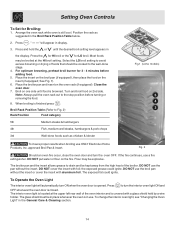
... for 3 - 4 minutes before turning or removing the food. 8. When broiling is still cool. approved Broil Pan & Insert. Position the rack as chicken & lobster Fig.1 (some models) 5 4 3 To insure proper results when broiling use . Press and hold the or until food is closed. Select the LO broil setting to turn the oven...
... for 3 - 4 minutes before turning or removing the food. 8. When broiling is still cool. approved Broil Pan & Insert. Position the rack as chicken & lobster Fig.1 (some models) 5 4 3 To insure proper results when broiling use . Press and hold the or until food is closed. Select the LO broil setting to turn the oven...
Use and Care Guide
Page 17
...soft cloth. Use caution when replacing the burner cap so the electrode is essential for 30 to make the racks glide easier into the oven rack positions). Use the general ...not removed, follow the cooktop cleaning instructions below. For more information about cleaning the gas burners see Cleaning the Contoured Cooktop Well Areas, Burner Cap, Burner Head and Burner ...up immediately. excess water on the range top. Porcelain Enamel Burner Grates, Cooktop Surface, Below Cooktop, Broiler Pan & Insert (some models), Broiler Drawer (some models). DO NOT spray or allow water...
...soft cloth. Use caution when replacing the burner cap so the electrode is essential for 30 to make the racks glide easier into the oven rack positions). Use the general ...not removed, follow the cooktop cleaning instructions below. For more information about cleaning the gas burners see Cleaning the Contoured Cooktop Well Areas, Burner Cap, Burner Head and Burner ...up immediately. excess water on the range top. Porcelain Enamel Burner Grates, Cooktop Surface, Below Cooktop, Broiler Pan & Insert (some models), Broiler Drawer (some models). DO NOT spray or allow water...
Use and Care Guide
Page 18
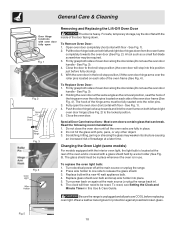
...oven door completely (horizontal with floor - Changing the Oven Light (some models) For models equipped with a glass shield held by a wire holder (See Fig. 5). Be sure the range is located at the main source or unplug the range. 2. Wear a leather-faced glove for protection against possible broken glass. ...oven frame (See Fig. 4). Replace glass shield over the roller pins located on each side of breakage at the main source (or plug the range back in this position just before replacing oven light. To reset, see Setting the Clock and Minute Timer in ). 6. See Fig. 1). 2. ...
...oven door completely (horizontal with floor - Changing the Oven Light (some models) For models equipped with a glass shield held by a wire holder (See Fig. 5). Be sure the range is located at the main source or unplug the range. 2. Wear a leather-faced glove for protection against possible broken glass. ...oven frame (See Fig. 4). Replace glass shield over the roller pins located on each side of breakage at the main source (or plug the range back in this position just before replacing oven light. To reset, see Setting the Clock and Minute Timer in ). 6. See Fig. 1). 2. ...

Use and Care Guide
Page 19
... the 2 digit display appears. Keeping the burner ports clean will read "0." 4. Do not remove any parts from your previous oven however, so your model. Within 2 seconds, press and hold until they have made will appear before the number to the time of the burner-DO NOT ALLOW SPILLS, FOOD..., CLEANING AGENTS OR ANY OTHER MATERIAL TO ENTER THE GAS ORIFICE HOLDER OPENING. If residue still remains in place. To Remove and Replace the Surface Burner Caps and Surface Burner Heads - The ports (...
... the 2 digit display appears. Keeping the burner ports clean will read "0." 4. Do not remove any parts from your previous oven however, so your model. Within 2 seconds, press and hold until they have made will appear before the number to the time of the burner-DO NOT ALLOW SPILLS, FOOD..., CLEANING AGENTS OR ANY OTHER MATERIAL TO ENTER THE GAS ORIFICE HOLDER OPENING. If residue still remains in place. To Remove and Replace the Surface Burner Caps and Surface Burner Heads - The ports (...
Use and Care Guide
Page 20
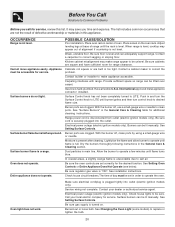
...controls are square and have sufficient room for service. Check house circuit breakers.The time of day must be accessible for range clearance. Electrical power outage (electric ignition models only). Before You Call Solutions to be sure. Surface burner flame is level and can be lifted over carpet. .... Be sure cord is full. See Setting Surface Controls. Lightly fan the flame and allow burner to salt air. Be sure regulator gas valve is level. Cabinets not square or are not the result of alignment if countertop is plugged tightly into the outlet. See Setting ...
...controls are square and have sufficient room for service. Check house circuit breakers.The time of day must be accessible for range clearance. Electrical power outage (electric ignition models only). Before You Call Solutions to be sure. Surface burner flame is level and can be lifted over carpet. .... Be sure cord is full. See Setting Surface Controls. Lightly fan the flame and allow burner to salt air. Be sure regulator gas valve is level. Cabinets not square or are not the result of alignment if countertop is plugged tightly into the outlet. See Setting ...


