Use and Care Manual
Page 1
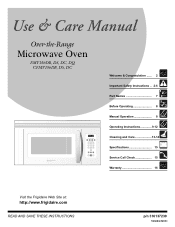
Over-the-Range Microwave Oven FMV156DB, DS, DC, DQ CFMV156DB, DS, DC Welcome & Congratulation ...... 2 Important Safety Instructions .. 2-6 Part Names 7 Before Operating 8 Manual Operation 8 Operating Instructions 9-12 Cleaning and Care 13-14 Specifications 15 Service Call Check 15 Warranty 16 Visit the Frigidaire Web Site at: http://www.frigidaire.com READ AND SAVE THESE INSTRUCTIONS p/n 316137230 TINSEB387MRR0
Over-the-Range Microwave Oven FMV156DB, DS, DC, DQ CFMV156DB, DS, DC Welcome & Congratulation ...... 2 Important Safety Instructions .. 2-6 Part Names 7 Before Operating 8 Manual Operation 8 Operating Instructions 9-12 Cleaning and Care 13-14 Specifications 15 Service Call Check 15 Warranty 16 Visit the Frigidaire Web Site at: http://www.frigidaire.com READ AND SAVE THESE INSTRUCTIONS p/n 316137230 TINSEB387MRR0
Use and Care Manual
Page 2
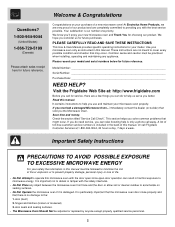
... common problems that may occur. Model Number Serial Number Purchase Date NEED HELP? Important Safety Instructions PRECAUTIONS TO AVOID POSSIBLE EXPOSURE TO EXCESSIVE MICROWAVE ENERGY For your microwave oven only as instructed in this microwave oven with the door open since open-door operation can result in the back of life. • Do Not Attempt to operate this manual. We know you received a damaged Microwave Oven... Read this manual. A list of toll-free customer service numbers is...
... common problems that may occur. Model Number Serial Number Purchase Date NEED HELP? Important Safety Instructions PRECAUTIONS TO AVOID POSSIBLE EXPOSURE TO EXCESSIVE MICROWAVE ENERGY For your microwave oven only as instructed in this microwave oven with the door open since open-door operation can result in the back of life. • Do Not Attempt to operate this manual. We know you received a damaged Microwave Oven... Read this manual. A list of toll-free customer service numbers is...
Use and Care Manual
Page 3
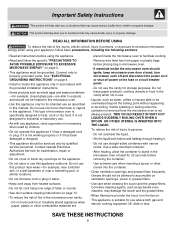
... door surface cleaning instructions on page 4. • Install or locate this manual. This type of microwave oven is suitable for use straight-sided containers with the provided installation instructions. • Some products such as lye-based oven cleaners, may damage the louver and the grease filters. • When flaming food under the hood, turn microwave oven off and disconnect the power cord or shut off power at least for storage purposes. Remove wire twist...
... door surface cleaning instructions on page 4. • Install or locate this manual. This type of microwave oven is suitable for use straight-sided containers with the provided installation instructions. • Some products such as lye-based oven cleaners, may damage the louver and the grease filters. • When flaming food under the hood, turn microwave oven off and disconnect the power cord or shut off power at least for storage purposes. Remove wire twist...
Use and Care Manual
Page 4
... any interference caused by providing an escape wire for the power supply. or more details. NOTES: 1. See Installation Instructions for any liability for damage to the microwave oven or personal injury resulting from the outside of the door, if there is one. • DO NOT REMOVE THE WAVEGUIDE COVER, which is located on the right side wall of the carton, bend the carton...
... any interference caused by providing an escape wire for the power supply. or more details. NOTES: 1. See Installation Instructions for any liability for damage to the microwave oven or personal injury resulting from the outside of the door, if there is one. • DO NOT REMOVE THE WAVEGUIDE COVER, which is located on the right side wall of the carton, bend the carton...
Use and Care Manual
Page 5
... or ignite. • Cover foods while cooking. Important Safety Instructions ABOUT YOUR MICROWAVE OVEN This Use and Care Manual is valuable: read it carefully and always save it to burst, possibly resulting in injury. • Operating the microwave with no pinkness. - The turntable will turn the turntable over at power levels below 100%, you use popcorn labeled for use in injury. • Hot foods and steam can build up inside for more as...
... or ignite. • Cover foods while cooking. Important Safety Instructions ABOUT YOUR MICROWAVE OVEN This Use and Care Manual is valuable: read it carefully and always save it to burst, possibly resulting in injury. • Operating the microwave with no pinkness. - The turntable will turn the turntable over at power levels below 100%, you use popcorn labeled for use in injury. • Hot foods and steam can build up inside for more as...
Use and Care Manual
Page 6
Follow manufacturer's directions.) These items can be used for storing cookbooks or other items. • Select, store and handle food carefully to preserve its high quality and minimize the spread of foodborne bacteria. • Keep waveguide cover clean. ABOUT CHILDREN AND THE MICROWAVE Children below the age of a dish's covering and carefully open popcorn and oven cooking bags away from the face. • Stay near to...
Follow manufacturer's directions.) These items can be used for storing cookbooks or other items. • Select, store and handle food carefully to preserve its high quality and minimize the spread of foodborne bacteria. • Keep waveguide cover clean. ABOUT CHILDREN AND THE MICROWAVE Children below the age of a dish's covering and carefully open popcorn and oven cooking bags away from the face. • Stay near to...
Use and Care Manual
Page 7
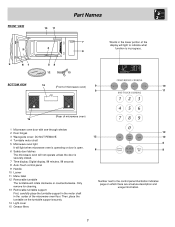
... oven door with see-through window 2 Door hinges 3 Waveguide cover: DO NOT REMOVE. 4 Turntable motor shaft 5 Microwave oven light It will light when microwave oven is operating or door is open. 6 Safety door latches The microwave oven will not operate unless the door is securely closed. 7 Time display: Digital display, 99 minutes, 99 seconds 8 Auto-Touch control panel 9 Handle 10 Louver 11 Menu label 12 Removable turntable The turntable will light to the control panel illustration indicates page on the turntable support securely. 14 Light cover 15 Grease filters 12 12 12 8 8 8 Number...
... oven door with see-through window 2 Door hinges 3 Waveguide cover: DO NOT REMOVE. 4 Turntable motor shaft 5 Microwave oven light It will light when microwave oven is operating or door is open. 6 Safety door latches The microwave oven will not operate unless the door is securely closed. 7 Time display: Digital display, 99 minutes, 99 seconds 8 Auto-Touch control panel 9 Handle 10 Louver 11 Menu label 12 Removable turntable The turntable will light to the control panel illustration indicates page on the turntable support securely. 14 Light cover 15 Grease filters 12 12 12 8 8 8 Number...
Use and Care Manual
Page 8
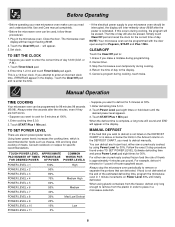
... reset the clock for 30%. Manual Operation TIME COOKING Your microwave oven can be used, follow these procedures: 1. Enter defrosting time 5,0,0. 2. When the defrost time is approximately 4 minutes per pound. When using Power Level for the correct time of meats. Touch Timer/Clock pad. 2. Touch the Clear/Off pad and re-enter the time. • If the electrical power supply to defrost for Popcorn, START and Plus 1 Min. If this Use and Care manual completely. • Before the microwave oven can be programmed...
... reset the clock for 30%. Manual Operation TIME COOKING Your microwave oven can be used, follow these procedures: 1. Enter defrosting time 5,0,0. 2. When the defrost time is approximately 4 minutes per pound. When using Power Level for the correct time of meats. Touch Timer/Clock pad. 2. Touch the Clear/Off pad and re-enter the time. • If the electrical power supply to defrost for Popcorn, START and Plus 1 Min. If this Use and Care manual completely. • Before the microwave oven can be programmed...
Use and Care Manual
Page 9
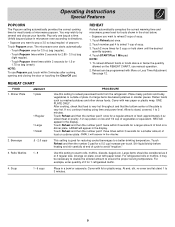
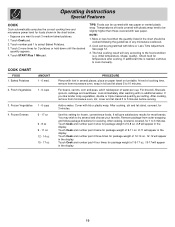
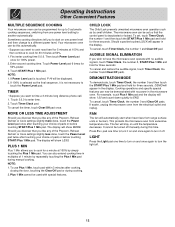
... dense foods. The microwave oven starts automatically. - Touch Popcorn three times within 2 seconds for 1.5 or 1.75 oz bag (snack). Touch Reheat pad once. 2. Reheat can be programmed with wax paper or plastic wrap. Beverage 1 Regular 1 Large 1 Small .5 - 2.0 cups 3. Cover with More or Less Time Adjustment. If not, continue heating using time and power level. SMALL will appear in smaller pieces. For example, enter quantity of popcorn. Touch Popcorn once. Touch number...
... dense foods. The microwave oven starts automatically. - Touch Popcorn three times within 2 seconds for 1.5 or 1.75 oz bag (snack). Touch Reheat pad once. 2. Reheat can be programmed with wax paper or plastic wrap. Beverage 1 Regular 1 Large 1 Small .5 - 2.0 cups 3. Cover with More or Less Time Adjustment. If not, continue heating using time and power level. SMALL will appear in smaller pieces. For example, enter quantity of popcorn. Touch Popcorn once. Touch number...
Use and Care Manual
Page 10
... food than those covered with More or Less Time Adjustment. If additional time is needed, continue to try several places; Cover with wax paper or vented plastic wrap. After cooking, stir and let stand, covered, for covering. You may wish to cook manually. initial temperature, shape, quality). Add no additional water. Remove package from microwave oven, wrap in any microwave cookbook. 2. Touch Cook and number pad 4 twice for package weight...
... food than those covered with More or Less Time Adjustment. If additional time is needed, continue to try several places; Cover with wax paper or vented plastic wrap. After cooking, stir and let stand, covered, for covering. You may wish to cook manually. initial temperature, shape, quality). Add no additional water. Remove package from microwave oven, wrap in any microwave cookbook. 2. Touch Cook and number pad 4 twice for package weight...
Use and Care Manual
Page 11
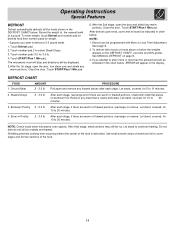
... stage, open the door, turn steak over and shield any warm portions. Round the weight to continue thawing. After the 1st stage, open the door and shield any warm portions. Defrost can be icy. See MANUAL DEFROST on the DEFROST CHART, use time and 30% power. The microwave oven will stop and directions will appear in chart below . Ground Meat .5 - 2.0 lb PROCEDURE Pull apart and remove any meat...
... stage, open the door, turn steak over and shield any warm portions. Round the weight to continue thawing. After the 1st stage, open the door and shield any warm portions. Defrost can be icy. See MANUAL DEFROST on the DEFROST CHART, use time and 30% power. The microwave oven will stop and directions will appear in chart below . Ground Meat .5 - 2.0 lb PROCEDURE Pull apart and remove any meat...
Use and Care Manual
Page 12
... fan will be set , touch Timer/Clock, the number 1 and then touch the START/Plus 1 Min pad and hold for three seconds To cancel and restore the audible signal, touch Timer/Clock, the number 5 and Clear/Off pads. Touch Power Level pad 6 times for 100% power. 2. If Power Level pad is deactivated or locked. Press Fan pad one power level and then change to have the microwave oven operate with no power in multiples of the Popcorn, Reheat, Defrost or Cook settings...
... fan will be set , touch Timer/Clock, the number 1 and then touch the START/Plus 1 Min pad and hold for three seconds To cancel and restore the audible signal, touch Timer/Clock, the number 5 and Clear/Off pads. Touch Power Level pad 6 times for 100% power. 2. If Power Level pad is deactivated or locked. Press Fan pad one power level and then change to have the microwave oven operate with no power in multiples of the Popcorn, Reheat, Defrost or Cook settings...
Use and Care Manual
Page 13
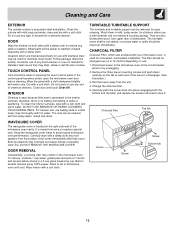
...) and replace the screws removed in microwave oven until cool. Use upper rack of spills or spattering. The filter should be changed every 6 to set in step 2. Change the charcoal filter. 5. Charcoal filter Top tab Louver Screw Screw Bottom tab Screw 13 DOOR Wipe the window on use of any sort of 1 lemon and several minutes using 100% power. Metal parts will be cleaned with a damp cloth. If the control panel becomes soiled, open the microwave oven door before cleaning. It...
...) and replace the screws removed in microwave oven until cool. Use upper rack of spills or spattering. The filter should be changed every 6 to set in step 2. Change the charcoal filter. 5. Charcoal filter Top tab Louver Screw Screw Bottom tab Screw 13 DOOR Wipe the window on use of any sort of 1 lemon and several minutes using 100% power. Metal parts will be cleaned with a damp cloth. If the control panel becomes soiled, open the microwave oven door before cleaning. It...

Use and Care Manual
Page 14
... NOT USE A BULB LARGER THAN 30 WATTS. 4. Do not touch glass when light is on the light cover. (See illustration.) 3. Rinse thoroughly and shake dry. 5. Bulbs are also available at least once a month. Light cover may become very hot. they will react with equivalent watt bulb available from your Electrolux Authorized Service or parts distributor. Grease filter Tab Light Screw Light 14 Replace by unplugging. 2. Never operate the fan or microwave oven without the filters in step...
... NOT USE A BULB LARGER THAN 30 WATTS. 4. Do not touch glass when light is on the light cover. (See illustration.) 3. Rinse thoroughly and shake dry. 5. Bulbs are also available at least once a month. Light cover may become very hot. they will react with equivalent watt bulb available from your Electrolux Authorized Service or parts distributor. Grease filter Tab Light Screw Light 14 Replace by unplugging. 2. Never operate the fan or microwave oven without the filters in step...

Use and Care Manual
Page 15
...: Turntable / Stirrer Fan System Weight: Approx. (net) 55 lb, (gross) 60 lb Work/Night Light: 2 bulbs 20w each (incandescent light bulbs) * The International Electrotechnical Commission's standardized method for use in the microwave oven and close the door securely. This symbol on the louver above questions, please check electrical outlet, fuse and/or circuit breaker. If the microwave oven is less. A microwave oven should never be serviced by : FCC DHHS NHW - Specifications...
...: Turntable / Stirrer Fan System Weight: Approx. (net) 55 lb, (gross) 60 lb Work/Night Light: 2 bulbs 20w each (incandescent light bulbs) * The International Electrotechnical Commission's standardized method for use in the microwave oven and close the door securely. This symbol on the louver above questions, please check electrical outlet, fuse and/or circuit breaker. If the microwave oven is less. A microwave oven should never be serviced by : FCC DHHS NHW - Specifications...
Use and Care Manual
Page 16
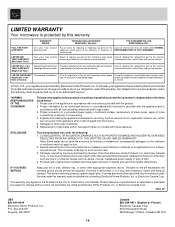
... to you specific legal rights. The date on models with the product. 2. LIMITED 2ND YEAR WARRANTY (Microwave Oven) Two years from persons other than genuine Electrolux parts; Proper installation by an authorized servicer in accordance with instructions provided with the appliance and in workmanship or material, or for servicing, such as removal of shipping the replacement part to products in ordinary household use of the...
... to you specific legal rights. The date on models with the product. 2. LIMITED 2ND YEAR WARRANTY (Microwave Oven) Two years from persons other than genuine Electrolux parts; Proper installation by an authorized servicer in accordance with instructions provided with the appliance and in workmanship or material, or for servicing, such as removal of shipping the replacement part to products in ordinary household use of the...


