Complete Owner's Guide
Page 2
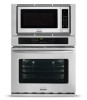
The graphics on your purchase of our product and are very proud of a new appliance! PLEASE CAREFULLY READ AND SAVE THESE INSTRUCTIONS This Use & Care Manual contains general operating instructions for your appliance may not have all the described features. Your product may not look exactly like those shown. These instructions ...
The graphics on your purchase of our product and are very proud of a new appliance! PLEASE CAREFULLY READ AND SAVE THESE INSTRUCTIONS This Use & Care Manual contains general operating instructions for your appliance may not have all the described features. Your product may not look exactly like those shown. These instructions ...

Complete Owner's Guide
Page 3
... forward. 3 PRECAUTIONS TO AVOID POSSIBLE EXPOSURE TO EXCESSIVE MICROWAVE ENERGY For your appliance for proper installation. Door (bent), 2. Save these instructions can result in this manual must be adjusted or repaired by anyone except properly qualified service personnel. CAUTION This symbol will help alert you to children and adults...
... forward. 3 PRECAUTIONS TO AVOID POSSIBLE EXPOSURE TO EXCESSIVE MICROWAVE ENERGY For your appliance for proper installation. Door (bent), 2. Save these instructions can result in this manual must be adjusted or repaired by anyone except properly qualified service personnel. CAUTION This symbol will help alert you to children and adults...
Complete Owner's Guide
Page 4
.... Children climbing on any part of interest to the appliance. Do not use your appliance is to be stored or discarded. • Storage in the manuals. They should not be damaged by a qualified technician in case of this appliance. Do not allow children to the power supply. IMPORTANT SAFETY...
.... Children climbing on any part of interest to the appliance. Do not use your appliance is to be stored or discarded. • Storage in the manuals. They should not be damaged by a qualified technician in case of this appliance. Do not allow children to the power supply. IMPORTANT SAFETY...
Complete Owner's Guide
Page 5
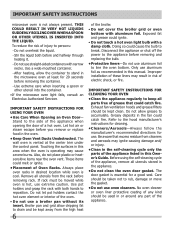
... become too hot. • Use Only Dry Pot holders. Do not leave paper products, cooking utensils or food in the cavity when not in this manual. Do not use as described in use this appliance outdoors. Fat or grease may cause the container to cool. This type of fire in...
... become too hot. • Use Only Dry Pot holders. Do not leave paper products, cooking utensils or food in the cavity when not in this manual. Do not use as described in use this appliance outdoors. Fat or grease may cause the container to cool. This type of fire in...
Complete Owner's Guide
Page 6
... in the self-cleaning cycle only the parts of the appliance listed in or around any part of any kind should be used in this manual. The door gasket is not always present. Remove all utensils stored in the fan could catch fire. Exposed fat and grease could catch fi...
... in the self-cleaning cycle only the parts of the appliance listed in or around any part of any kind should be used in this manual. The door gasket is not always present. Remove all utensils stored in the fan could catch fire. Exposed fat and grease could catch fi...
Complete Owner's Guide
Page 8
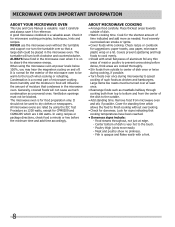
... the magnetron cycling on to the touch. - Meat and poultry show no pinkness. - MICROWAVE OVEN IMPORTANT INFORMATION ABOUT YOUR MICROWAVE OVEN This Use and Care Manual is valuable: read it carefully and always save it for signs indicating that cooking temperatures have food in the microwave oven when it for the...
... the magnetron cycling on to the touch. - Meat and poultry show no pinkness. - MICROWAVE OVEN IMPORTANT INFORMATION ABOUT YOUR MICROWAVE OVEN This Use and Care Manual is valuable: read it carefully and always save it for signs indicating that cooking temperatures have food in the microwave oven when it for the...
Complete Owner's Guide
Page 13
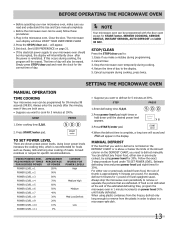
... USER PREFERENCE on power level 30% until the desired power level appears. Cancel a program during programming. 2. SETTING THE MICROWAVE OVEN MANUAL OPERATION TIME COOKING Your microwave oven can be programmed for 5 minutes at 30%. TO SET POWER LEVEL There are both zeros. ...8226; Before operating your microwave oven should be programmed with the door open except for 5 minutes at 100%. If this Use and Care manual completely. • Before the microwave oven can be used, follow these procedures: 1. Return the time of frozen spaghetti sauce. STEP PRESS...
... USER PREFERENCE on power level 30% until the desired power level appears. Cancel a program during programming. 2. SETTING THE MICROWAVE OVEN MANUAL OPERATION TIME COOKING Your microwave oven can be programmed for 5 minutes at 30%. TO SET POWER LEVEL There are both zeros. ...8226; Before operating your microwave oven should be programmed with the door open except for 5 minutes at 100%. If this Use and Care manual completely. • Before the microwave oven can be used, follow these procedures: 1. Return the time of frozen spaghetti sauce. STEP PRESS...
Complete Owner's Guide
Page 14
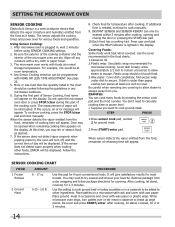
... or turkey as it heats. Place patties on the display. When microwave oven stops, turn off any covering to allow steam to cook manually. 9. After microwave oven is a semi-conductor device that detects the vapor (moisture and humidity) emitted from the food as patties or ...escape away from the food, remainder of the cooking cycle. See page 22. 5. To continue cooking, press the STOP/clear pad and cook manually. SENSOR COOKING CHART FOOD AMOUNT PROCEDURE 1. SETTING THE MICROWAVE OVEN SENSOR COOKING Electrolux's Sensor is plugged in, wait 2 minutes before using SENSOR COOKING...
... or turkey as it heats. Place patties on the display. When microwave oven stops, turn off any covering to allow steam to cook manually. 9. After microwave oven is a semi-conductor device that detects the vapor (moisture and humidity) emitted from the food as patties or ...escape away from the food, remainder of the cooking cycle. See page 22. 5. To continue cooking, press the STOP/clear pad and cook manually. SENSOR COOKING CHART FOOD AMOUNT PROCEDURE 1. SETTING THE MICROWAVE OVEN SENSOR COOKING Electrolux's Sensor is plugged in, wait 2 minutes before using SENSOR COOKING...

Complete Owner's Guide
Page 16
See page 22. 2.The final result will vary according to heat manually. initial temperature, shape, quality). Check food for 1 cup. If additional time is needed, continue to the food condition (e.g. Large items should be necessary to double ...
See page 22. 2.The final result will vary according to heat manually. initial temperature, shape, quality). Check food for 1 cup. If additional time is needed, continue to the food condition (e.g. Large items should be necessary to double ...

Complete Owner's Guide
Page 17
Press START pad. 6.After defrost cycle ends, let stand, covered. NOTE 1. See page 22. 3. See MANUAL DEFROST on AUTO DEFROST CHART use time and 30% power. This procedure may be programmed with MORE OR LESS TIME ADJUSTMENT. Do not defrost until ...
Press START pad. 6.After defrost cycle ends, let stand, covered. NOTE 1. See page 22. 3. See MANUAL DEFROST on AUTO DEFROST CHART use time and 30% power. This procedure may be programmed with MORE OR LESS TIME ADJUSTMENT. Do not defrost until ...

Complete Owner's Guide
Page 18
... or 1/16th of hot dogs and press START/enter. Enter weight and touch START/ enter. Press auto cook and 1 for temperature after heating to heat manually. 4.Each food has a cooking hint. See page 22. 3.The final cooking result will vary according to a better drinking temperature. Pizza 2. STEP PRESS 1. Press the...
... or 1/16th of hot dogs and press START/enter. Enter weight and touch START/ enter. Press auto cook and 1 for temperature after heating to heat manually. 4.Each food has a cooking hint. See page 22. 3.The final cooking result will vary according to a better drinking temperature. Pizza 2. STEP PRESS 1. Press the...

Complete Owner's Guide
Page 19
...operation will start . SNACK MENU CHART FOOD AMOUNT PROCEDURE 1. Press START/enter. 2. KEEP WARM will start . NOTE SNACK MENU can program KEEP WARM with manual cooking to 30 minutes. Hand-held Snacks 5 - 6 oz Press snack menu pad and number 2 for 15 minutes. DIRECT USE • Suppose you want... food warm up to keep food warm continuously after cooking. The display will be displayed during the count down for 15 minutes. WITH MANUAL COOKING • Suppose you want to cook a cup of soup warm for 15 minutes and KEEP WARM will show15.00 and count down...
...operation will start . SNACK MENU CHART FOOD AMOUNT PROCEDURE 1. Press START/enter. 2. KEEP WARM will start . NOTE SNACK MENU can program KEEP WARM with manual cooking to 30 minutes. Hand-held Snacks 5 - 6 oz Press snack menu pad and number 2 for 15 minutes. DIRECT USE • Suppose you want... food warm up to keep food warm continuously after cooking. The display will be displayed during the count down for 15 minutes. WITH MANUAL COOKING • Suppose you want to cook a cup of soup warm for 15 minutes and KEEP WARM will show15.00 and count down...

Complete Owner's Guide
Page 20
... heating time and microwave power level for melting and softening foods shown in the chart below the quantity allowed on the MELT/SOFTEN Chart, use manual operation. Press 1 for 1 pint. See page 22. 2. Butter 2 tbsp 1/2 cup 2. After pressing soften, press number 3 once for 2 tablespoons. 3. Press START/enter. MELT/SOFTEN can be...
... heating time and microwave power level for melting and softening foods shown in the chart below the quantity allowed on the MELT/SOFTEN Chart, use manual operation. Press 1 for 1 pint. See page 22. 2. Butter 2 tbsp 1/2 cup 2. After pressing soften, press number 3 once for 2 tablespoons. 3. Press START/enter. MELT/SOFTEN can be...

Complete Owner's Guide
Page 21
Should a pad be set so that can be used for manual cooking if clock is set. 2.If the microwave oven door is opened after programming AUTO START, it is a 12 hour clock. To cancel, press user ...
Should a pad be set so that can be used for manual cooking if clock is set. 2.If the microwave oven door is opened after programming AUTO START, it is a 12 hour clock. To cancel, press user ...

Complete Owner's Guide
Page 22
... cannot be displayed. 2. NOTE To use add 30 sec, press pad within 3 minutes after cooking, closing the door, pressing the STOP/clear pad or during manual cooking. To cancel the timer, press the STOP/clear pad once. 22 Your microwave oven can also extend cooking time in the display. STEP PRESS...
... cannot be displayed. 2. NOTE To use add 30 sec, press pad within 3 minutes after cooking, closing the door, pressing the STOP/clear pad or during manual cooking. To cancel the timer, press the STOP/clear pad once. 22 Your microwave oven can also extend cooking time in the display. STEP PRESS...

Complete Owner's Guide
Page 38
... lights. The interior oven lights are permanent and will turn on automatically, when the oven door is needed. Follow the same procedure again if you manually change (Example 30°F) 3 0. NOTE The oven temperature adjustments made with a glass shield held by using a temperature setting that is higher or lower than what...
... lights. The interior oven lights are permanent and will turn on automatically, when the oven door is needed. Follow the same procedure again if you manually change (Example 30°F) 3 0. NOTE The oven temperature adjustments made with a glass shield held by using a temperature setting that is higher or lower than what...

Complete Owner's Guide
Page 40
Before manually cleaning any part of the steam clean cycle. StC will show in the display. 5. Remaining time will show in the display. Wipe oven cavity bottom. .... Steam clean may require a deeper cleaning. CAUTION Do not add ammonia, oven cleaners, or any other household cleaners or chemicals to the water used before manually cleaning the oven to air dry. • Steam clean cannot be sure all racks and oven accessories. 2.
Before manually cleaning any part of the steam clean cycle. StC will show in the display. 5. Remaining time will show in the display. Wipe oven cavity bottom. .... Steam clean may require a deeper cleaning. CAUTION Do not add ammonia, oven cleaners, or any other household cleaners or chemicals to the water used before manually cleaning the oven to air dry. • Steam clean cannot be sure all racks and oven accessories. 2.

