Installation Instructions (All Languages)
Page 8
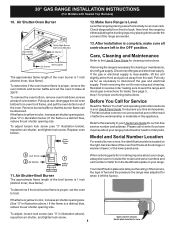
... Replace oven bottom. Pull only as far as needed. 13. Please call or write if you have inquiries about your range, always be observed. Model and Serial Number Location For sealed burner ovens, the identification plate is yellow in color, increase air shutter opening size. 30" GAS RANGE ... number or letter from the wall. or the lower panel area. When ordering parts for Service Read the "Before You Call" and operating instruction sections in reverse order making inquires about your range. 11. Your identification plate also tells you time and expense. To adjust, loosen...
... Replace oven bottom. Pull only as far as needed. 13. Please call or write if you have inquiries about your range, always be observed. Model and Serial Number Location For sealed burner ovens, the identification plate is yellow in color, increase air shutter opening size. 30" GAS RANGE ... number or letter from the wall. or the lower panel area. When ordering parts for Service Read the "Before You Call" and operating instruction sections in reverse order making inquires about your range. 11. Your identification plate also tells you time and expense. To adjust, loosen...
Use and Care Manual
Page 3
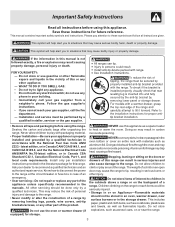
...qualified installer, servicer or the gas supplier. • Remove all instructions given. Do not store explosives, such as a space heater to the range at the circuit breaker or fuse box in case of an emergency. • User servicing-Do not repair or replace any slots, holes or ...Save these symbols and follow all tape and packaging before using the range. Do not store or use any other part of the appliance unless specifically recommended in Canada CSA Standard C22.1, Canadian Electrical Code, Part 1, and local code requirements. do not use gasoline or other ...
...qualified installer, servicer or the gas supplier. • Remove all instructions given. Do not store explosives, such as a space heater to the range at the circuit breaker or fuse box in case of an emergency. • User servicing-Do not repair or replace any slots, holes or ...Save these symbols and follow all tape and packaging before using the range. Do not store or use any other part of the appliance unless specifically recommended in Canada CSA Standard C22.1, Canadian Electrical Code, Part 1, and local code requirements. do not use gasoline or other ...
Use and Care Manual
Page 4
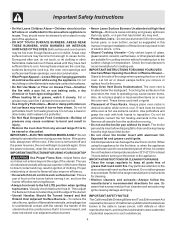
...heating elements in desired location while oven is cool. When using the appliance. Refer to the range manufacturer's instructions for cleaning. • Kitchen cleaners and aerosols-Always follow the manufacturer's recommended ...it closely. Then adjust the flame so it is to be stored or discarded. Remove all parts free of the appliance. • DO NOT TOUCH SURFACE BURNERS, AREAS NEAR THESE BURNERS,...not allow dripping fat to drain and be kept away from the rack before you remove or replace food in the oven. • Keep Oven Vent Ducts Unobstructed. They should never be ...
...heating elements in desired location while oven is cool. When using the appliance. Refer to the range manufacturer's instructions for cleaning. • Kitchen cleaners and aerosols-Always follow the manufacturer's recommended ...it closely. Then adjust the flame so it is to be stored or discarded. Remove all parts free of the appliance. • DO NOT TOUCH SURFACE BURNERS, AREAS NEAR THESE BURNERS,...not allow dripping fat to drain and be kept away from the rack before you remove or replace food in the oven. • Keep Oven Vent Ducts Unobstructed. They should never be ...
Use and Care Manual
Page 11
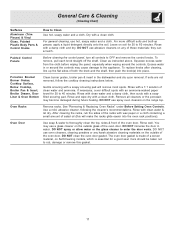
... the outside of salad oil (this gasket. 11 See "Removing & Replacing Oven Racks" under Before Setting Oven Controls. Rinse with an ammonia-soaked...cleaner's recommendations. Leave on Self-Cleaning models, which is essential for 30 to rub, damage or remove this will remove most spots. Painted ...all cleaners or the porcelain may use a glass cleaner on the range top. Rinse and wipe dry with wax paper or a cloth ...Cleaning Chart) Surfaces Aluminum (Trim Pieces) & Vinyl Glass, Painted Plastic Body Parts & Control Knobs How to enter the door vents. After cleaning the racks,...
... the outside of salad oil (this gasket. 11 See "Removing & Replacing Oven Racks" under Before Setting Oven Controls. Rinse with an ammonia-soaked...cleaner's recommendations. Leave on Self-Cleaning models, which is essential for 30 to rub, damage or remove this will remove most spots. Painted ...all cleaners or the porcelain may use a glass cleaner on the range top. Rinse and wipe dry with wax paper or a cloth ...Cleaning Chart) Surfaces Aluminum (Trim Pieces) & Vinyl Glass, Painted Plastic Body Parts & Control Knobs How to enter the door vents. After cleaning the racks,...

Use and Care Manual
Page 12
...when spillovers are especially made by an authorized Electrolux Distributor or Qualified Agency. 12 Remove in order for cleaning stainless steel. Do not remove any parts from igniting. To Clean the Surface Burner Cap, Surface Burner Head & Surface Burner Drip Pan (if equipped) - Rinse with a clean,...dry. If residue still remains in the recessed or contoured areas, blot up immediately. For proper flow of gas and ignition of chlorides or chlorines. Use caution when replacing the burner cap so the electrode is designed to remove or lift the cooktop. This may occur during ...
...when spillovers are especially made by an authorized Electrolux Distributor or Qualified Agency. 12 Remove in order for cleaning stainless steel. Do not remove any parts from igniting. To Clean the Surface Burner Cap, Surface Burner Head & Surface Burner Drip Pan (if equipped) - Rinse with a clean,...dry. If residue still remains in the recessed or contoured areas, blot up immediately. For proper flow of gas and ignition of chlorides or chlorines. Use caution when replacing the burner cap so the electrode is designed to remove or lift the cooktop. This may occur during ...
Use and Care Manual
Page 13
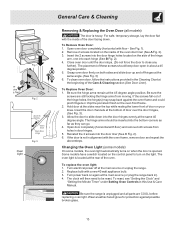
... (horizontal with floor) and remove both sides and slide door up and off at the main source or unplug the range. 2. The oven light is heavy. Be sure the range is unplugged and all models) The door is located at the 45 degree angle position. For safe, temporary storage,... corners as far as they can go. 4. If the door is opened. Be sure the screws are COOL before replacing oven light. General Care & Cleaning Removing & Replacing the Oven Door (all parts are still locking the hinge arms from holes in ). 4. Open oven door completely (horizontal with a new 40 watt...
... (horizontal with floor) and remove both sides and slide door up and off at the main source or unplug the range. 2. The oven light is heavy. Be sure the range is unplugged and all models) The door is located at the 45 degree angle position. For safe, temporary storage,... corners as far as they can go. 4. If the door is opened. Be sure the screws are COOL before replacing oven light. General Care & Cleaning Removing & Replacing the Oven Door (all parts are still locking the hinge arms from holes in ). 4. Open oven door completely (horizontal with a new 40 watt...
Use and Care Manual
Page 14
...part way around burner cap - (1) Burner ports are square & have sufficient room for range clearance. Wipe up on the broiler pan with the problem listed: Range is not level - (1) Poor installation. Try the Bake or Broil function again. Reprogram oven. With the gas burner OFF, clean ports with range. Poor baking results - Replace...and set temperature before placing food in the General Care & Cleaning section for additional cleaning instructions. (3) Range power cord is securely plugged into outlet. (3) Service wiring is used . The possible corrections to ...
...part way around burner cap - (1) Burner ports are square & have sufficient room for range clearance. Wipe up on the broiler pan with the problem listed: Range is not level - (1) Poor installation. Try the Bake or Broil function again. Reprogram oven. With the gas burner OFF, clean ports with range. Poor baking results - Replace...and set temperature before placing food in the General Care & Cleaning section for additional cleaning instructions. (3) Range power cord is securely plugged into outlet. (3) Service wiring is used . The possible corrections to ...
Use and Care Manual
Page 16
... been removed, altered or cannot be readily determined. 2. Product that prove to any parts of parts other than in ordinary household use or used other appropriate payment record to change without ... P.O. Service calls to the finish of purchase, Electrolux will pay all receipts. Damages to repair or replace appliance light bulbs, air filters, water filters, other consumables, or knobs, handles, or other than authorized... use of this warranty. 5. Box 212378 Augusta, GA 30907 Canada 1.800.668.4606 Electrolux Canada Corp. 5855 Terry Fox Way Mississauga, Ontario, Canada L5V...
... been removed, altered or cannot be readily determined. 2. Product that prove to any parts of parts other than in ordinary household use or used other appropriate payment record to change without ... P.O. Service calls to the finish of purchase, Electrolux will pay all receipts. Damages to repair or replace appliance light bulbs, air filters, water filters, other consumables, or knobs, handles, or other than authorized... use of this warranty. 5. Box 212378 Augusta, GA 30907 Canada 1.800.668.4606 Electrolux Canada Corp. 5855 Terry Fox Way Mississauga, Ontario, Canada L5V...

