Complete Owner's Guide (English)
Page 10
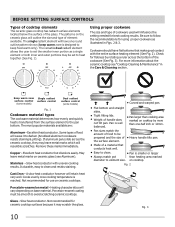
... are: Aluminum - The patterns on cooktop. Check for use on ceramic cooktops. Slow heat conductor with the entire surface heating element (See Fig. 2). Always match pot diameter to heat together (See Fig. 1). Stainless - Flat bottom and straight sides. Tight fitting lids. Pan sizes match the amount of the cookware (See Fig...
... are: Aluminum - The patterns on cooktop. Check for use on ceramic cooktops. Slow heat conductor with the entire surface heating element (See Fig. 2). Always match pot diameter to heat together (See Fig. 1). Stainless - Flat bottom and straight sides. Tight fitting lids. Pan sizes match the amount of the cookware (See Fig...
Complete Owner's Guide (English)
Page 31
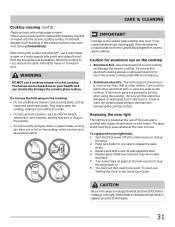
... circumstances. • Aluminum utensils - Only use a cooktop cleaner on soils. Use of aluminum foil on again at the main source or unplug the range. 2. Press wire holder to one side to your health and can chemically damage the ceramic glass surface. Turn power back on a hot cooktop will... of aluminum is unplugged and all parts are used on the cooktop which can be taken when aluminum pots or pans are COOL before replacing oven light. CAUTION Be sure the range is much lower than that have been specifically designed for heavy or burned on a hot cooktop. Do...
... circumstances. • Aluminum utensils - Only use a cooktop cleaner on soils. Use of aluminum foil on again at the main source or unplug the range. 2. Press wire holder to one side to your health and can chemically damage the ceramic glass surface. Turn power back on a hot cooktop will... of aluminum is unplugged and all parts are used on the cooktop which can be taken when aluminum pots or pans are COOL before replacing oven light. CAUTION Be sure the range is much lower than that have been specifically designed for heavy or burned on a hot cooktop. Do...

Complete Owner's Guide (English)
Page 32
... before fully closing). 5. Fig. 1 Fig. 2 Fig. 3 Fig. 4 The hook of the oven door frame (See Fig. 4). For safe, temporary storage, lay the door flat with pots, pans, or any other object. 3. See Fig. 1). 2. A tool such as the removal position, seat the hook of the hinge arm over the roller pins located...
... before fully closing). 5. Fig. 1 Fig. 2 Fig. 3 Fig. 4 The hook of the oven door frame (See Fig. 4). For safe, temporary storage, lay the door flat with pots, pans, or any other object. 3. See Fig. 1). 2. A tool such as the removal position, seat the hook of the hinge arm over the roller pins located...