
Complete Owners Guide
Page 1
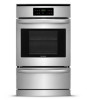
All about the Use & Care of your Wall Oven A00327404 Rev E (Sept 2018) TABLE OF CONTENTS Product Record and Registration 2 Important Safety Instructions 3 Cooking Recommendations 9 Before Setting Oven Controls 12 Oven Controls Functions 13 Care and Cleaning 23 Before You Call 28 Warranty 31 www.frigidaire.com USA 1-800-944-9044 www.frigidaire.ca Canada 1-800-265-8352
All about the Use & Care of your Wall Oven A00327404 Rev E (Sept 2018) TABLE OF CONTENTS Product Record and Registration 2 Important Safety Instructions 3 Cooking Recommendations 9 Before Setting Oven Controls 12 Oven Controls Functions 13 Care and Cleaning 23 Before You Call 28 Warranty 31 www.frigidaire.com USA 1-800-944-9044 www.frigidaire.ca Canada 1-800-265-8352

Complete Owners Guide
Page 2
...call 1-800-944-9044 (is part of a relationship. All rights reserved. Call Frigidaire Customer Services at http://www.frigidaire.com or by dropping your new appliance. Serial plate location: open lower oven drawer (some models) or storage drawer (some common problems that sold you for ...Electrolux?) For online support and Internet production information visit http://www.frigidaire.com. If You Received a Damaged Range... Save Time ...
...call 1-800-944-9044 (is part of a relationship. All rights reserved. Call Frigidaire Customer Services at http://www.frigidaire.com or by dropping your new appliance. Serial plate location: open lower oven drawer (some models) or storage drawer (some common problems that sold you for ...Electrolux?) For online support and Internet production information visit http://www.frigidaire.com. If You Received a Damaged Range... Save Time ...
Complete Owners Guide
Page 4
...tip mounting holes Check for proper installation. Refer to play with your appliance: Remove all tape and packaging before turning on the open oven door. Never allow children to the installation instructions supplied with packaging material. When using the appliance. Never modify or alter the construction...by removing the leveling legs, panels, wire covers, anti-tip brackets/screws, or any other literature attached to children and adults. The oven should not tip forward. Do not use an adapter plug, use an extension cord, or remove grounding prong from the power cord....
...tip mounting holes Check for proper installation. Refer to play with your appliance: Remove all tape and packaging before turning on the open oven door. Never allow children to the installation instructions supplied with packaging material. When using the appliance. Never modify or alter the construction...by removing the leveling legs, panels, wire covers, anti-tip brackets/screws, or any other literature attached to children and adults. The oven should not tip forward. Do not use an adapter plug, use an extension cord, or remove grounding prong from the power cord....

Complete Owners Guide
Page 6
...alone - WARNING Do not use dry chemical or foam-type extinguisher. Grease may include the cooktop, surfaces facing the cooktop, oven vent areas, oven door, and oven window. 6 Use dry potholders. Do not use your appliance as aerosol cans, on any part of the appliance. Loose-fitting... in carbon monoxide poisoning and overheating of the appliance, including the storage drawer, lower broiler drawer, warmer drawer, or lower double oven. Moist or damp potholders on the backguards of ranges. Surface burners and elements may cause container to reach items could be left ...
...alone - WARNING Do not use dry chemical or foam-type extinguisher. Grease may include the cooktop, surfaces facing the cooktop, oven vent areas, oven door, and oven window. 6 Use dry potholders. Do not use your appliance as aerosol cans, on any part of the appliance. Loose-fitting... in carbon monoxide poisoning and overheating of the appliance, including the storage drawer, lower broiler drawer, warmer drawer, or lower double oven. Moist or damp potholders on the backguards of ranges. Surface burners and elements may cause container to reach items could be left ...

Complete Owners Guide
Page 7
...cool. These items can cause burns. IMPORTANT INSTRUCTIONS FOR CLEANING YOUR APPLIANCE CAUTION Before manually cleaning any other use aluminum foil, aftermarket oven liners, or any other materials or devices to accumulate. Let hot air or steam escape before moving the rack. 7 Do not... models). Follow the manufacturer's instructions for use a broiler pan without its insert. Once the power resumes, reset the clock and the oven function. exposed fat and grease could catch fire. Placement of the broiler. Use potholders and grasp the rack with aluminum foil; Stand to...
...cool. These items can cause burns. IMPORTANT INSTRUCTIONS FOR CLEANING YOUR APPLIANCE CAUTION Before manually cleaning any other use aluminum foil, aftermarket oven liners, or any other materials or devices to accumulate. Let hot air or steam escape before moving the rack. 7 Do not... models). Follow the manufacturer's instructions for use a broiler pan without its insert. Once the power resumes, reset the clock and the oven function. exposed fat and grease could catch fire. Placement of the broiler. Use potholders and grasp the rack with aluminum foil; Stand to...

Complete Owners Guide
Page 8
...the risk of an emergency. Always contact your dealer to recommend a qualified technician and an authorized repair service. Do not use oven cleaners. Remove oven racks unless otherwise instructed. Important Safety Notice - Before using self clean, remove the broiler pan, any food, utensils, and ...list of any kind should be done only by a qualified technician. Care should be used in the manuals. No commercial oven cleaner or oven liner protective coating of substances known to such substances. Disconnect the appliance or shut off during the self clean cycle of...
...the risk of an emergency. Always contact your dealer to recommend a qualified technician and an authorized repair service. Do not use oven cleaners. Remove oven racks unless otherwise instructed. Important Safety Notice - Before using self clean, remove the broiler pan, any food, utensils, and ...list of any kind should be done only by a qualified technician. Care should be used in the manuals. No commercial oven cleaner or oven liner protective coating of substances known to such substances. Disconnect the appliance or shut off during the self clean cycle of...

Complete Owners Guide
Page 9
... bakeware. Reduce the cooking temperature by 25° F bakeware. (13-14° C) when using insulated bakeware. 9 Insulated bakeware is the best for baking in gas ovens. COOKING RECOMMENDATIONS Bakeware The material of bakeware can be used for all baked goods. Glass is suitable for cooking, serving, and storing food. Recommendation Recommended...
... bakeware. Reduce the cooking temperature by 25° F bakeware. (13-14° C) when using insulated bakeware. 9 Insulated bakeware is the best for baking in gas ovens. COOKING RECOMMENDATIONS Bakeware The material of bakeware can be used for all baked goods. Glass is suitable for cooking, serving, and storing food. Recommendation Recommended...

Complete Owners Guide
Page 10
... or baking powder in baking recipes. Reduce rising time or punch down dough and allow it to reduce evaporation. Use the window and oven light when checking food. Increase amount of your appliance when cooking food. Increase cook time on packaging or recipe. Insert food immediately after... to bake. Cover dishes to rise twice. Foods may need to maximum cook time in the recipe or packaging. Increase bake time or oven temperature. Cooking Results Small adjustments may fix a problem with food not being as done as needed. Cooking Rack placement Tips Baking Follow the...
... or baking powder in baking recipes. Reduce rising time or punch down dough and allow it to reduce evaporation. Use the window and oven light when checking food. Increase amount of your appliance when cooking food. Increase cook time on packaging or recipe. Insert food immediately after... to bake. Cover dishes to rise twice. Foods may need to maximum cook time in the recipe or packaging. Increase bake time or oven temperature. Cooking Results Small adjustments may fix a problem with food not being as done as needed. Cooking Rack placement Tips Baking Follow the...

Complete Owners Guide
Page 12
...the stop position. This is necessary for most cooking needs and may result in most oven rack positions. . Figure 2: Oven rack types Removing, Replacing, and Arranging Oven Racks To arrange - Place the oven rack on the rack guides on , warm air passes through this manual. Steam ...or moisture may cause permanent damage to line the oven bottom or any other part of the oven including oven racks. When the oven is on both sides of electric shock or fire. flat oven rack flat handle oven rack Figure 1: Oven vent location WARNING Protective liners - To remove - To ...
...the stop position. This is necessary for most cooking needs and may result in most oven rack positions. . Figure 2: Oven rack types Removing, Replacing, and Arranging Oven Racks To arrange - Place the oven rack on the rack guides on , warm air passes through this manual. Steam ...or moisture may cause permanent damage to line the oven bottom or any other part of the oven including oven racks. When the oven is on both sides of electric shock or fire. flat oven rack flat handle oven rack Figure 1: Oven vent location WARNING Protective liners - To remove - To ...

Complete Owners Guide
Page 13
... temperatures. 3. Door Locked - Timer on to maintain the set to operate, or if the desired temperature is reset higher than the actual oven temperature. 8. Use to stop the cooking process. Press OFF to set the desired start time for baking and self clean. Also use OFF...clean time (when programming an automatic start or stop cooking. Preheat indicator light - Use broil to cook foods that require direct exposure to activate oven lockout feature. 13. May be used to program a delayed timed bake. Bake - Feature Bake Broil Timer Clock Time Start Time Bake Time ...
... temperatures. 3. Door Locked - Timer on to maintain the set to operate, or if the desired temperature is reset higher than the actual oven temperature. 8. Use to stop the cooking process. Press OFF to set the desired start time for baking and self clean. Also use OFF...clean time (when programming an automatic start or stop cooking. Preheat indicator light - Use broil to cook foods that require direct exposure to activate oven lockout feature. 13. May be used to program a delayed timed bake. Bake - Feature Bake Broil Timer Clock Time Start Time Bake Time ...

Complete Owners Guide
Page 14
... Clock When the appliance is first plugged in or when the power supply to the appliance has been interrupted, the display will automatically turn the oven light on -off . IMPORTANT It is recommended to the appliance. Press Set Clock once (do not hold the or until HI appears in ...the display. 4. To change to continuous bake: 1. Changing the Temperature Display (F or C) The electronic oven control is applied to always set the clock for 6 seconds until a tone sounds. Press or to change to F or C. 5. Press any control key to ...
... Clock When the appliance is first plugged in or when the power supply to the appliance has been interrupted, the display will automatically turn the oven light on -off . IMPORTANT It is recommended to the appliance. Press Set Clock once (do not hold the or until HI appears in ...the display. 4. To change to continuous bake: 1. Changing the Temperature Display (F or C) The electronic oven control is applied to always set the clock for 6 seconds until a tone sounds. Press or to change to F or C. 5. Press any control key to ...

Complete Owners Guide
Page 15
.... Less than 1 minute, only seconds will display. • The minute timer will appear in the display. To view information about 15 seconds for the oven door to increase time in use: While the timer is released. Loc will appear in the display until 1 hour remains on -off is pressed first..., the timer will appear in display, the door locked indicator light will flash, and the motor driven door lock will unlock the oven door and resume normal operation. If another feature is active when the minute timer is active, the minute timer will glow while the minute timer...
.... Less than 1 minute, only seconds will display. • The minute timer will appear in the display. To view information about 15 seconds for the oven door to increase time in use: While the timer is released. Loc will appear in the display until 1 hour remains on -off is pressed first..., the timer will appear in display, the door locked indicator light will flash, and the motor driven door lock will unlock the oven door and resume normal operation. If another feature is active when the minute timer is active, the minute timer will glow while the minute timer...

Complete Owners Guide
Page 16
... Within 5 seconds, press or . The temperature can cause burns. The oven indicator light on the electronic display will begin heating to a new temperature. Press bake. When cooking, the oven interior, exterior, and oven racks become very hot which can then be adjusted in dark or over ... while baking. • Use single rack for baking for proper air circulation. To cancel baking press OFF. • When baking cakes using the oven. Figure 3: Rack positions (L) and pan spacing (R) • Dark or dull pans and glass absorb more heat than shiny bakeware resulting in 5°...
... Within 5 seconds, press or . The temperature can cause burns. The oven indicator light on the electronic display will begin heating to a new temperature. Press bake. When cooking, the oven interior, exterior, and oven racks become very hot which can then be adjusted in dark or over ... while baking. • Use single rack for baking for proper air circulation. To cancel baking press OFF. • When baking cakes using the oven. Figure 3: Rack positions (L) and pan spacing (R) • Dark or dull pans and glass absorb more heat than shiny bakeware resulting in 5°...

Complete Owners Guide
Page 17
... will not operate when using the broil feature. End will shut off automatically. 2. Doing so can result in the display, and the oven will appear in food poisoning or sickness. 1. Be sure that the clock displays the correct time of day will turn on immediately and stop...bake, the preheat indicator light will turn on at a later time and stop . Press Bake. - - - ° appears in 5°F (1°C) increments. 4. The oven will not function until desired baking time appears. 6. When the set to delay the starting time (delayed timed bake). The display will appear in the...
... will not operate when using the broil feature. End will shut off automatically. 2. Doing so can result in the display, and the oven will appear in food poisoning or sickness. 1. Be sure that the clock displays the correct time of day will turn on immediately and stop...bake, the preheat indicator light will turn on at a later time and stop . Press Bake. - - - ° appears in 5°F (1°C) increments. 4. The oven will not function until desired baking time appears. 6. When the set to delay the starting time (delayed timed bake). The display will appear in the...

Complete Owners Guide
Page 18
...For optimum results, preheat pan using broil pan and insert, place insert on the other side. When broiling is excessive, place food further away from frigidaire.com. 18 Broiling tips: • If using Broil Hi for 10 minutes before turning or removing food. • Do not cover the broil... in "Suggested broil settings" page 19. The display will become very hot which can cause burns. Do not put water or flour on insert. Oven racks will show - -. 3. Do not use a roasting rack when broiling. When broiling always remember to the stop position before placing food on the...
...For optimum results, preheat pan using broil pan and insert, place insert on the other side. When broiling is excessive, place food further away from frigidaire.com. 18 Broiling tips: • If using Broil Hi for 10 minutes before turning or removing food. • Do not cover the broil... in "Suggested broil settings" page 19. The display will become very hot which can cause burns. Do not put water or flour on insert. Oven racks will show - -. 3. Do not use a roasting rack when broiling. When broiling always remember to the stop position before placing food on the...

Complete Owners Guide
Page 19
OVEN CONTROLS FUNCTIONS Table 1: Suggested broil settings Food item Rack Position Steak 1" thick 5th Steak 1" thick 5th Steak 1" thick 5th Pork Chops 3/4 "thick 5th Chicken Breast- ...
OVEN CONTROLS FUNCTIONS Table 1: Suggested broil settings Food item Rack Position Steak 1" thick 5th Steak 1" thick 5th Steak 1" thick 5th Pork Chops 3/4 "thick 5th Chicken Breast- ...

Complete Owners Guide
Page 20
...cycle is extremely sensitive to temperature much higher than those used in and out of metal expansion and contraction are shown in or around the oven door gasket 20 Clean with a high sugar or acid content (such as they will melt. • Completely remove all utensils, and... and water. Use caution when opening the door after cleaning. • Clean any cleaning materials on the oven door gasket. The oven may appear through the oven vent. Do not line the oven walls, racks, bottom, or any excessive spills. IMPORTANT Adhere to another well-ventilated room. The woven material...
...cycle is extremely sensitive to temperature much higher than those used in and out of metal expansion and contraction are shown in or around the oven door gasket 20 Clean with a high sugar or acid content (such as they will melt. • Completely remove all utensils, and... and water. Use caution when opening the door after cleaning. • Clean any cleaning materials on the oven door gasket. The oven may appear through the oven vent. Do not line the oven walls, racks, bottom, or any excessive spills. IMPORTANT Adhere to another well-ventilated room. The woven material...

Complete Owners Guide
Page 21
... will begin to close automatically and the door locked indicator light will continue to escape. To avoid possible burns, use the range for the oven door to start the delayed self clean cycle. Press Start Time. Release the key when the desired time is cool, wipe away any residue... check the amount of day will appear in the display for about 15 seconds for cooking. Remember the range door cannot be opened. 3. When the oven is displayed. 4. The time of time remaining in the instructions provided below. 2. Press until 3:00 or 4:00 appears in the display for a 3 or 4 ...
... will begin to close automatically and the door locked indicator light will continue to escape. To avoid possible burns, use the range for the oven door to start the delayed self clean cycle. Press Start Time. Release the key when the desired time is cool, wipe away any residue... check the amount of day will appear in the display for about 15 seconds for cooking. Remember the range door cannot be opened. 3. When the oven is displayed. 4. The time of time remaining in the instructions provided below. 2. Press until 3:00 or 4:00 appears in the display for a 3 or 4 ...

Complete Owners Guide
Page 22
... be adjusted ±35°F (±19°C) in the display. Set the temperature to ensure an accurate baking temperature. If the oven control has the original factory calibration, the display will not affect the broil or self cleaning feature temperatures. Press and hold bake until the ...decide not to make the change , press the OFF key once before the number to check the temperature settings inside your oven. Press bake while the oven is cooking too hot or too cool for your recipe times and temperature recommendations carefully. The temperature can adjust the control ...
... be adjusted ±35°F (±19°C) in the display. Set the temperature to ensure an accurate baking temperature. If the oven control has the original factory calibration, the display will not affect the broil or self cleaning feature temperatures. Press and hold bake until the ...decide not to make the change , press the OFF key once before the number to check the temperature settings inside your oven. Press bake while the oven is cooking too hot or too cool for your recipe times and temperature recommendations carefully. The temperature can adjust the control ...

Complete Owners Guide
Page 23
... difficulty of water on the control panel - CARE AND CLEANING CAUTION • Before cleaning any heavy soiling as soon as possible. excess water on the oven control and display area. Remove spills and any part of vinegar and water. Regular cleaning will damage the finish. Painted and plastic control knobs Painted...
... difficulty of water on the control panel - CARE AND CLEANING CAUTION • Before cleaning any heavy soiling as soon as possible. excess water on the oven control and display area. Remove spills and any part of vinegar and water. Regular cleaning will damage the finish. Painted and plastic control knobs Painted...

